How to Replace a Heat Pump Motor: Step-by-Step Guide
Learn how to replace a heat pump motor safely and effectively. This comprehensive guide covers tools, safety, compatibility checks, and post-install testing to restore reliable heating and cooling.

Goal: Replace a failing heat pump motor safely and correctly. You’ll need a compatible replacement motor, proper model match, new capacitors, and basic HVAC tools. This guide covers safety, required tools, step-by-step actions, and post-install checks. If you’re uncomfortable with electrical work or refrigerant handling, hire a licensed technician.
Understanding the role of the blower and condenser motor in a heat pump
The heat pump system relies on a blower motor to circulate air across the evaporator and condenser coils. The condenser fan motor, in particular, helps release heat to the outdoors. When these motors fail or run poorly, you’ll notice reduced airflow, unusual noises, or a decrease in heating or cooling efficiency. According to Heatpump Smart analysis, motor failures are a common contributor to downtime in aging systems, especially where capacitors or bearings have worn over time. The Heatpump Smart team found that many motor-related issues stem from wear on the shaft bearings, worn-out windings, or damaged fan blades. Understanding these failure modes helps you diagnose the likely cause before ordering a replacement and ensures you select a motor with the correct voltage, RPM, and mounting footprint. In addition to motor health, verify the drive belt (if present) and the blower wheel for any obstructions or misalignment that could overheat the motor.
For homeowners, recognizing early warning signs—unsteady airflow, overheating cabinet, or tripping breakers—can save time and prevent further damage to the compressor or refrigerant lines.
Signs your heat pump motor needs replacement
Watch for persistent grinding noises, a motor that won’t start, or a motor that runs intermittently. You may also notice reduced airflow, higher energy bills, or ice buildup on the outdoor coil due to insufficient fan performance. If the motor appears hot to the touch after running, this is another strong indicator that a replacement is warranted. Before proceeding, check the capacitor associated with the motor; a failing capacitor can mimic motor trouble and is often a cheaper fix. If you rely on your heat pump for critical comfort, treat ambiguous symptoms as a signal to evaluate motor health rather than attempting risky field repairs. A professional diagnosis can confirm whether a motor replacement is truly necessary and avoid misdiagnosis.
Safety prerequisites before you start
Electrical work on HVAC equipment can be hazardous. Always shut off power at the main disconnect and the breaker feeding the unit, and use a lockout-tagout procedure. Wear insulated gloves, eye protection, and avoid touching metal parts when the system is energized. Verify zero voltage with a multimeter or voltage tester before handling any wires. Keep the area clear of pets and children, and note the model and serial number of the unit for compatibility checks. If you’re not confident in reading electrical schematics or connecting motor leads, this is a sign to call a qualified technician.
Assessing compatibility and ordering the right motor
Motor compatibility depends on several factors: voltage (V), current (A), RPM,-frame size, shaft type, and mounting orientation. Check the existing motor’s nameplate or the service sheet for these specs, and match them exactly on the replacement. Also, verify the capacitor rating and type; a mismatched capacitor can cause startup failure or excessive heat. When ordering, it’s wise to confirm the replacement motor is designed for your specific heat pump model and blower configuration. If you’re between models, consider replacing related components such as the capacitor or blower belt (if applicable) to ensure reliable operation.
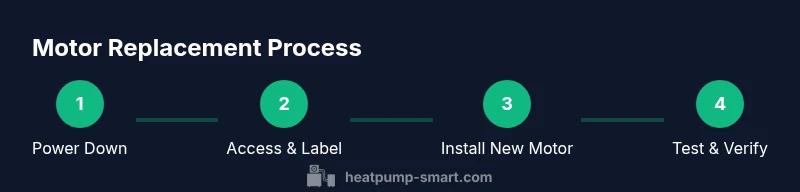
The replacement process overview (high level)
Replacing a heat pump motor involves five broad stages: safe shutdown and access, wiring documentation, removal of the old motor, installation of the new motor, and post-install testing. Each stage requires careful attention to mounting alignment, electrical connections, and secure fasteners. After installation, you’ll run the blower to verify that the motor starts cleanly, maintains proper speed, and does not produce abnormal noises. Remember that refrigerant work is not typically part of motor replacement unless you encounter a seal breach; when in doubt, involve a licensed professional.
Post-install checks and maintenance to extend motor life
After replacement, run the system through a full cycle to observe performance across heating and cooling modes. Listen for unusual vibrations, and inspect the blower wheel for clearances. Check the electrical connections for heat discoloration after a short test run. Schedule a routine maintenance visit to clean coils, verify belt tension (if applicable), and inspect the capacitor’s integrity. Regular lubrication (where specified by the manufacturer) and ensuring airtight ductwork will reduce load on the motor and improve efficiency over time.
Tools & Materials
- New motor (matched to system)(Ensure same frame size, mounting configuration, RPM, and voltage as the old motor)
- New capacitor(Capacitor rating should match the motor; consider replacing if worn)
- Multimeter or voltage tester(Verify zero voltage before touching wires)
- Screwdrivers (Phillips and flat-head)(Keep bits organized; avoid cross-threading mounting screws)
- Wrench set and socket set(Remove and secure mounting bolts; torque to manufacturer specs)
- Nut drivers(Useful for stubborn fasteners in tight spaces)
- Pliers and wire labels(Label wires before disconnecting; take photos for reference)
- Insulated gloves and eye protection(Protect hands and eyes from sharp edges and debris)
- Electrical tape or wire nuts(Cap and secure wire splices as needed)
- Manual or service sheet for the unit(Helps confirm wiring diagrams and torque specs)
Steps
Estimated time: 60-120 minutes
- 1
Power down and lockout
Shut off power at the outdoor disconnect and the main breaker. Apply a lockout-tagout device and verify zero voltage with a multimeter before touching any wiring.
Tip: Take a photo of existing wiring and label conductor groups before disconnecting. - 2
Access the blower compartment
Remove the access panel or cabinet cover to reveal the blower motor and mounting bolts. Keep track of screws and gaskets and avoid losing small parts.
Tip: Work on a clear surface and avoid bending flexible ductwork when removing panels. - 3
Document wiring and disconnect
Label each wire using color-coded tags, then disconnect the motor wiring from the control board and capacitor. Note the orientation of any direction-sensitive leads.
Tip: A schematic or service diagram is helpful if wires aren’t clearly labeled. - 4
Remove the old motor
Loosen mounting bolts and detach the motor from its mount. If a belt is present, release tension and remove the belt carefully.
Tip: Support the motor with your free hand to prevent damage to mountings or ductwork. - 5
Prepare and install the new motor
Compare old and new motors for compatibility. Mount the new motor in the same orientation and reattach mounting bolts with correct torque. If a belt exists, align pulleys and tension the belt as per spec.
Tip: Double-check rotor balance and ensure there’s no contact with housing or ductwork. - 6
Reconnect wiring
Connect wires to the new motor and capacitor following the labeled references. Secure with wire nuts or heat-shrink, and re-inspect insulation.
Tip: Apply new capacitor and test the capacitor-resistor path with a meter if available. - 7
Reassemble and test with power
Reinstall the access panel, restore power, and run the blower on low speed to confirm starting torque and smooth operation. Listen for abnormal noises or heat buildup.
Tip: Monitor the first startup for 60–120 seconds and be ready to power down if something sounds off. - 8
Final checks
Run the unit in both heating and cooling modes, observe airflow, and verify that temperature outputs are within expected ranges. Recheck wiring and mounting after a short run.
Tip: Record maintenance notes and replace any worn components identified during the test.
Your Questions Answered
Can I replace the motor myself?
You can replace a motor if you have HVAC electrical experience and follow safety procedures. For many homeowners, hiring a licensed technician is the safer option to protect your equipment warranty and avoid hazards.
It’s possible for a skilled homeowner to replace the motor, but for safety and warranty reasons, consider hiring a licensed technician.
How do I know which motor to buy?
Match the motor by voltage, RPM, frame size, and mounting configuration to the old unit. Check the model number and documentation, and verify capacitor rating as well.
Make sure the replacement motor matches your unit’s voltage, RPM, frame size, and mounting.
What about the capacitor?
Capacitors wear over time and can cause motor startup issues. If you’re replacing the motor, inspect or replace the capacitor as well to avoid future failures.
Capacitors often wear out; replacing the capacitor during motor replacement can prevent another failure.
How long does a motor replacement take?
Most replacements take about 60 to 120 minutes depending on access and wiring complexity. Complex systems with limited access may take longer.
Most replacements take about an hour or two, depending on access and wiring.
Is refrigerant handling required?
Motor replacement typically does not require refrigerant handling. If you disturb sealed lines or suspect a leak, contact a licensed professional.
Usually not, but if lines are touched or a leak is suspected, call a pro.
Watch Video
Top Takeaways
- Verify motor compatibility before replacement.
- Follow strict safety protocols at all times.
- Document and label wiring to simplify reassembly.
- Test blower operation thoroughly after install.
- Schedule maintenance to extend motor life.