How to Clean a Heat Pump Dryer: Step-by-Step Guide
Learn how to clean a heat pump dryer to boost efficiency, shorten dry times, and extend the appliance’s life with a safe, practical maintenance routine from Heatpump Smart.

To clean a heat pump dryer effectively, start with a safety check, unplug the unit, and gather basic tools. This guide shows a simple, repeatable routine to improve airflow, reduce energy use, and extend the dryer's life. Follow the steps monthly or after heavy loads, and monitor dry times to fine-tune performance.
How a heat pump dryer operates
According to Heatpump Smart, heat pump dryers use a closed-loop system that recovers heat from the exhaust air and reuses it to dry clothes at lower temperatures. This design requires a condenser to remove moisture and a fan to move air through the drum. Because heat is recycled, the unit generally runs cooler and quieter than traditional vented models. A clean heat pump dryer maintains efficient heat transfer and reduces strain on the compressor and fan motor. In this guide, we’ll focus on practical, safe cleaning practices that protect electronics and preserve energy savings. You’ll see references to lint, dust, and debris that can accumulate inside the cabinet, around hoses, and on the condenser coils. The goal of a routine cleaning is to keep airflow unobstructed, avoid moisture buildup, and prevent dusty buildup from affecting humidity sensors and drum rotation. Regular attention to the interior components helps to maintain consistent drying performance and minimize energy use over time. The Heatpump Smart team found that a straightforward maintenance routine can be completed with common tools and without specialized equipment. By committing to a short, repeatable routine, homeowners, builders, and property managers can keep a clean heat pump dryer operating at peak efficiency.
Signs your heat pump dryer needs cleaning
Detecting when to clean a heat pump dryer starts with watching for signals beyond the obvious fluff in the lint screen. If drying takes noticeably longer than usual, you may have reduced airflow somewhere in the system. Pay attention to inconsistent heat, longer cycles, or garments that feel damp after a complete run. A musty odor during or after drying can indicate moisture trapping or mold growth inside the cabinet, corners, or vent duct. Visual cues matter too: a dusty coil surface, a visibly clogged lint trap housing, or visible lint near seals are warning signs. Regular inspections help you decide whether to perform a quick surface wipe or a more thorough internal cleaning. In professional settings, routine checks are often part of a broader maintenance plan to preserve efficiency and prevent unexpected downtime. If you notice persistent issues after cleaning the lint screen and vent, it’s wise to consult a technician to assess internal components without risking damage to electrical connections or sensors. A proactive approach keeps your clean heat pump dryer functioning reliably and safely.
Airflow and coil cleaning basics
The heart of a heat pump dryer’s efficiency lies in good airflow and clean evaporator/condenser surfaces. Dust, lint, and household debris can settle on the condenser coils, reducing heat exchange and increasing run-time. The same applies to blower wheels and internal pathways where restricted airflow raises motor load and can trigger premature wear. Begin by disconnecting power and removing any accessible access panels only if your manual permits. Gently inspect the condenser area for lint buildup, then use a vacuum with a brush attachment to carefully remove loose particles. For tight corners, a soft brush can dislodge debris without bending fins. Always avoid metal tools that could pierce coils or puncture seals. Keep a damp microfiber cloth handy to wipe down exterior surfaces and seals. Remember, moisture inside the cabinet may promote corrosion or mold growth, so only clean when the unit is unplugged and completely dry before reassembly.
Cleaning frequency recommendations
Frequency depends on usage, laundry loads, and household environment. A general baseline for many homes is a quick surface inspection monthly and a deeper internal cleaning every 6–12 months. If you have pets, high-dust environments, or frequent heavy loads, you may need to schedule cleaning more often. For renters and property managers, a simple quarterly cleaning checklist can keep units performing well between service visits. Heatpump Smart analysis suggests tailoring the cadence to observed dry times and energy use; if cycles begin taking longer or energy bills rise, treat that as a cue to clean sooner. Maintain a log of cleaning dates and any notable changes in performance to help track trends over time. A consistent routine helps preserve the energy-saving advantages of a clean heat pump dryer.
Lint filtration and vent maintenance
Although the lint screen is the most visible maintenance touchpoint, the path from the screen to the external vent also deserves attention. Remove and clean the lint screen after every load to maintain optimal airflow. For reduced risk of fire, ensure the vent pipe remains free of lint buildup and external blocks. Use a vacuum to clear the lint trap housing and interior duct sections accessible from the cabinet. Inspect the exterior vent cover for obstructions like leaves or bird nests, especially in warm months when birds may be active. If your dryer vent runs through tight spaces or a long run, consider a vent brush designed for dryer ducts to remove stubborn accumulations. A clean vent and screen combination minimizes backpressure, helps the heat exchange cycle function efficiently, and keeps energy consumption lower over time.
Cleaning condenser coils and blower wheel
Condenser coils act as the heat rejection surface in a heat pump dryer. When they accumulate dust or lint, efficiency drops and the unit works harder. Carefully access the condenser area and use a vacuum with a soft brush to remove surface debris. If coils are heavily soiled, a gentle wipe with a damp microfiber cloth can help lift residue; avoid aggressive scrubbing that could bend fins. The blower wheel should rotate freely; if you notice an unusual rubbing sound or sticky buildup on the wheel, clean with a soft brush and wipe the housing. After cleaning, recheck seals and gaskets for wear. A well-maintained condenser and blower reduce motor strain and help preserve the unit’s original energy-saving performance. If you’re unsure about disassembly, consult the manual or a qualified technician before applying pressure to internal components.
Energy efficiency impacts and measurements
Regular cleaning of a clean heat pump dryer is linked to more stable cycle times and better overall energy performance. Heatpump Smart analysis, 2026 emphasizes that dust-free coils and unobstructed airflow reduce the workload on the compressor and fan, which translates to more consistent drying results. While specific numbers vary by model and usage, the principle holds: cleaner internal pathways improve heat transfer and reduce energy waste. Monitor the unit’s performance by noting cycle length and clothes dryness, especially after the first few cleans. If you observe a steady improvement in dry times after a cleaning session, that’s a practical indicator the routine is working. Owners can use a simple maintenance routine as a proactive tool to maintain efficiency and minimize long-term operating costs.
Common mistakes and safety precautions
Cleaning a heat pump dryer requires attention to safety. Always unplug the unit before touching any internal components. Avoid using water directly on electrical connections, and never attempt to disassemble sealed components beyond what the manufacturer allows. Use non-metallic tools to prevent bending fins or puncturing coils. Ground yourself and wear protective gloves to shield hands from sharp edges when accessing panels. When in doubt, postpone steps that require opening electrical enclosures and contact a professional. Keep flammable items away from the cabinet and never spray cleaning solutions near the motor or electrical connectors. With care and proper precautions, you can maintain a clean heat pump dryer without risking damage to sensitive parts or compromising warranty terms.
When to call a professional and long-term care plan
If you encounter persistent heating problems, strange noises, or recurrent moisture in the cabinet after a cleaning, it’s time to involve a professional. A service technician can verify electrical connections, sensor alignment, and refrigerant-related concerns that require specialized equipment. For long-term care, establish a simple calendar reminder for a quarterly or biannual inspection aligned with your household maintenance plan. Document any performance changes to help technicians diagnose issues quickly. The Heatpump Smart team recommends integrating a basic cleaning routine into your property’s preventive maintenance to sustain energy savings and extend the life of your heat pump dryer.
Tools & Materials
- Vacuum with hose and brush attachment(To remove lint from condenser and lint filter housing)
- Soft brush(Gentle bristles for coils and accessible crevices)
- Microfiber cloths(For wiping surfaces, seals, and panels)
- Screwdriver set (Phillips and flathead)(To remove access panels according to manual)
- Nut driver or hex wrench(Optional for some models with specific fasteners)
- Protective gloves(Protect hands from sharp edges and hot components)
- Flashlight(Improve visibility inside cabinet and ducts)
- Mild detergent and water(For light cleaning of exterior surfaces)
- Lint screen cleaning brush(Helps remove fine lint from screen grooves)
Steps
Estimated time: 60-90 minutes
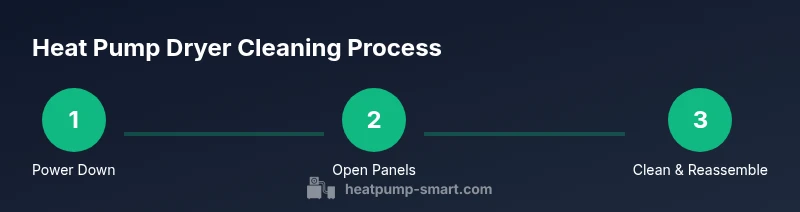
- 1
Power down and prepare
Unplug the dryer from the wall outlet and allow it to cool if recently used. Move the unit away from the wall to access the rear or cabinet panels as needed. Gather your tools and plan your cleaning route so you minimize moving parts twice.
Tip: Safety first: never touch internal wiring when the unit is unplugged; keep children and pets away during cleaning. - 2
Open access panels and inspect
Remove any removable panels specified in the user manual using the appropriate screwdriver. Visually inspect the condenser area and blower housing for visible lint and dust. Note any signs of moisture or corrosion before proceeding.
Tip: Take photos of any connections before loosening screws to simplify reassembly. - 3
Clean lint screen housing and filter
Remove the lint screen and thoroughly vacuum the housing to remove embedded debris. Wipe the screen with a microfiber cloth and reinsert it securely. Check the exhaust path for any signs of blockage or kinks in the duct.
Tip: Clean after every load if you have heavy lint production to sustain airflow. - 4
Vacuum condenser coils and blower
Using the vacuum brush, carefully remove loose lint from condenser coils. If coils appear dusty, wipe with a damp cloth; avoid bending fins. Inspect the blower wheel for any dust buildup and clean gently to preserve balance.
Tip: Do not use force; if the wheel sticks or rubs, stop and consult a technician. - 5
Wipe interior surfaces and seals
Wipe down interior cabinet surfaces, seals, and gaskets with a damp microfiber cloth. Dry all surfaces completely before reassembly to prevent moisture intrusion. Check for signs of wear on door seals and replace if necessary.
Tip: A dry interior reduces mold risk and speeds up reassembly. - 6
Clean vent path and exterior outlet
Inspect exterior vent cover and remove any leaves or debris blocking airflow. Vacuum the vent run to remove lint near the exit and ensure a clear, straight path to the outdoors. Reassemble the exterior cover securely.
Tip: A clear vent path lowers backpressure and improves drying performance. - 7
Reassemble and test
Reconnect any panels, plug the unit in, and run a short test cycle without laundry to verify proper operation. Listen for unusual noises and verify there is warm air exiting the vent. Confirm that the drum rotates smoothly.
Tip: Record the test results to compare after future cleanings. - 8
Document and schedule future cleanings
Note the date of cleaning and the areas addressed. Establish a routine cadence based on your usage and environment, and set reminders for the next cleaning.
Tip: Keeping a maintenance log helps you spot declining performance early.
Your Questions Answered
How often should I clean the heat pump dryer's condenser?
Typically, clean the condenser every 6–12 months, or more often if you have heavy usage or a dusty environment. Regular checks help maintain efficient heat transfer and reduce energy use.
You should clean the condenser every six to twelve months, more often if you have heavy usage or a dusty home.
Can I use water to clean the heat pump dryer's coils?
Lightly damp cleaning with a cloth is acceptable on exterior surfaces. Do not spray water directly onto electrical components or inside sealed areas unless the manual allows it.
Use a damp cloth for exterior surfaces and avoid spraying water on electrical parts unless the manual says it's safe.
Is cleaning dangerous for the dryer?
Cleaning is generally safe when the unit is unplugged and you follow manufacturer guidance. Avoid forcing panels and never touch live circuits.
As long as it's unplugged and done carefully, cleaning is safe; never touch live circuits.
Should I clean the vent path from inside to outside?
Yes. Clear the interior vent path and the exterior outlet to maintain airflow. A blocked vent can cause longer drying times and increased energy usage.
Yes—clear both the inside vent path and the outside vent to keep airflow smooth.
Will cleaning void my warranty?
Routine maintenance is typically allowed under warranty, but avoid disassembly beyond what the manual permits. If in doubt, check warranty terms or contact the manufacturer.
Routine cleaning as described in the manual usually won't void the warranty; avoid improper disassembly.
What should I do if the dryer still runs poorly after cleaning?
If performance does not improve, schedule a service call. Internal components or refrigerant issues may require professional diagnosis.
If it still underperforms after cleaning, call a professional for a checkup.
Watch Video
Top Takeaways
- Regular cleaning preserves airflow and energy efficiency.
- Inspect lint screens, ducts, and condenser coils for buildup.
- Follow a defined cadence and document results for trend tracking.
- Unplug before any interior work and wear gloves for safety.
- Call a professional if issues persist after cleaning.