How to Clean a Heat Pump Outdoor Unit: Step-by-Step Guide
Learn to safely clean your outdoor heat pump unit to improve efficiency and longevity. This Heatpump Smart guide covers tools, safety, and practical steps for homeowners and builders.

This guide walks you through safely cleaning a clean heat pump outdoor unit to boost airflow, efficiency, and longevity. You’ll learn how to assess debris, power down, clean coils, and inspect fins without damage. Use proper tools, follow safety guidelines, and complete the steps for reliable performance and better home comfort. This quick answer previews the full process.
Why a clean heat pump outdoor unit matters
A clean heat pump outdoor unit is essential for efficient heat transfer and reliable operation. When dirt, leaves, or dust accumulate on the condenser coils, airflow is restricted, compressor workload increases, and energy use rises. The Heatpump Smart team finds that routine cleaning helps maintain peak performance and can reduce cycling strain during peak heating or cooling months. In residential settings, a clean outdoor unit supports steady indoor comfort and can extend the life of the system. Keep in mind that local environmental factors—pollen in spring, construction dust, or nearby vegetation—shape how often you’ll need cleaning. By addressing debris promptly, you reduce the risk of coil corrosion and improve heat exchange efficiency without expensive repairs later. This section explains the science behind airflow, fins, and coil condition, and how a simple cleaning routine pays off across seasons for homeowners, builders, and property managers.
Safety first: prerequisites before cleaning
Before you touch any outdoor unit, de-energize the system. Turn off power at the disconnect switch or breaker and, if possible, disconnect the outdoor unit from the electrical supply. Wear safety glasses and gloves to protect eyes from debris and sharp fins. Check the forecast; avoid cleaning in wet conditions to reduce slip risk and ensure you won’t trap heat or moisture around electrical components. The goal is to create a safe, controlled environment so you can inspect and clean without injuries or equipment damage. Heatpump Smart emphasizes following manufacturer guidelines and never bypassing safety features.
Debris and environmental threats affecting performance
Outdoor units battle a range of debris: fallen leaves, pine needles, grass clippings, bird nests, spider webs, and pollen. In dusty environments, fine particles cling to coil surfaces and reduce heat transfer. Heatpump Smart analysis shows that even small accumulations can force the system to work harder, shortening its life. Regular checks during spring and fall can prevent buildup before it becomes a problem. If you notice persistent debris around the unit, consider relocating nearby plants or using a protective screen that still allows adequate airflow.
What to inspect during a clean
During a cleaning, inspect the exterior housing, fins, coil surface, and the fan shroud. Look for bent or damaged fins, corrosion on the coil, and any loose mounting hardware or wiring. Check for obstructions around the unit—vegetation, storage items, or debris—that could impede airflow. Note any unusual noises or vibrations, which may indicate a mounting issue or a failing fan motor. A thorough inspection helps you decide whether a simple cleaning is sufficient or a professional service is warranted. Heatpump Smart advises documenting any wear and tear for maintenance records.
Timing and frequency: when to clean
Frequency depends on climate, the surrounding environment, and how close the unit is to trees or dusty roads. In dusty or pollen-heavy areas, a quarterly or biannual clean may be appropriate, while milder environments may only require annual attention. After severe weather, storms, or a long period of yard work nearby, a quick inspection and light cleaning can prevent debris from affecting performance. Establishing a regular schedule reduces risk and keeps the system operating near peak efficiency while aligning with seasonal maintenance tasks. Heatpump Smart recommends syncing outdoor-unit upkeep with your annual HVAC service.
Common mistakes and how to avoid them
Avoid using power washers or high-pressure hoses, which can bend fins and harm the coil. Do not spray water directly into electrical components or the motor. Use a soft brush to dislodge stubborn debris and finish with a light rinse from the outer edges toward the center to avoid forcing dirt inward. Never attempt to disassemble the fan housing or condenser; improper handling can void warranties or cause safety hazards. Instead, follow manufacturer guidelines and consult a professional if you see bent fins, damaged wiring, or persistent leakage. A cautious, methodical approach yields better results and preserves warranty protections.
How to extend life with proper care
Beyond cleaning, keep the outdoor unit shielded from direct snow buildup and heavy vegetation, maintain adequate clearance (typically 2–3 feet around the sides and above), and schedule professional inspections on a regular cycle. Simple habits—clearing surrounding debris, inspecting for signs of corrosion, and monitoring performance—help sustain efficiency and prevent costly repairs. According to Heatpump Smart, a proactive maintenance mindset reduces energy waste and supports consistent indoor comfort. Regular care now means fewer surprises when temperatures swing.
When to call a professional
If you notice persistent debris buildup, bent fins that you cannot safely straighten, unusual noises, refrigerant smells, or if the unit is not cooling or heating effectively after cleaning, contact a licensed HVAC technician. A pro can perform advanced coil cleaning, assess refrigerant pressures, test electrical components, and verify that all safety measures are functioning correctly. The Heatpump Smart team recommends seeking professional help for complex problems or if you’re unsure about any step of the process.
Tools & Materials
- Safety glasses(ANSI Z87.1 rated)
- Work gloves(Grip and protection)
- Low-pressure garden hose(No high-pressure spray)
- Non-metallic coil brush(Soft bristles to avoid fins damage)
- Non-corrosive coil cleaner (optional)(Follow product instructions; not always needed)
- Step ladder or stable platform(If unit is elevated; ensure safety)
Steps
Estimated time: 45-60 minutes
- 1
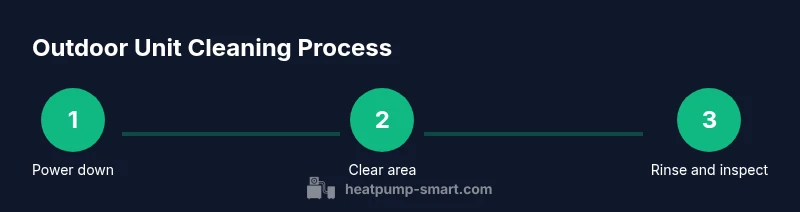
Power down and secure
Switch off the outdoor unit at the breaker or disconnect. Lock out if possible and confirm there is no stored power in the control circuit. This prevents electric shock or compressor restart during cleaning.
Tip: Double-check that other electrical devices nearby are not accidentally energized. - 2
Clear surrounding area
Remove any loose debris, leaves, or branches within a 2–3 foot radius. Tripping hazards or contact with the fan blades can occur if the unit is left obscured. A clear space also improves airflow during operation.
Tip: Do not climb on the unit; use a stable ladder if necessary. - 3
Inspect fins and coil surface
Visually inspect the coil and fins for bending, corrosion, or damage. Bent fins reduce airflow; if needed, use a fin comb or a professional to restore them safely.
Tip: Only perform light straightening if you are confident; otherwise, call a pro. - 4
Rinse coils gently
Using a low-pressure hose, rinse from the outer edges toward the center to avoid forcing debris inward. Avoid direct spraying at electrical components or the fan housing.
Tip: Keep nozzle at a moderate distance to prevent damage. - 5
Check for issues and reassemble
After cleaning, inspect for loose wiring, corrosion, or signs of moisture around electrical connections. If everything looks dry and intact, re-secure any access panels and prepare for testing.
Tip: Wait for any moisture to dry before powering back up. - 6
Test and monitor
Restore power and observe operation for a short period. Listen for unusual noises and verify consistent airflow. If performance seems off, schedule a professional check.
Tip: Document the cleaning date for your maintenance log.
Your Questions Answered
Is it safe to spray water directly onto the outdoor unit?
No. Use a gentle, low-pressure spray and avoid directing water at electrical components, the fan motor, or wiring. High-pressure water can bend fins and push debris into the coil.
Avoid high-pressure water and spray gently from the unit's outer edges toward the center.
How often should you clean the outdoor unit?
Frequency depends on environment. In dusty or pollen-heavy areas, clean every 3–6 months; in milder environments, annually may be enough. Adjust based on observed debris and performance.
Clean more often in dusty areas and at least once a year in calm environments.
Can I use a pressure washer on the fins?
No. Pressure washers can bend fins and damage the coil. Stick to low-pressure rinsing and a soft brush for stubborn grime.
Avoid pressure washers; use gentle rinsing and brushing instead.
What should I do if fins are bent or damaged?
If fins are only lightly bent, a plastic fin comb can carefully straighten them. For extensive damage, a professional fin straightening or coil service is recommended.
Light bends can be fixed with a fin comb; major damage needs a technician.
Should ice buildup be removed during cleaning?
Do not remove ice while the unit is operating. Allow it to thaw during defrost cycles and cleaned after it’s melted to avoid shock or electrical issues.
Let ice melt during defrost cycles and clean only when dry.
Is professional cleaning always necessary?
Not always, but complex issues, damaged fins, refrigerant concerns, or persistent performance problems warrant a licensed HVAC professional.
Not always, but call a pro for major issues or if unsure.
Watch Video
Top Takeaways
- Power off before starting any cleaning.
- Use low-pressure rinsing and soft brushes to protect fins.
- Maintain clear surrounding space for airflow.
- Inspect for damage and document maintenance.
- Call a professional for significant issues or uncertainties.