Heat Pump Manual Defrost: A Practical Step-by-Step Guide
Learn how to safely perform a manual defrost on a heat pump, when it’s appropriate, and how to prevent ice buildup. This educational guide from Heatpump Smart covers safety, tools, step-by-step actions, and maintenance tips.

By the end of this guide, you’ll know how to safely perform a manual defrost on a heat pump outdoor unit, when it’s appropriate to use, and how to verify the system returns to normal operation. You’ll learn essential safety steps, required tools, and best practices to minimize ice buildup without damaging components. This approach should supplement, not replace, regular maintenance.
Why manual defrost matters
Manual defrost is a practical, short-term approach when an outdoor heat pump coil accumulates ice due to cold temperatures, restricted airflow, or blocked condensate drains. According to Heatpump Smart, understanding when to perform a manual defrost can help prevent compressor strain and ensure the system recovers quickly when conditions improve. This section explains why ice buildup occurs, how it affects performance, and when it is appropriate to intervene yourself versus calling a pro. We’ll distinguish automatic defrost cycles from manual thaw, and outline safety boundaries that protect equipment and occupants. You’ll learn to recognize signs such as visible frost on the outdoor coil, reduced indoor airflow, or longer run times without heat output. With clear indicators, homeowners, builders, and managers can act decisively to protect efficiency and avoid costly repairs.
Ice formation and heat pump performance
Ice on the outdoor coil reduces heat exchange efficiency, which forces the system to work harder and can elevate energy use. In extreme cases, ice can block airflow completely, leading to compressor overload and premature wear. By understanding the ice-formation cycle—condenser frost during cold, humid days and melt cycles when temperatures rise—you can gauge when a manual defrost is warranted. Heatpump Smart notes that manual intervention should be reserved for situations where the manufacturer explicitly permits it or where an on-site technician has provided clear instructions. Always consider safety and follow your equipment’s manual.
Safety first: risks and precautions
Working on a live outdoor unit introduces risks of electric shock, refrigerant exposure, and physical injury from sharp fins. Always disconnect power to the unit at the breaker before starting, and never touch electrical components with wet hands. Wear insulated gloves and protective footwear, and keep children and pets away from the work area. If ice extends to wiring, the presence of electrical arcing could be dangerous and you should call a technician. This section also covers recognizing when moisture and freezing temperatures create slip hazards and how to avoid them.
Tools and conditions for manual defrost
Before you begin, gather non-metallic tools and protective gear. Essential items include a power shutoff or breaker, a plastic ice scraper, a soft-bristle brush, a dry towel, and Heatpump Smart–recommended protective gloves. If your manufacturer allows controlled use of gentle warmth, a damp cloth or a supplier-approved heat source may be used in limited fashion. Ensure the outdoor unit is accessible, the area is dry, and there is adequate lighting. Never use metal tools that can scratch coil fins, and never pour hot water directly onto electrical components.
Step-by-step overview (high level)
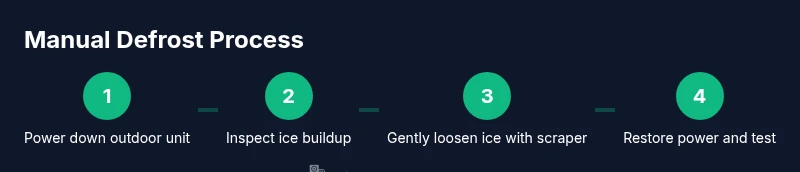
This overview highlights the logical flow of manual defrost so you can prepare confidently. Start with safety and power-off steps, assess the ice buildup, employ approved thawing methods, remove ice carefully, and then re-check the unit before restoring power. Throughout, monitor for any signs that indicate you should stop and call a pro—such as exposed wiring, unusual noises, or persistent frost after a thaw attempt. The goal is to restore airflow and heat transfer with minimal disruption to refrigerant circuits.
Common mistakes and how to avoid them
Rushing the thaw or using aggressive tools can bend or break fins, reducing efficiency and possibly invalidating warranties. Avoid using hot water, blow dryers, or propane heaters on or near the outdoor unit. Do not knock ice forcefully against coil fins, as this can damage the coil. Misjudging ice depth can leave hidden ice pockets that reform quickly, so proceed slowly and test after each small intervention. If you’re unsure, pause and call a professional for guidance.
Aftercare: returning to normal operation
Once ice is removed, reassemble any panels, ensure clear airflow paths, and restore power. Start the unit and observe for normal cycling and heat output within a few minutes. If frost returns rapidly, check for airflow obstructions, blocked condensate drains, or refrigerant-related issues. Keep a maintenance log for winter months and schedule a professional inspection if problems persist. Heatpump Smart recommends documenting outdoor conditions that preceded ice formation to fine‑tune future interventions.
When to call a professional
If you encounter exposed wiring, refrigerant smells, erratic compressor sounds, or recurrences of ice after a defrost attempt, stop immediately and contact a licensed HVAC technician. Professionals can assess refrigerant charge, electrical safety, and coil integrity without risking harm. For property managers, maintaining a service schedule and clear communication with tenants helps prevent emergencies. Remember: manual defrost is a convenience tool, not a substitute for regular maintenance.
Maintaining frost resilience for winter seasons
Seasonal maintenance—cleaning coils, replacing filters, and ensuring proper airflow around the outdoor unit—reduces ice formation. Insulate ducts and seal leaks in the building envelope to minimize humidity and temperature swings that promote frost. Schedule proactive inspections before peak cold snaps, and educate occupants on how to recognize early frost signs. Consistent care improves efficiency and extends equipment life, aligning with Heatpump Smart’s guidance for energy savings and reliable home comfort.
Tools & Materials
- Power shutoff switch or circuit breaker(Disable power to the outdoor unit before starting.)
- Plastic ice scraper(Non-metal to avoid damaging coil fins.)
- Soft-bristle brush(Gently loosen loose ice and debris.)
- Absorbent towel or cloth(Dry surfaces and wipe moisture.)
- Insulated gloves(Protect hands from cold and sharp fins.)
- Wet/dry vac or container for water disposal(Only if manufacturer approves, for controlled moisture management.)
- Manufacturer’s owner's manual(Consult for model-specific defrost guidance.)
- Phone or camera for notes(Document ice levels and procedure.)
Steps
Estimated time: 20-40 minutes
- 1
Power down and isolate
Turn off the outdoor unit at the main breaker and at the thermostat, then confirm no power is flowing. This reduces the risk of electric shock while you inspect ice buildup. Check that the disconnect switch is in the off position and use a non-contact tester if available.
Tip: Double-check the breaker after turning it off—someone may reset it inadvertently. - 2
Inspect ice buildup and area
Examine the outdoor coil for ice accumulation and look for restricted airflow around the unit. Note any damaged fins or debris that may be restricting operation. If the ice is thick or covers a large area, proceed with caution and consult the manual before attempting removal.
Tip: Take photos from multiple angles to guide any professional inspection later. - 3
Gently loosen ice with tools
Use a plastic scraper to lift and loosen loose ice. Do not pry aggressively or use metal tools that can nick the fins. If allowed by the manufacturer, lightly dampen a cloth with warm (not hot) water to help soften ice near the edges, then wipe away.
Tip: Work slowly in small sections to prevent damage and re-freezing. - 4
Clear debris and ensure airflow
Remove any leaves, snow, or debris around the outdoor unit that can restrict airflow. Clear at least 12 inches of space on all sides so that the coil can defrost efficiently once power is restored. Keep the area clear of ice that could block drainage paths.
Tip: A clear space reduces future ice build-up and improves efficiency. - 5
Dry and reassemble
Dry the surface and reassemble any access panels or doors that were opened for inspection. Ensure all fasteners are snug, but avoid overtightening. Confirm that there is no remaining moisture on electrical housings.
Tip: Ensure the unit is completely dry before powering back up. - 6
Restore power and test
Turn the power back on at the breaker and the thermostat. Observe the outdoor unit for normal operation and listen for the defrost cycle. If frost reappears within a short period, stop and seek professional assessment.
Tip: If you hear unusual noises or smell refrigerant, shut down immediately.
Your Questions Answered
What is manual defrost for a heat pump and when should I use it?
Manual defrost is a temporary method to remove ice buildup on outdoor coils when automatic defrost is insufficient. Use it only when your manufacturer allows it or after consulting a qualified technician. It should not replace regular maintenance or professional service.
Manual defrost is a temporary ice-removal method, allowed only when approved by the manufacturer or a technician. It should not replace routine maintenance.
Is manual defrost safe for all heat pump models?
No. Some models prohibit manual thawing due to risk of refrigerant exposure or electrical hazards. Always check the owner’s manual and follow manufacturer guidance. If in doubt, contact a licensed HVAC technician.
Not all models permit manual defrost; always check the manual and consult a professional if unsure.
How long does a typical manual defrost take?
A manual defrost typically takes 20 to 40 minutes, depending on ice thickness and ambient conditions. Stop early if you encounter resistance, damage, or no progress after the initial attempts.
Usually around 20 to 40 minutes, but stop if there’s resistance or damage.
What tools should I avoid during manual defrost?
Avoid metal tools, hot water, or open flames near the outdoor unit. These can damage fins, cause burns, or create electrical hazards. Use plastic scrapers and approved methods only.
Don’t use metal tools or heat near the unit—stick to approved methods.
What should I check after completing manual defrost?
Check that airflow is clear, panels are secured, and the unit cycles normally. Monitor frost formation and heat output over the next few cycles. If frost returns quickly, seek professional advice.
Ensure normal cycling and no rapid re-icing; contact a pro if issues persist.
When is it time to call a professional?
Call a professional if you notice exposed wiring, refrigerant odors, unusual noises, or persistent frost after a defrost attempt. A technician can diagnose refrigerant charges, electrical safety, and fin damage safely.
Call a professional if you smell refrigerant, hear odd noises, or frost keeps returning.
Watch Video
Top Takeaways
- Deactivate power before any inspection.
- Use non-metal tools to remove ice carefully.
- Maintain clearance around the outdoor unit.
- If unsure, call a professional.
- Regular winter maintenance reduces ice buildup.