How to Clean Heat Pump Coils
Learn how to safely clean heat pump coils to restore airflow, improve efficiency, and extend system life. This expert guide covers prep, tools, step-by-step actions, maintenance tips, and safety for homeowners and property managers.

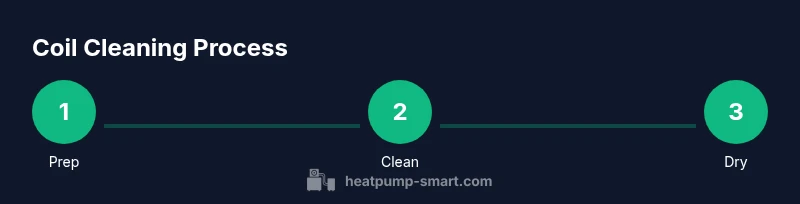
By following these steps, you will safely remove debris from your heat pump coils and restore airflow for better efficiency. You’ll need basic safety gear, a gentle coil cleaner, and a garden hose. Start with a visual check, switch off power at the breaker, and use soft brushes to dislodge dirt before rinsing. This process minimizes mold growth and energy waste while extending component life.
Why Cleaning Heat Pump Coils Matter
Heat pump coils are the heart of your system's heat transfer. When dirt, pollen, dust, or mold settle on the outdoor condenser coil or indoor evaporator coil, airflow is restricted, refrigerant temperatures rise, and efficiency drops. Over time, this can lead to higher energy costs, reduced heating or cooling capacity, and increased wear on fans and compressors. According to Heatpump Smart, regular coil maintenance helps sustain optimal airflow and system performance. A clean coil also minimizes moisture retention, which reduces mold and bacterial growth that can affect indoor air quality. In dusty or humid climates, routine cleaning becomes even more important. This section explains how dirt accumulates, what to watch for, and how cleaning restores transfer efficiency without harming delicate fins.
Safety Considerations Before You Start
Safety comes first when working on a heat pump. Before you touch any component, switch off power at the circuit breaker and lock out the disconnect if present. Wait for the unit to come to a full stop; never spray water while the fan is spinning. Wear eye protection and gloves to guard against sharp fins and cleaning chemicals. Keep children and pets away from the work area, and avoid leaning or standing on outdoor equipment. If you feel unsure about wiring or refrigerant lines, pause and call a licensed technician. Heatpump Smart analysis shows that following safety protocols reduces the likelihood of shocks or accidental damage.
Access Points and Coil Types
Most homes have outdoor condenser coils and indoor evaporator coils. Access points vary by system design: you may need to remove a panel, lift a grille, or open a service door. Outdoor coils are exposed to weather and pollen; indoor coils can collect kitchen grease or household dust. Identify which coil you are cleaning and plan your approach, including any protective fins and obstacles such as wiring harnesses. If you have a severe ice buildup, or you see obvious refrigerant leaks, stop and contact a pro—coils and connections require specialized care.
Cleaning Methods: Brush, Cleaner, and Rinse
Use a non-acid coil cleaner designed for aluminum fins and an attachment brush to soften and lift debris. Rinse gradually from the top down to prevent dirt from running into clean areas. Do not use high-pressure washers or metal brushes that can bend fins; a soft-bristled brush works best. Apply cleaner, wait the recommended dwell time, then gently agitate with a nylon brush. For stubborn buildup, a fin comb can straighten bent fins before rinsing. Remember to work from the outer edges inward, and avoid spraying into electrical components or seals.
Rinsing, Drying, and Reassembly
Rinse with a garden hose on a low to medium gentle spray, keeping water temperature moderate to avoid warping seals. Rinse from top to bottom until the water runs clear and all cleaner residue is removed. Allow coils to dry completely—this can take several hours, depending on humidity and airflow. Replace panels, panels must seat properly to protect components. Do not run the unit until completely dry; moisture can cause short circuits.
Post-Clean Inspection and Performance Check
Inspect fins for damage; bent fins can be straightened with a fin comb. Check that electrical connections and strain reliefs are intact, then reattach any panels. Recheck airflow by feeling a strong breeze at the coil face; you should notice improved cooling or heating response after the job.
Regular Maintenance to Keep Coils Clean
Create a simple quarterly or seasonal cleaning schedule, depending on climate. Keep nearby vegetation trimmed and remove debris from the outdoor unit's grill area. Consider covering outdoor units only during extreme weather if manufacturer instructions permit; never block airflow around the unit. Document the date of cleaning to track maintenance and plan future visits.
Common Mistakes and When to Call a Pro
Common mistakes include using high-pressure water, acidic household cleaners, or metal tools on fins. Forgetting to shut off power or leaving the unit wet can cause damage. If you notice ice buildup, refrigerant hissing, or persistent performance issues after cleaning, pause and call a licensed technician.
Tools & Materials
- Safety gloves(Heatproof gloves recommended to protect hands from sharp fins and cleaners)
- Safety goggles(Eye protection against splashes and debris)
- Soft-bristle brush(Non-metal brush; nylon or polypropylene works best)
- Coil cleaner (non-acid)(Choose a cleaner labeled safe for HVAC aluminum fins)
- Garden hose with adjustable nozzle(Low to medium pressure; avoid high pressure)
- Fin comb(Useful for bent fins, especially on outdoor coils)
- Bucket and towels(Catch and dry debris; absorb water during rinsing)
- Ladder or step stool(Access panels safely if coils are hard to reach)
- Permanent marker or tape(Label service panels before removal to aid reassembly)
Steps
Estimated time: 60-90 minutes
- 1
Power down and prepare the workspace
Switch off the heat pump at the main breaker and, when applicable, disable the external disconnect. Verify no power is reaching the unit by testing with a non-contact tester. Clear the area of debris and pets, and lay down towels to catch any spills.
Tip: Use a lockout-tagout procedure if available to prevent accidental re-energizing. - 2
Access the coils safely
Remove access panels or grilles needed to expose the coils. Avoid forcing panels or waking nearby wiring; if panels resist, consult the manual or a pro. Take photos before removing parts to ensure proper reassembly.
Tip: Label screws and note which panel belongs to which side if you disassemble multiple parts. - 3
Inspect for damage and debris
Look for bent fins, signs of mold, or visible corrosion. Photograph any damage to fins or seals for reference. Remove loose debris by hand or with a soft brush, taking care not to bend fins.
Tip: Do not scrub aggressively; soft pressure is enough to lift grime. - 4
Apply coil cleaner and dwell
Apply the non-acid coil cleaner evenly across the coil surface from top to bottom. Allow the cleaner to dwell for the manufacturer’s recommended time to loosen grime. Keep cleaner off electrical components and seals.
Tip: Start with a small area to test for any immediate discoloration or damage. - 5
Gently scrub and lift grime
Use a soft-bristled brush to gently lift dirt from fins and surfaces. Work in sections and avoid scraping fins with metal tools. For stubborn deposits, re-apply cleaner and give extra dwell time.
Tip: Don’t press hard on fins; this can bend or snap them. - 6
Rinse from top to bottom
Rinse with a garden hose at low-to-medium pressure, keeping spray aligned with fins to avoid pushing dirt into clean areas. Rinse until all cleaner residue is gone and water runs clear. Avoid spraying into electrical boxes or seals.
Tip: Rinse in a continuous motion to prevent water pooling. - 7
Dry and reassemble
Allow coils to dry completely before reassembling panels and turning the unit back on. Re-seat all panels firmly to ensure weather sealing and airflow. Wipe exposed surfaces to remove moisture.
Tip: Patience matters here—wet coils can cause electrical faults if powered too soon. - 8
Test operation and observe performance
Restore power and run the heat pump through a cycle to confirm normal operation. Listen for unusual noises and check airflow from supply registers. Note any changes in heating or cooling performance after cleaning.
Tip: If performance hasn’t improved within a few hours, consider scheduling a technician inspection. - 9
Clean up and schedule future maintenance
Collect tools, dispose of waste properly, and store cleaners safely away from children. Mark your maintenance calendar for the next coil cleaning—seasonal or quarterly based on climate and dust levels.
Tip: Keep a cleaning log with dates and observed coil condition for reference.
Your Questions Answered
Do I need to turn off power to the heat pump before cleaning coils?
Yes. Always shut off power and disconnect the unit before touching coils to prevent shocks or shorts. Verify no current is present with a tester before starting.
Yes—power off first to stay safe and avoid damage.
Can I use dish soap or regular household cleaners on heat pump coils?
Regular cleaners can leave residues or be too harsh for aluminum fins. Use a coil cleaner specifically designed for HVAC coils, following the manufacturer’s instructions.
Avoid dish soap; use HVAC coil cleaner per instructions.
Is it safe to clean outdoor coils myself, or should I hire a pro?
Many homeowners can clean outdoor coils with proper precautions, but call a pro for severe damage, refrigerant concerns, or if you’re unsure about access or wiring. Safety and accuracy matter for these systems.
DIY is possible for basic cleaning, but call a pro if in doubt.
How often should coils be cleaned?
Frequency depends on climate and environment. In dusty or humid areas, more frequent cleaning pays off. Use a regular maintenance schedule and adjust based on coil condition.
Frequency varies by climate; dustier environments need more frequent cleaning.
What should I do if fins are bent after cleaning?
Bent fins can reduce heat transfer. Use a fin comb carefully to straighten them. If fins are severely damaged, a professional service may be required.
Straighten bent fins with a fin comb if possible; otherwise contact a pro.
Will cleaning coils really improve energy savings?
Cleaner coils improve airflow and heat transfer, which supports near-design efficiency. You’ll likely notice better system performance and potentially lower energy use over time.
Yes, better airflow can improve efficiency and performance.
Watch Video
Top Takeaways
- Clean coils boost airflow and efficiency
- Power down before any cleaning and follow safety steps
- Use non-acid cleaners and avoid high-pressure water
- Dry coils completely before reassembly to prevent electrical issues