What to Clean Heat Pump With: A Homeowner's Guide
Learn what to clean heat pump with, safe cleaners, tools, and a practical maintenance plan to keep your system efficient and reliable.

What you clean a heat pump with depends on its components and environment, but the basics stay the same: use mild cleaners, non-abrasive tools, and low-pressure rinsing, while keeping power off. This guide outlines safe cleaners, recommended tools, and a straightforward maintenance routine so homeowners can reliably clean heat pumps without risking damage or safety.
What to Clean Heat Pump With: The Basics
Keeping a heat pump clean starts with using safe, non-abrasive cleaners and common tools. When homeowners ask what to clean heat pump with, the answer is simple: opt for mild soap, warm water, a soft cloth or brush, and a gentle rinse. Avoid high-pressure hoses, abrasive brushes, and caustic chemicals that can bend fins or push moisture into electrical components. This approach helps maintain airflow, efficiency, and reliability over time. According to Heatpump Smart, always power down the system before cleaning and work in a dry, well-lit area to minimize risk. In this section you’ll learn exactly what materials are appropriate for outdoor condensers, indoor coils, and air handlers, plus how to tailor the routine to your climate and system type.
Essential Tools and Materials
Having the right toolkit makes cleaning easier and safer. A basic set includes a soft-bristle brush, microfiber cloths, mild dish soap, a spray bottle with clean water, a garden hose with a low-pressure nozzle, a vacuum with a brush attachment, protective gloves, safety goggles, a bucket, and fresh or washable replacement filters. Keep spare PPE handy and store cleaners in a cool, dry place. The combination of gentle tools and proper protection minimizes the risk of damage and personal injury during maintenance.
Safety First: Protecting Yourself and Your Unit
Safety is non-negotiable when cleaning a heat pump. Always shut off power at the thermostat and at the main service panel to prevent unexpected starts. Wear eye protection and gloves, and ensure the area around outdoor units is clear of debris. Use a non-conductive plastic brush rather than metal tools to avoid bending fins or creating shorts. If you must access electrical components, wait for a dry day and keep water away from any live parts. A quick inspection for loose connections or signs of moisture can prevent costly failures later.
Cleaning the Outdoor Condensing Unit
The outdoor condenser houses the coils that transfer heat. Start by turning off the unit and removing loose debris around the perimeter. Use a soft brush to knock down dust on the fins, then gently rinse with a downstream, low-pressure spray from top to bottom. Do not blast water directly into the electrical housing or fans. If you notice bent fins, a fin comb can straighten them without damaging the coil. Leave a clear space around the unit to ensure proper airflow and prevent overheating in hot seasons.
Cleaning the Indoor Evaporator Coil and Air Handler
Indoor components like the evaporator coil and air handler collect dust over time. Remove easily accessible panels and vacuum the area with a brush attachment. Wipe down accessible surfaces with a damp microfiber cloth and mild soap solution. If the evaporator coil has visible dust, a careful spray of water from a spray bottle can help, but never saturate the coil. Replace or wash reusable filters as needed to maintain indoor air quality and system efficiency.
Cleaning Agents: What to Use and What to Avoid
Choose cleaners that are mild, non-corrosive, and non-foaming. Dish soap diluted in warm water is often sufficient for most metal and plastic surfaces. Avoid bleach, ammonia, solvents, and acidic cleaners that can degrade coil coatings or plastics. Never use abrasive pads on fins or coil surfaces. For stubborn grime, use a cloth dampened with soapy water rather than aggressively scrubbing. Always test a small area first to ensure there is no discoloration or damage.
Step-by-Step Quick Maintenance Plan
A practical overview of routine tasks helps keep the process efficient without skipping important steps. By following a simple schedule, you’ll cover both outdoor and indoor components, plus filter care. This plan emphasizes safety, proper tool use, and gentle cleaning methods to preserve system integrity and performance across seasons.
Seasonal Cleaning Schedule and Best Practices
Developing a seasonal cleaning calendar keeps maintenance predictable and manageable. In spring and fall, perform a full checkup: inspect the outdoor unit, clean accessible coils, and replace or wash indoor filters. In between, perform quick dust checks, wipe down surfaces, and ensure there are no obstructions around outdoor equipment. Keeping a log of cleaning dates helps track performance and plan professional service when needed.
Troubleshooting Common Cleaning Problems
If you notice reduced airflow after cleaning, double-check that all panels are properly reseated and that filters are correctly installed. A foggy or faint airflow may indicate a blocked coil or a mispatterned return airway, which could require professional inspection. If the unit won’t start after cleaning, verify the breaker and disconnect switch are in the correct positions and confirm there is power at the outlet. When in doubt, consult a licensed HVAC technician.
Why Regular Cleaning Improves Efficiency and Longevity
Regular cleaning reduces strain on the system, supporting efficient heat transfer and reducing energy use. Clean coils maintain better refrigerant pressure and improve airflow, leading to lower utility bills and longer equipment life. By establishing a routine, homeowners can avoid costly repairs and maintain indoor comfort with greater reliability. The Heatpump Smart team emphasizes proactive maintenance as a cornerstone of home comfort and energy savings.
Tools & Materials
- soft-bristle brush(Fine-minned brush for coils and fins; avoid metal bristles that can bend fins)
- microfiber cloths(Lint-free; use dampened with mild soap solution for surfaces)
- mild dish soap(Dilute according to label; avoid harsh degreasers)
- spray bottle(Fill with clean water or soapy solution for controlled application)
- garden hose with low-pressure nozzle(Use gentle spray; never use high-pressure on coils)
- vacuum with brush attachment(Dust and debris removal without moisture risk)
- protective gloves and safety goggles(Personal protective equipment for safety)
- bucket(For mixing cleaners or collecting wash water)
- replacement filters(Have spares on hand for rapid swaps)
Steps
Estimated time: 45-60 minutes
- 1
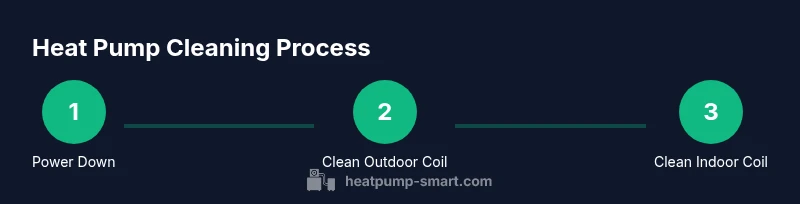
Power down and secure
Turn off the heat pump at the thermostat and at the main electrical panel to prevent accidental startup during cleaning. Confirm the system is de-energized by attempting to adjust settings and waiting a few minutes. This protects you and the equipment from electrical shocks.
Tip: Use a lockout/tagout procedure if available to prevent accidental restoration of power. - 2
Prepare and inspect the area
Clear the work area around both units and inspect for obvious damage or debris. Remove loose leaves, sticks, and other obstructions that could block airflow. A clean work area reduces the risk of introducing new debris during cleaning.
Tip: Wear safety goggles to protect eyes from debris that may shift during brushing. - 3
Clean the outdoor condenser coils
Gently brush the fins with a soft-bristle brush to loosen dirt, then rinse from top to bottom with a low-pressure garden hose. Avoid directing water into electrical housing or fan openings. Let the unit dry completely before reassembling any panels.
Tip: Do not use a metal tool to straighten fins; use a fin comb if needed. - 4
Vacuum and wipe indoor components
Vacuum accessible dust from the indoor air handler and evaporator coil with the brush attachment. Wipe surfaces with a damp microfiber cloth and mild soap solution. Do not saturate the coil and ensure the air path remains unobstructed.
Tip: Only wipe surfaces you can reach without forcing moisture into wiring. - 5
Check and replace filters
Inspect filters and replace with new or clean washable ones. A clean filter improves airflow and indoor air quality, reducing strain on the system.
Tip: If using washable filters, ensure they are completely dry before reinstallation. - 6
Inspect drainage and seals
Check condensate drain lines for clogs and ensure seals around panels are intact. Proper drainage prevents standing water that can breed mold and reduce efficiency.
Tip: Run a quick test by pouring a little water down the drain to confirm unobstructed flow. - 7
Power back up and test
Reconnect power, reset controls, and run a short operational test to listen for unusual noises and confirm proper fan operation. Verify airflow from vents and ensure there are no abnormal vibrations.
Tip: If you hear grinding or see frost buildup, shut down and call a professional.
Your Questions Answered
What should I clean heat pump with as a beginner?
Start with mild dish soap diluted in warm water, a soft brush or microfiber cloth, and a low-pressure rinse. Avoid harsh chemicals, abrasive tools, and high-pressure sprays that can damage fins or wiring.
Use mild soap and a soft brush to start; avoid harsh cleaners or strong jets that can harm the unit.
Can I use bleach or ammonia to clean a heat pump?
Bleach and ammonia can corrode metal components and coatings, potentially damaging coils and plastics. Stick to mild soap solutions and water for routine cleaning.
No, avoid bleach and ammonia; they can damage the unit. Use mild soap and water instead.
How often should I clean my heat pump?
Aim for a light wipe and visual check every 1-3 months, with a full outdoor and indoor coil clean at least once a year, or more often in dusty environments.
Clean and check every few months, and do a full cleaning annually or when your air feels less efficient.
Is it necessary to hire a professional for cleaning?
Professional service is recommended if you notice persistent frost, refrigerant issues, or electrical faults. Routine cleaning by homeowners is safe if done carefully and with power off.
For basic cleaning you can do it yourself, but call a pro for complex issues or unusual noises.
What about indoor air quality after cleaning?
Changing or washing filters improves IAQ, and keeping coils clean helps maintain proper airflow, reducing dust and allergens circulating through your home.
Clean filters and coils help your air stay cleaner and your system run better.
Watch Video
Top Takeaways
- Clean with mild cleaners and gentle tools.
- Power down before starting to avoid shocks.
- Regular filter care boosts efficiency and longevity.
- Outdoor and indoor components require different cleaning approaches.