How to Get Mold Out of a Heat Pump: A Practical Guide
Learn safe, practical steps to remove mold from heat pumps, protect indoor air quality, and prevent mold return with maintenance tips and expert guidance.

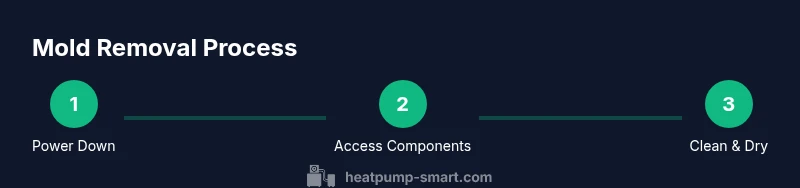
To remove mold from a heat pump, power off the unit, access the evaporator coil and condensate pan, and clean with a mild detergent or white vinegar solution. Rinse, dry completely, and flush the condensate drain. Replace the air filter and reassemble. If mold returns, seek a professional inspection. Also ensure proper ventilation during cleaning and wear protective gear.
Understanding mold growth in heat pumps
According to Heatpump Smart, mold growth in heat pumps is often caused by lingering moisture, warm temperatures, and limited airflow within the air handler and coil enclosure. Even when the unit looks clean, damp pockets behind the evaporator coil, in the condensate pan, or inside the blower housing can harbor mold spores that spread into the living space via supply ducts. In humid climates or after a long period of operation without proper drainage, mold can establish colonies on coils, fans, and drainage components. A proactive cleaning plan targets moisture sources, improves airflow, and disrupts mold colonies before they spread. Regular maintenance is essential for indoor air quality and system efficiency. This guide provides practical steps to safely remove mold and prevent future growth, with safety-first recommendations and options for DIY cleaning or professional assistance. Heatpump Smart's aim is to help homeowners, builders, and managers maintain clean, efficient systems while protecting occupants.
Health and safety considerations when cleaning mold
Mold cleanup involves exposure to tiny spores, dust, and cleaning agents. Before you begin, power down the heat pump at the main breaker and lockout the switch if possible. Wear PPE: an N95 respirator or better, protective gloves, and safety goggles. Improve ventilation by opening nearby windows or using a ventilator fan. If you or household members have allergies or asthma, consider delaying the task or hiring a pro. Never mix cleaning agents; combining bleach with ammonia or acids can release hazardous gases. Keep kids and pets away from the work area, and avoid touching mold with bare skin. After cleaning, wash exposed skin and hands thoroughly.
Where mold tends to hide in a heat pump system
Mold commonly grows on or behind the evaporator coil, inside the condensate drain pan, within the blower housing, and along duct connections near the air handler. It can also form in humid spaces around the outdoor unit if moisture control is poor. A visual inspection should include the coils’ fins (look for brownish or black discoloration), the drain pan (wet or rusty areas), and the interior of access panels. Smell is an early indicator; a musty odor often precedes visible mold growth. Understanding these hiding places helps you target cleaning and moisture control effectively.
DIY vs professional cleaning: risks, scope, and decision points
Small, isolated mold spots on readily accessible surfaces may be addressed by a careful DIY cleaning. More extensive growth, confined spaces, or mold inside the coil assembly or related wiring carries electrical and safety risks that require a licensed HVAC technician or mold remediation professional. If you are unsure about the extent of contamination or if there is water intrusion from leaks, consult a pro. Professionals can also seal and test for residual spores to verify remediation.
Cleaning agents: safe and effective options
White vinegar (5% acetic acid) or hydrogen peroxide (3%) are common, consumer-friendly mold cleaners for home projects. A mild dish soap solution works for surface grime. Do not use chlorine bleach on aluminum heat exchanger fins or insulated components, as it can corrode metal over time. Test cleaners on a small, inconspicuous area first. Always apply cleaners to a cloth or spray bottle, never pour directly onto electrical components. Allow surfaces to remain wet for a few minutes before rinsing, then dry completely to inhibit regrowth.
Visual inspection and prep tips before cleaning
Before you clean, remove access panels following your unit’s manual to expose coils, drain pan, and blower area. Use a flashlight to inspect for mold discoloration and moisture buildup behind fins. Vacuum loose dust with a HEPA-equipped vacuum to minimize aerosolized spores. Set up a containment area if you’re cleaning indoors; place towels around the unit to catch drips. Prepare a brush with soft bristles and a microfiber cloth for delicate scrubbing, and keep a bucket and spray bottle handy for dilution and rinsing.
Quick overview of the cleaning steps (high level)
- Power down and protect yourself with PPE. 2) Access the coil and drain pan; identify areas with growth. 3) Apply selected cleaner; gently scrub mold from fins and surfaces. 4) Rinse with clean water; dry surfaces thoroughly and use a fan to speed drying. 5) Sanitize the condensate drain line and flush the trap to prevent residual spores. 6) Replace filters and reassemble. 7) Run the system on a dehumidified setting for 15–30 minutes to dry remaining moisture. 8) Monitor the area for new odors or dampness and schedule routine maintenance.
Preventing mold return: maintenance best practices
Establish a moisture-control plan: fix leaks, ensure adequate ventilation, and keep humidity below about 50-60%. Schedule regular coil and drain pan cleaning as part of routine HVAC maintenance. Replace air filters monthly or as recommended, and inspect condensate pans for standing water. In humid regions, consider a smart humidity sensor near the air handler. A proactive maintenance culture reduces mold risk and improves energy efficiency.
When to call a professional and what to expect
Persistent mold growth, water leaks, or mold growth in hard-to-reach assemblies is a red flag. A professional remediation team will assess moisture sources, contain the area to prevent spore spread, and test surfaces for residual contamination. Expect a written remediation plan, a quote, and post-cleanup verification. After remediation, ensure the system is dried, sanitized, and returned to normal operation. The Heatpump Smart team recommends scheduling annual inspections to catch issues early.
Authoritative sources and further reading
Reliable mold remediation guidelines come from government and university sources. For foundational guidance, see the EPA's mold information, the CDC's mold guidelines, and ASHRAE's HVAC guidelines. These sources provide context on safe cleaning practices, moisture control, and best-practice HVAC maintenance. Heatpump Smart also shares practical insights based on field experience and 2026 analysis to help homeowners plan responsible remediation and prevention.
Tools & Materials
- Nitrile gloves(Chemical-resistant and powder-free)
- Safety goggles(Protect eyes from splashes)
- N95 respirator or higher(Protect lungs from spores)
- Soft-bristle brush(Gentle on fins)
- Microfiber cloths(For wiping and drying)
- Spray bottle(Mix cleaner solutions)
- Mild dish soap(Surface grime removal)
- White vinegar (5%)(Natural mold cleaner)
- Hydrogen peroxide (3%)(Alternative sanitizer)
- Isopropyl alcohol (70%)(Disinfectant on hard surfaces)
- Vacuum with HEPA filter(Contain spores)
- Bucket(Rinse and dilution)
- Replacement air filter(Prevent re-contamination)
- Screwdriver (Philips/flat)(Open access panels)
Steps
Estimated time: 60-90 minutes
- 1
Power down and prep safety gear
Turn off the heat pump at the main breaker and lock out the switch if possible. Put on an N95 respirator, gloves, and goggles to minimize exposure to mold spores and cleaners. Ensure pets and kids are out of the area.
Tip: Double-check that the unit is completely de-energized before touching any component. - 2
Access coil and drain pan
Remove the front panel or service cover to reach the evaporator coil and condensate drain pan. Use a flashlight to inspect for visible growth and moisture accumulation. Keep a tray or towels handy for drips.
Tip: Avoid bending the aluminum coil fins; use a gentle touch when inspecting. - 3
Choose and apply cleaner
Dilute a mild cleaner or vinegar solution in the spray bottle. Apply to moldy surfaces, allowing contact time of 5–10 minutes to loosen residues. Do not mix cleaners with bleach or ammonia.
Tip: Test a small area first to ensure no surface damage. - 4
Scrub away visible mold
Gently scrub the coil fins, drain pan, and surrounding surfaces with a soft-bristle brush. Use microfiber cloths to wipe away loosened growth and dust. Rinse surfaces with clean water if possible.
Tip: Work from the cleanest area toward potential unseen growth to minimize spread. - 5
Rinse and dry thoroughly
Rinse off cleaner residues with clean water. Use a fan or blower to speed drying; ensure all components are completely dry to prevent regrowth.
Tip: Do not leave moisture on electrical components; ensure airflow to dry those areas first. - 6
Sanitize drain line and trap
Flush the condensate drain line with clean water or a mild sanitizer. Check the trap for standing water and clear any blockages to prevent future mold growth.
Tip: Capture remnants with towels to observe drainage quality post-cleaning. - 7
Replace filter and reassemble
Install a fresh air filter and reattach the service panel. Verify all connections are secure and there are no loose parts before powering on.
Tip: Keep a maintenance log noting the date of cleaning and filter change. - 8
Test run and monitor
Turn the unit back on, set to cooling or dehumidify mode, and observe for unusual odors, moisture, or reduced airflow. Monitor for several days and address any signs of lingering dampness promptly.
Tip: If dampness or odor persists beyond 48 hours, schedule a professional inspection.
Your Questions Answered
Is it safe to clean mold in a heat pump myself?
You can perform a basic cleanup for small areas, using safe cleaners and PPE. For extensive growth, hidden mold, or if you have health concerns, hire a professional. Always ensure power is off and follow safety guidelines.
Yes, for small, visible mold areas you can clean yourself with proper safety gear; otherwise, call a professional.
What are the signs mold is present in a heat pump?
Signs include a musty odor, visible discoloration on coils or pans, increased dust, and frequent allergies when the system runs. Moisture buildup and condensation can also indicate a mold issue.
Look for musty smells, discoloration, and damp areas near the coil and drain pan.
Can I use bleach on heat pump components?
Bleach can corrode metal fins and insulation; it is generally not recommended for heat exchangers or coil components. Use vinegar or hydrogen peroxide instead, following proper dilution and testing first.
Bleach is usually not advised for heat pumps; try vinegar or peroxide with caution.
How often should I inspect mold risk in my heat pump?
Annual HVAC maintenance is recommended, with additional checks after high humidity, flooding, or long operation periods without cleaning. Regular inspections help catch issues early.
Annual checks are best, especially after humid seasons.
Will mold affect indoor air quality (IAQ)?
Yes. Mold spores can reduce IAQ and trigger allergy symptoms. Prompt cleaning and moisture control help protect occupants.
Mold can impact IAQ; remediation and moisture control are important.
Should I replace the heat pump if mold keeps returning?
Persistent mold after remediation and moisture correction may indicate structural issues or unit age. Consider replacement or more extensive remediation plans with a pro.
If mold recurs after proper remediation, seek professional assessment and consider replacement if needed.
Watch Video
Top Takeaways
- Identify moisture sources and mold hiding spots
- Use safe cleaners and never mix chemicals
- Thoroughly dry all cleaned surfaces to prevent regrowth
- Plan preventative maintenance to reduce future mold risk