Mold in Heat Pump: Quick Diagnosis and Safe Remediation
Urgent guide to mold in heat pumps: causes, signs, safety steps, cleaning, and prevention to protect home comfort and indoor air quality.

Direct answer: Mold in a heat pump is typically the result of trapped moisture, condensate drainage issues, and restricted airflow. For a quick fix, shut off power, clean accessible surfaces, clear the condensate drain, and replace dirty air filters. If growth is visible or odor persists, contact a licensed HVAC professional.
Mold in Heat Pumps: Quick Overview
Mold growth inside a heat pump is not uncommon in humid environments or when drainage fails. According to Heatpump Smart, moisture control and proper drainage are the first lines of defense against mold formation. When humidity stays high and condensate can’t escape, mold finds its way into cabinet insulation, ductwork, and around the evaporator coil. This isn’t just a cosmetic issue—black, green, or gray growth can impact air quality and system performance. The moment you notice a musty smell, visible growth, or increased allergy-like symptoms among occupants, treat the situation as urgent. Prompt action protects your family, preserves efficiency, and reduces the risk of secondary contamination in other parts of the home.
How Mold Develops in Your Heat Pump System
Mold thrives wherever there is lingering moisture, organic surfaces, and limited airflow. In a heat pump, the evaporator coil and surrounding cabinet can collect condensation during cooling cycles, especially if humidity is high or if the drainage system is blocked. Mold spores are tiny and can colonize on insulation, liner material, and even within the duct plenums. Even a small amount of persistent moisture can lead to a noticeable musty odor and surface discoloration over time. Preventing moisture buildup starts with simple checks: confirm the condensate line drains freely, verify there are no leaks in the cabinet, and ensure there is adequate airflow through the return and supply ducts.
Steps
Estimated time: 60-90 minutes
- 1
Power down and secure the unit
Shut off power at the breaker to the heat pump and, if possible, disable the outdoor unit to prevent any accidental startup during cleaning. Use a lockout/tagout if others may re-energize the circuit. This protects you from shock and keeps mold spores from spreading.
Tip: Double-check the main disconnect before touching any wiring or refrigerant lines. - 2
Wear PPE and prepare the work area
Put on gloves, a mask (N95 or better), and eye protection. Lay down plastic sheeting to catch debris and to prevent cross-contamination to other rooms. Ensure good ventilation but keep spores contained within the working zone.
Tip: Keep a trash bag handy for disposable wipes and paper towels to reduce handling of contaminated materials. - 3
Access and inspect the condensate system
Locate the condensate pan and drain line. Look for standing water, clogs, or slow drainage. If you see obvious blockages, clear them carefully using a pipe cleaner or small brush, and flush with water if appropriate for the system.
Tip: Never use unsuitable chemical drains that could corrode components. - 4
Clean accessible moldy surfaces
Gently scrub visible mold on accessible surfaces with a cleaner labeled for mold remediation. Rinse with clean water if the cleaner requires it, and dry the area completely to prevent immediate regrowth. Avoid spreading moisture to insulated areas.
Tip: Do not mix cleaners; follow product instructions and use minimal moisture on insulative materials. - 5
Sanitize and protect surfaces
Apply a mold-safe sanitizer or a diluted bleach solution only if recommended by manufacturer guidelines. Wipe surfaces dry and allow to air-dry fully before reassembly. This step helps reduce residual viability of mold spores.
Tip: Rinse surfaces after sanitizer if the product requires it. - 6
Restore airflow and humidity control
Replace the filter with a clean one, confirm the air path is unobstructed, and ensure return vents are clear. If humidity remains high, consider a dehumidifier or improving building ventilation to reduce future mold risk.
Tip: Register the unit for a quick post-clean test to verify there are no odors or moisture pockets.
Diagnosis: Musty odor or visible mold around heat pump cabinet, evaporator coil, or condensate pan.
Possible Causes
- highExcess moisture due to high ambient humidity and poor drainage
- highClogged condensate drain or pan overflow
- mediumRestricted airflow from dirty filters or blocked vents
Fixes
- easyClear condensate drain and pan; ensure proper drainage path
- mediumClean evaporator coil and sanitize accessible surfaces
- easyReplace dirty air filters and improve airflow paths
- mediumAddress humidity with dehumidification and improve ventilation
Your Questions Answered
What causes mold in a heat pump?
Mold in a heat pump typically stems from trapped moisture, clogged condensate drainage, high humidity, and restricted airflow. Regular maintenance helps prevent growth, but persistent moisture requires addressing humidity and drainage as a priority.
Mold in heat pumps usually happens when moisture sticks around and the drainage isn’t working well.
Is mold in a heat pump dangerous to health?
Yes. Mold can affect air quality and trigger allergy or asthma symptoms. It’s important to address visible growth promptly and use proper protective gear during cleanup.
Yes, mold can affect air quality and irritate lungs; address it quickly and safely.
Can I clean mold myself, or do I need a pro?
Many surface mold and accessible parts can be cleaned by homeowners with proper PPE and cleaners. If mold covers insulation, ductwork, or recurs after cleaning, hire a licensed HVAC professional for a thorough remediation.
You can clean small, surface mold yourself, but call a pro if it’s growing back or covers hard-to-reach areas.
How can I prevent mold from returning after cleaning?
Control humidity with dehumidification, ensure proper drainage, and schedule regular maintenance. Keep filters clean and vents unobstructed to maintain good airflow and reduce moisture buildup.
Keep humidity down, maintain drainage, and stay on top of regular maintenance to prevent return.
Should insulation be replaced if mold is present?
If mold has penetrated insulation or porous materials, replacement is often necessary to stop regrowth and protect efficiency. A pro can determine the extent.
If insulation is moldy, replacement is usually needed to prevent future growth.
How often should I check my heat pump for mold?
Plan a seasonal check, especially in humid climates, focusing on drainage, filters, and cabinet seals. Regular checks help catch moisture issues early.
Check the drainage and filters once a season, especially if you live in a humid area.
Watch Video
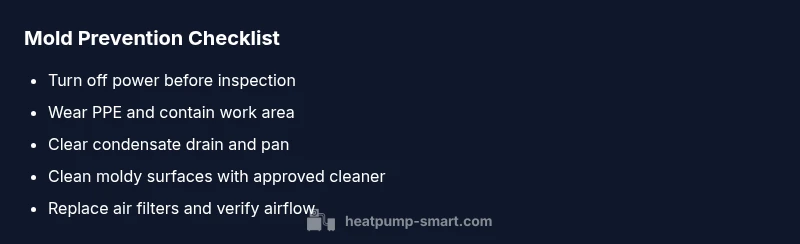
Top Takeaways
- Turn off power before inspection.
- Address drainage and humidity to stop mold growth.
- Replace filters and improve airflow to prevent recurrence.
- Use proper cleaners and PPE to protect your health.
- Call a pro if mold recurs or covers insulation areas.