How to Make Heat Pumps Look Better: A Practical Guide
Learn practical, budget-friendly ways to improve heat pump aesthetics while preserving airflow and efficiency. Heatpump Smart shares actionable tips, from enclosure options to landscaping and maintenance.

You can learn how to make heat pumps look better by starting with placement, airflow, and enclosure options, then applying simple cosmetic upgrades like color-matched panels, decorative screens, and tidy cabling. These steps boost curb appeal without compromising performance. Ready to improve appearance while preserving efficiency? This guide shows you how.
Why appearance matters for heat pumps
According to Heatpump Smart, improving heat pump aesthetics doesn't require expensive equipment; smart, low-cost updates can make a noticeable difference. Outdoor units are often visible from sidewalks and yards, influencing first impressions of your home. A clean, intentional look can enhance curb appeal, support property value, and even reflect careful maintenance habits. Importantly, aesthetics should never impede airflow or service access; the goal is to blend function with form. By planning around three core ideas—airflow, access, and coordination with your home’s exterior—you can elevate the look without sacrificing performance or warranty protections. This approach is especially valuable for homeowners, builders, and property managers seeking durable, cost-effective improvements.
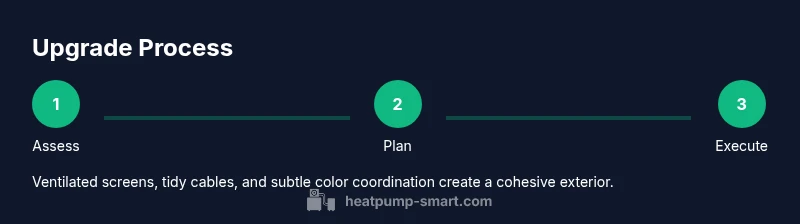
Quick-start aesthetic upgrades
Begin with a simple evaluation of what’s visible and what’s hidden:
- Inspect the outdoor unit’s surroundings and identify clutter or overgrowth.
- Check that air intakes and outlets remain unobstructed by debris, furniture, or plants.
- Consider color-matching panels or painting only when manufacturer guidelines permit.
- Plan to install a decorative screen or lattice that allows for ventilation while reducing visual impact.
Small changes can produce big results. For many homes, a combination of a screen, tidy cabling, and a subtle color touch is enough to significantly improve appearance without major renovations. Heatpump Smart notes these tweaks are quickest to implement and often the most cost-effective.
Enclosures and covers that respect airflow
Covers and enclosures can reduce visual impact if they are specifically designed for outdoor HVAC equipment. Prefer products with louvers or slats that allow steady airflow and easy inspection. Avoid solid shells that trap heat or restrict access to service panels. If you choose a cover, verify manufacturer clearance requirements and consider models with adjustable panels to accommodate seasonal airflow needs. When in doubt, consult your installation manual or a qualified technician. A well-ventilated enclosure improves aesthetics while safeguarding unit efficiency.
Color, materials, and paneling choices
Color coordination with siding, trim, or fencing is a powerful way to visually integrate the heat pump into the home’s exterior. Neutral tones like charcoal, slate, or earth tones often work best, but ensure any paint or coating is rated for exterior metal and won’t gunk up temperature-sensitive components. If painting is not recommended by the manufacturer, explore color-matched panels or wrap solutions designed for HVAC equipment. Materials should be fade-resistant and low-maintenance to keep the look fresh over time. When selecting panels, prioritize breathable materials that won’t trap moisture near the unit.
Decorative screens and fences
Decorative screens can disguise the HVAC unit while still allowing airflow. Choose screens made of lattice, slats, or perforated panels that maintain venting. Install the screen on the exterior side of the unit with a small gap to the ground to prevent moisture buildup. A privacy screen or planting bed can simultaneously enhance curb appeal and provide a gradual visual transition from the unit to the yard. Ensure there is ample clearance for service access and routine maintenance.
Cable management and tidy wiring
Visible cables are a common eyesore. Use exterior-rated conduit or cable channels to guide cords neatly along the wall or behind a decorative screen. Keep junction boxes accessible and avoid covering critical components. Label cables for easier maintenance, and choose color-matched conduit to blend with the home’s exterior. A tidy wiring setup not only looks better but also reduces the risk of accidental damage during landscaping work.
Landscaping and screening strategies
Plants and hardscape can soften the appearance of a heat pump while preserving access for service. Place shrubs or ornamental grasses with enough clearance for airflow and noise reduction. Use low-porous planters or raised beds to create a visual barrier without blocking vents. Mulch and edging contribute to a polished look, but never plant so close that it obstructs intake or exhaust paths. A well-planned landscape can dramatically improve aesthetics across seasons while maintaining function.
Placement and orientation for airflow and aesthetics
Where you place and orient the unit matters. Position the heat pump to minimize street-side visibility while keeping it well away from windows and doors to reduce noise impact. Maintain manufacturer-recommended clearances on all sides to ensure proper airflow and service access. If you must relocate or rotate the unit, consult a professional to re-establish drainage, routing, and electrical connections. Thoughtful placement yields both better aesthetics and reliable performance.
Maintenance routines that preserve appearance
Create a simple maintenance calendar: monthly visual checks for debris, quarterly cleanings of fins with a soft brush, and semi-annual professional inspections. Clean the exterior panels and screens with mild soap and water, avoiding pressure washing that could force water into seals. Replace any worn screens promptly and address rust or corrosion early. Routine care keeps the unit looking tidy and functioning efficiently for years.
Cost-effective upgrades and case examples
Case examples show a spectrum of options. A low-cost refresh might involve a matching screen, cable management, and plantings under $100. A mid-range upgrade could add a decorative enclosure and color-matched panels for $100–$400. Premium improvements, such as custom cabinetry or high-end screens with integrated lighting, can range from $400–$800 and more, depending on materials and installation complexity. Always verify warranty implications and airflow requirements before purchasing components. These ranges reflect typical homeowner expenditures and can vary by region and unit model.
Quick-start checklist to implement this week
- Assess visibility and determine which upgrades deliver the most impact with the least disruption.
- Source exterior-safe materials and confirm compatibility with your heat pump model.
- Schedule a routine maintenance visit to validate airflow and access after changes.
- Document changes with photos for future reference and resale discussions.
- Monitor performance after changes and adjust as needed for aesthetics and efficiency.
Tools & Materials
- Exterior-safe paint or color-matched panels(Only if manufacturer allows repainting or panel replacement)
- Louvered/decorative screen or lattice panels(Ventilated design; ensure airflow remains unrestricted)
- Exterior-rated conduit or cable management clips(Keeps wiring tidy and protected)
- Zip ties and weatherproof fasteners(For securing cables and screens)
- Soft brush and mild detergent(Used for exterior cleaning without damaging surfaces)
- Pruning shears or shrub trimmer(To manage nearby vegetation without touching the unit)
- Planting materials or mulch(Create soft screening while maintaining airflow)
- Gloves and safety glasses(Basic personal protection during installation)
Steps
Estimated time: 60-120 minutes
- 1
Assess current setup
Inspect the heat pump area for airflow, access, and visibility. Note any obstructions and potential improvements that won’t affect performance. This initial pass sets the direction for all following steps.
Tip: Take photos from multiple angles to compare before and after visuals. - 2
Plan placement and airflow
Review manufacturer recommended clearances and verify that any planned enclosure or screen won’t restrict intake or exhaust. Decide which upgrades deliver the largest aesthetic impact with minimal risk to efficiency.
Tip: Keep a minimum 1–2 ft clearance around vents if possible; consult the manual for exact numbers. - 3
Choose enclosure or screen option
Select a decorative screen, lattice, or panel system that allows airflow. Ensure the product is rated for outdoor use and has vented sections. Align color with the home exterior where feasible.
Tip: Avoid solid, non-ventilated covers unless the unit manufacturer approves. - 4
Install cable management
Route cables through exterior conduit or clips, securing them neatly along the wall. Leave access panels clear and label connections for future maintenance.
Tip: Use weatherproof seals on any penetrations to prevent water intrusion. - 5
Integrate landscaping elements
Plant low-height greenery or install planters to soften the view while preserving airflow. Maintain a safe distance from vents and ensure seasonal pruning does not obstruct vents.
Tip: Check local planting guidelines to avoid overgrowth that could become a maintenance issue. - 6
Perform a final airflow and aesthetics check
After changes, check that airflow remains unobstructed and the unit has a neat appearance from key viewing angles. Schedule a follow-up check after a few weeks to ensure everything stays in place.
Tip: Document any issues and call a professional if airflow flags or rattling begins.
Your Questions Answered
Can I paint a heat pump to improve its appearance?
Painting a heat pump is possible only if the manufacturer approves color changes and the coating is rated for outdoor HVAC equipment. Improper paint can insulate surfaces and reduce efficiency. Always consult the installation manual or a technician before painting.
Paint a heat pump only if approved by the manufacturer; otherwise it could affect performance. Check the manual or ask a technician first.
Will enclosing a heat pump affect airflow?
Enclosures must be ventilated and designed specifically for HVAC units. Solid covers can trap heat and block airflow, reducing efficiency and potentially shortening the unit’s life. Always verify clearance and ventilation.
As long as the enclosure is ventilated and designed for HVAC units, airflow should remain okay; avoid solid covers that block vents.
What’s the best way to screen a heat pump without compromising service?
Choose screens with vents or lattice patterns that allow air movement. Position screens to conceal the unit from view while keeping panels accessible for maintenance.
Use ventilated screens that hide the unit but still let air flow and access remain easy.
Are there warranty concerns with aesthetic upgrades?
Some cosmetic changes may affect warranty if they alter airflow or access. Always check with the manufacturer or installer before proceeding with modifications.
Check with the manufacturer before cosmetic changes to avoid warranty issues.
How often should I maintain exterior upgrades?
Perform a quick exterior check monthly and a deeper cleaning quarterly. Schedule professional inspections at least once a year to ensure performance isn’t impacted by aesthetics.
Do a quick monthly check, deep clean every few months, and have an annual professional inspection.
Do these upgrades affect energy efficiency?
If airflow is maintained, aesthetics upgrades do not reduce efficiency. Poorly planned changes can harm performance, so prioritize airflow and serviceability.
Aesthetics won’t hurt efficiency if airflow and serviceability are preserved.
Watch Video
Top Takeaways
- Plan around airflow and access first.
- Use ventilated screens to balance aesthetics and function.
- Coordinate colors with the home exterior for cohesive look.
- Tidy cables and strategic landscaping boost curb appeal.
- Regular maintenance preserves appearance and performance.