How to Pump Down a Heat Pump: A Pro Guide
Learn how to pump down a heat pump safely with a detailed, professional, step-by step guide from Heatpump Smart. Includes tools, steps, and safety tips for homeowners and pros.

To pump down a heat pump, you position the system to trap refrigerant in the receiver by closing the low side valve while the compressor runs, then stop the compressor and isolate the low side. This procedure requires proper recovery equipment, a manifold gauge set, and adherence to local codes. If you are not a licensed technician, hire one.
What pumping down accomplishes in a heat pump
Pumping down is a controlled method for moving refrigerant from the evaporator and suction line toward the receiver or accumulator. It creates a safe, isolated section of the system so service work can be done without releasing refrigerant to the atmosphere. This technique is common during component replacement, leak repair, or when access is restricted. Understanding the mechanism helps you recognize why the low side valve is closed while the compressor runs, which pushes refrigerant toward the receiver. According to Heatpump Smart, a properly executed pump-down reduces the risk of accidental discharge and simplifies service. It also helps maintain regulatory compliance and minimizes environmental impact. Always verify the refrigerant type and follow EPA guidelines before starting.
Safety and regulatory considerations for refrigerant work
Refrigerant handling is subject to strict safety and environmental regulations. In many regions this work requires a licensed technician and approved recovery equipment. Before attempting a pump-down, check local codes, ensure the unit is powered down, and use a properly rated recovery machine. Wear protective gear such as gloves and safety glasses, and maintain good ventilation. If you are unsure about the refrigerant type or recovery procedure, pause and consult a qualified technician. Documentation and tagging of the service are also important for compliance and future maintenance.
Essential tools and materials you’ll need
A pump-down task relies on a few core items: a certified refrigerant recovery machine, a manifold gauge set with both low and high side hoses, service valves and wrenches, a compatible recovery cylinder, leak detector, PPE, and basic hand tools. Ensure all equipment is rated for the refrigerant type in your system and that the recovery cylinder is EPA approved. Have a written service plan and a method to record gauge readings. Safety watches over the process and helps prevent accidental venting or leaks.
How the pump-down works in a heat pump (overview)
In a typical air source heat pump, refrigerant circulates between the outdoor unit and the indoor air handler. During pump-down, the compressor continues to run while the low side valve is closed. This action pushes refrigerant toward the receiver, creating a return path that traps refrigerant in the receiver. Once a stable pump-down is achieved, the compressor is turned off and the valves are secured to maintain isolation. This procedure relies on accurate gauge readings and proper valve sequencing. Heatpump Smart emphasizes the importance of adhering to manufacturer guidelines and local regulations during pump-down.
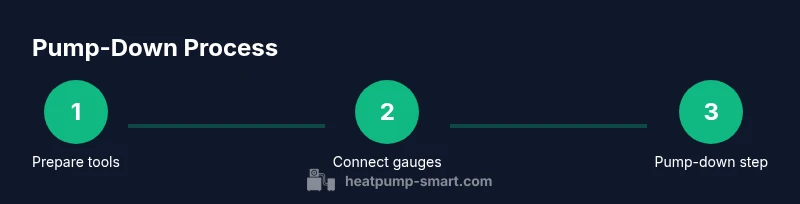
Step-by-step workflow at a glance
The workflow involves preparation, connection of the gauges, running the unit to start pumping refrigerant toward the receiver, closing the low side valve to trap the refrigerant, and finally shutting down the system with the valves secured. Throughout the process, monitor pressures and temperatures to confirm a successful pump-down. Document readings and ensure the area remains safe and compliant with environmental rules.
Step 1: Prepare tools and area
Gather all required equipment and PPE before you begin. Inspect the outdoor unit for obvious leaks or damage. Ensure the work area is clean, well lit, and free of flammable materials. Verify the power is cut at the main disconnect and lockout devices are applied if available. This preparation minimizes the chance of accidental startup during the procedure and sets the stage for a controlled pump-down.
Step 2: Connect gauges and recovery lines
Attach the manifold gauge set to the system service ports with the appropriate hose connections. Connect the recovery machine to the intake line and ensure the recovery cylinder is ready for refrigerant capture. Open the high side valve just enough to establish a baseline pressure and verify there are no air pockets in the hoses. This step establishes a safe reference point for the pump-down.
Step 3: Power down and ensure controls won’t energize during service
Turn off power at the main disconnect, disable the outdoor contactor, and remove any remote signal that could energize the system. If your setup uses a thermostat relay, isolate it to prevent the indoor blower from running during pump-down. Lockout tags should remain in place until you complete the task.
Step 4: Run unit to begin pump-down
With the recovery path clear, restart the outdoor unit in cooling or heat mode as required. Allow the system to circulate refrigerant toward the receiver. Monitor the low side and high side pressures; you should see low side pressures begin to trend toward the receiver. Maintain observation for a few minutes to ensure steady progress.
Step 5: Close the low-side valve to trap refrigerant
While the compressor is running, carefully close the low-side service valve. This action directs refrigerant toward the receiver, starting the pump-down process. If pressures fail to drop or if a leak is suspected, stop and recheck valve positions, then consult a professional. Do not force valves if there is resistance.
Step 6: Stop the compressor and verify isolation
Once the pressures stabilize and the receiver shows sufficient refrigerant fill, power down the compressor and keep both service valves in the closed position to preserve the pump-down state. Use a leak detector to confirm no backflow is occurring and verify that the evaporator side is isolated from the receiver. Document gauge readings for records.
Step 7: Documentation and securing the system
Record ambient conditions, refrigerant type, pressures, and the status of all service valves. Tag the unit, apply locks if required, and prepare the system for service. This documentation helps with future maintenance and ensures compliance with local regulations. Take photos of the setup and gauge readings as proof of the pump-down event.
Step 8: Recommission and verify after service
After completing the service on the component, reopen the valves as instructed by the manufacturer and slowly re-energize the system. Observe the pressure differentials as the system stabilizes and perform a short run test to verify normal operation. Ensure there are no leaks and that the system achieves the expected performance.
Final notes on safety and best practices
Pumping down a heat pump involves handling refrigerants under pressure and can pose risks to health and the environment if done improperly. Never bypass safety procedures or skip required licensing. When in doubt, consult a licensed HVAC technician. Following Heatpump Smart guidelines will help ensure a compliant and safe pump-down.
Tools & Materials
- Refrigerant recovery machine(Rated for the refrigerant type in the system; verify EPA certification)
- Manifold gauge set (low and high side)(Hoses and fittings compatible with service ports)
- EPA-approved recovery cylinder(Empty or designated for refrigerant capture)
- Service valve wrenches and adapters(Ensure proper sizes for the system ports)
- Leak detector(Helps confirm no leaks during isolation)
- Personal protective equipment(Safety glasses, chemical-resistant gloves, long sleeves)
- Thermal camera or thermometer(Useful for spot checking temperature differences)
- Vacuum pump(Optional for post-service evacuation)
- Digital manometer or gauge reading notebook(Record exact pressures during pump-down)
Steps
Estimated time: 60-120 minutes
- 1
Prepare tools and area
Gather all required equipment and PPE. Inspect the unit for damage and ensure the work area is safe and well lit. Verify power is isolated and lockout tags are applied to prevent accidental restart.
Tip: Check that recovery equipment is rated for your refrigerant and test gauges for accuracy before starting. - 2
Connect gauges and recovery lines
Attach the manifold to the service ports and connect the recovery machine. Open the high side just enough to verify baseline readings and ensure lines are free of air.
Tip: Keep hoses organized to avoid kinks and leaks during operation. - 3
Power down and disable controls
Turn off power at the main disconnect and disable any remote signals or thermostats that could energize the system during service.
Tip: Apply lockout tagout for added safety. - 4
Run unit to begin pump-down
Start the outdoor unit to circulate refrigerant toward the receiver. Monitor pressures as refrigerant shifts from the evaporator toward the receiver.
Tip: Do not exceed recommended pressures; stop if readings are unstable. - 5
Close the low-side valve to trap refrigerant
With the system running, carefully close the low-side valve to begin trapping refrigerant in the receiver. Watch the low-side pressure fall and the receiver pressure rise.
Tip: If the pressure does not trend toward the receiver, pause and recheck the valve positions. - 6
Stop the compressor and verify isolation
Power down the compressor and leave valve positions as is. Confirm no backflow by using a leak detector and ensuring the evaporator side is isolated from the receiver.
Tip: Document the final pressures and tag the system as pumped down. - 7
Document readings and secure the system
Record pressures, refrigerant type, and valve positions. Tag and lock the unit if required and take photos for your records.
Tip: Store documentation in the service file for future reference. - 8
Recommission and verify after service
When service is complete, reopen valves per manufacturer guidance and start the system. Observe normal operation and perform a brief functional test.
Tip: Check for leaks and ensure the system reaches operating temperatures as expected.
Your Questions Answered
What does pumping down a heat pump do
Pumping down moves refrigerant into the receiver to create a safe isolated area for service. It reduces the chance of refrigerant release and makes maintenance easier. Always follow proper procedures and regulations.
Pumping down moves refrigerant into the receiver to create a safe space for service. Always follow proper procedures and regulations.
Is pump-down required for all service
Not every service requires pump-down. It is commonly used for component replacement and leak repairs where access is restricted. Check manufacturer guidance and local codes before proceeding.
Not all service requires pump-down. Use it when recommended by the manufacturer and local codes.
Can a DIYer pump down a heat pump
Refrigerant handling and pump-down typically require licensing and EPA-compliant recovery equipment. In many locations this is not a DIY task. Hiring a licensed technician ensures safety and code compliance.
Refrigerant work usually requires licensing. Hire a licensed technician to ensure safety and code compliance.
What signs indicate pump-down worked
Indicators include a stable receiver pressure, a sustained low-side pressure trending toward the receiver, and no backflow to the evaporator. Gauge readings should be documented.
Stable receiver pressure and no backflow indicate pump-down success. Document readings.
What are the risks of an improper pump-down
Improper valve sequencing can release refrigerant, cause pressure spikes, or damage components. Always adhere to steps and safety protocols and seek professional help if unsure.
Improper sequencing can cause leaks or equipment damage. Follow steps and seek help if unsure.
What documentation should be kept
Record refrigerant type, readings, valve positions, and the date of the pump-down. This helps with future maintenance and regulatory compliance.
Document refrigerant type and all readings and valve actions for future reference.
Watch Video
Top Takeaways
- Identify pump-down goals and select the correct equipment
- Close low-side valve only while the compressor is running
- Verify isolation and document all readings
- Always follow local regulations and manufacturer guidelines