Replacement Filters for Heat Pumps: A Practical Guide
Learn how to choose, install, and maintain replacement filters for heat pumps to improve efficiency and comfort. Step-by-step guidance with tips, maintenance cadence, and expert insights from Heatpump Smart.

Replacement filters for heat pumps play a crucial role in maintaining airflow, protecting the blower, and boosting efficiency. Regularly replacing the right type of filter helps reduce energy use and prolong equipment life. According to Heatpump Smart, choosing the correct filter size and replacing it on a consistent cadence keeps your system performing at its best and supports overall home comfort.
Understanding replacement filters for heat pumps
Replacement filters for heat pumps are designed to capture dust, pollen, pet dander, and other particulates before they reach the indoor coil and blower. When these filters become clogged, the system must work harder to move air, which can lower efficiency, raise energy bills, and shorten equipment life. Heatpump Smart recommends starting with a filter that matches your unit's intended size and filtration level. In many homes, a standard disposable panel filter fits the cabinet, but some systems use pleated or electrostatic designs. Always consult the owner's manual for the exact filter dimensions and MERV rating recommended by the manufacturer. Environmental factors—such as a home with pets, high outdoor dust, or proximity to construction—may require more frequent changes. Keeping a tidy filter compartment also helps you quickly inspect for signs of mold growth, moisture, or damage. If your air quality needs are high, consider upgrading to a higher MERV filter within the manufacturer's limits, or discuss a filtration upgrade with a professional. By establishing a predictable cadence and keeping spare filters on hand, you minimize downtime and keep your heat pump delivering reliable comfort.
Filter types and compatibility in heat pump systems
Heat pumps use a range of filter designs to balance filtration efficiency with airflow. Disposable fiberglass and pleated filters are common, offering different capture efficiencies and resistance to airflow. Some systems use electrostatic or activated carbon filters for odor control or specialized particle capture. Before buying replacements, verify the exact size (width, height, depth) and the MERV rating recommended by the manufacturer. Compatibility also depends on housing design and whether the panel is reusable or single-use. In environments with pets or high dust, higher-efficiency pleated filters may be appropriate, but you must ensure the system can handle the added airflow resistance. If you’re unsure, consult the manual or contact a professional to avoid restricting airflow or triggering fault indicators in the control board.
How to choose the right replacement filters
Choosing the right replacement filters involves matching size, type, and filtration level to your heat pump model and environment. Start by removing the old filter and checking its dimensions printed on the frame. Select a filter that fits those dimensions and aligns with the recommended MERV rating. For allergy-prone households or homes with pets, a pleated or higher-MERV filter can improve indoor air quality, but verify that the unit’s blower and ductwork can support the increased resistance. If you’re replacing a washable filter, follow the manufacturer’s cleaning and drying instructions; some units require replacement rather than washing. Keep in mind that aftermarket substitutes should meet manufacturer specifications to prevent warranty concerns or performance issues. Finally, store extra filters in a clean, dry location and label them with replacement dates for easy scheduling.
Assessing your filter performance and when to replace
Performance indicators that it’s time to replace a filter include reduced airflow, longer cooling/heating cycles, and visible dirt build-up on the filter. If the system seems to run longer to achieve the same comfort level, or you notice an unusual odor or increased dust in living spaces, it’s a sign to inspect the filter housing. Temperature or humidity fluctuations can also echo airflow restrictions. Regular inspections—every 4-12 weeks depending on usage—help you catch dirty filters before they impact efficiency. In households with occupants who have allergies or asthma, more frequent changes may be warranted to maintain air quality. After replacement, reset any indicator lights or maintenance reminders as applicable and observe the system for a few cycles to confirm improved airflow.
Cleaning vs replacing washable filters and maintenance routine
Some heat pumps use washable, reusable filters. If your model supports this, remove the filter, rinse with lukewarm water, and allow it to dry completely before reinstalling. Never use hot water or detergents that could degrade the filter media. For disposable filters, simply replace with a fresh unit of the correct size and rating. Establish a cadence that aligns with your environment—homes with pets or dusty surroundings may need more frequent changes. Create a simple maintenance routine: inspect monthly during seasonal transitions, replace every 3 months under normal conditions, and document dates to build a predictable schedule.
Common mistakes and how to avoid them
Common mistakes include using the wrong size, installing filters upside down, and neglecting to reseal the housing after replacement. Also avoid selecting a filter with a higher resistance than the system is designed to handle, which can reduce airflow and trigger warnings. Another frequent pitfall is delaying replacement due to perceived inefficiency; delaying can lead to clogged coils and decreased performance. Always consult the manufacturer’s guidance for your specific model and err on the side of timely replacement to maintain comfort and efficiency.
Next steps and where to find replacements
When you’re ready to replace filters, start with the unit’s manual or manufacturer’s website to identify the correct filter type and size. Local home improvement stores and HVAC dealers usually carry common filter sizes, and many offer online ordering with quick home delivery. If you have a complex system or special filtration needs (such as activated carbon for odors), contact a licensed technician to determine the best option and ensure compatibility with your heat pump’s control system. Keep a small stock on hand, label replacements with dates, and create a simple maintenance calendar to stay on track.
Tools & Materials
- Replacement filters for heat pumps (correct size for your model)(Check the filter size printed on the existing filter; confirm the MERV rating recommended by your system’s manual.)
- Screwdriver (Philips head)(Only needed if access panels are secured with screws.)
- Soft cloth(For cleaning the filter housing exterior and surrounding area.)
- Vacuum with brush attachment(Use to clean loose dust from the housing without displacing the filter.)
- Mild detergent solution(Gently wipe down louvers or grilles if dirty.)
- Gloves and dust mask(Protect hands and lungs from dust and particles during replacement.)
- Owner’s manual or model-specific guide(Refer to exact filtration requirements and step-by-step instructions.)
Steps
Estimated time: 15-25 minutes
- 1
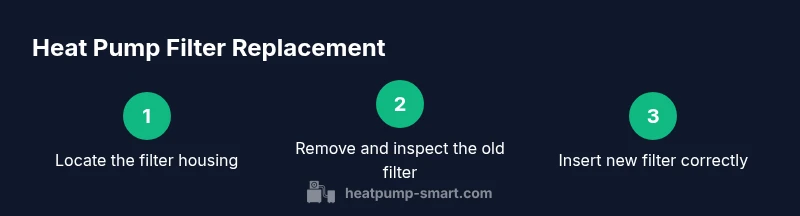
Power down and locate the filter compartment
Turn off the heat pump and, if applicable, the indoor air handler. Locate the filter slot according to the owner's manual. This ensures you won’t have moving parts or live electrical components while you work.
Tip: Use the manual to find the exact filter location; some units hide the slot behind removable panels. - 2
Open housing and remove the old filter
Carefully slide the filter out without shaking loose accumulated dust. Inspect the old filter for overall dirt level and any signs of moisture or mold. If mold is present, take extra care and consider replacing the housing seal.
Tip: Hold the filter with both hands to avoid bending the frame; place it on a clean surface as you assess replacement needs. - 3
Check size, type, and rating on the old filter
Read the filter dimensions and any color-coded rating printed on the frame. This information ensures you select the correct replacement. If you can’t read it, measure the slot and bring the old filter to the store for comparison.
Tip: If the old filter is missing, rely on the manual’s specifications for your exact model. - 4
Insert the new filter with correct orientation
Slide the new filter into the housing, making sure the air flow arrows on the frame point in the direction of airflow. A wrong orientation can reduce filtration effectiveness and airflow. Confirm the filter sits evenly in the slot.
Tip: If you feel resistance, remove and reinsert to ensure it aligns with the frame rails. - 5
Close the housing and test the system
Replace any panels and restore power. Run the heat pump for a short cycle to ensure air is flowing smoothly and there are no unusual noises. If you notice reduced airflow, recheck filter seating and orientation.
Tip: Check for whistling or vibration; these can indicate a mis-seated filter. - 6
Document the replacement date and cadence
Record the replacement date in a maintenance log or calendar. Note the filter type, size, and MERV rating for future reference. This helps you maintain a consistent cadence and simplifies future purchases.
Tip: Set a reminder on your phone or calendar to prompt the next replacement.
Your Questions Answered
How often should I replace heat pump filters?
Most heat pump filters should be replaced on a cadence based on usage and environment; consult the owner's manual for recommended intervals and adjust for dust, pets, and allergy needs.
Most heat pump filters should be replaced on a cadence based on usage and environment; consult your manual and adjust for dust and pets.
Are washable filters a good option for heat pumps?
Some systems use washable filters; if your model supports this, follow the manufacturer’s cleaning and drying instructions. If in doubt, use disposable filters to avoid performance issues.
Some systems use washable filters; follow the manufacturer’s cleaning instructions. If unsure, disposable filters may be safer.
What should I do if the filter is hard to access?
Refer to the user manual for alternate access points or consider scheduling a service visit if the filter location requires tools or disassembly.
If access is difficult, check the manual or call a technician to avoid damaging the housing.
Can replacing filters improve energy efficiency?
Yes, maintaining clean filters helps maintain airflow and can reduce energy use by minimizing system strain. Pair filtration with other maintenance for best results.
Yes, clean filters help airflow and can reduce energy use when combined with regular maintenance.
Do I need to replace filters year-round in cold climates?
In colder climates, indoor air recirculation and dust levels may vary seasonally. Tailor replacement cadence to usage, and inspect more frequently during peak heating seasons.
In cold climates, tailor cadence to usage and inspect more often during peak heating seasons.
Watch Video
Top Takeaways
- Replace filters on schedule to maintain airflow
- Match size and MERV rating to your model
- Always power down before replacing filters
- Document replacement dates for maintenance tracking