How to Clean a Heat Pump Filter: A Practical Step-by-Step Guide
Learn how to clean a heat pump filter safely and effectively to boost efficiency, airflow, and home comfort. Step-by-step instructions, tools, maintenance tips, and safety warnings for homeowners and professionals.

Learn how to clean a heat pump filter safely and effectively to boost efficiency and comfort. Gather a soft brush, mild detergent, a towel, and a bucket. This clear, 5–7 minute prep plus a thorough cleaning finishes in under an hour and helps reduce running costs. Regular maintenance supports airflow, system longevity, and steady indoor comfort.
Why Clean Heat Pump Filters Matter
A clean heat pump filter is a small component with a big job. It catches dust, hair, and other particles before air reaches the evaporator coil and the blower. When the filter is dirty, the system must work harder to pull air through, which can raise energy use, reduce cooling or heating effectiveness, and shorten component life. For homeowners, this is a routine maintenance task that pays off in practical ways: steadier temperatures, quieter operation, and lower utility bills over time. Regular cleaning also helps maintain indoor air quality by limiting the circulation of dust and allergens.
According to Heatpump Smart, keeping the filter clean is foundational for optimal performance. Even modest buildups can impede airflow and create a feedback loop where the unit runs longer to meet setpoints. In many models, cleaning the filter is a quick, low-risk job you can perform monthly or seasonally, depending on usage and the environment. The key phrase here is clean heat pump filter: when the filtration stage is clear, the entire system breathes easier, and you protect both efficiency and comfort. If you notice reduced airflow, unusual noises, or ice on the outdoor coil, lack of filter maintenance is often the culprit, and cleaning the filter is typically the first line of defense.
Tools and Materials You’ll Need Before You Start
Before you tackle a heat pump filter cleaning, assemble a small kit so you’re not hunting for pieces mid-task. A clean heat pump filter is easier to handle when you have the right tools handy. Here’s a practical list:
- Soft brush or old toothbrush for gentle scrubbing
- Mild detergent or dish soap
- Microfiber cloth or lint-free towel
- Bucket or basin for soaking or rinsing
- Clean water (tap water is fine)
- Protective gloves to keep hands clean
- Replacement filter (optional, if the existing one is worn or damaged)
- A small screwdriver or coin for removing any clips (optional, depending on model)
Having these items organized reduces downtime and helps you finish faster. If you’re using a high-efficiency filter with a tight seal, avoid abrasive brushes that can scratch the media. Heatpump Smart notes that starters often overlook the importance of drying time: plan for at least several hours if you’ve used water on the filter, and always confirm the filter is completely dry before reinstallation.
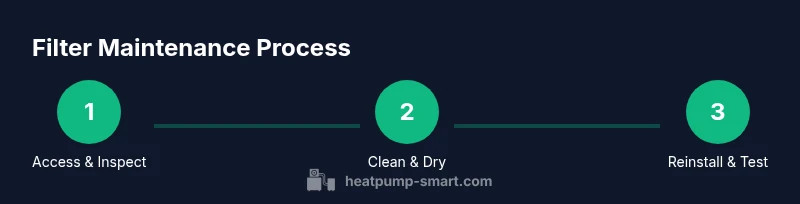
Step-by-Step Cleaning Process: Part 1 — Access, Inspect, and Remove
Step 1: Power down and unplug the unit, then open the filter access panel. Why: unpowered equipment reduces risk and protects electronics during handling. Step 2: Remove the filter carefully, noting its orientation so you can reinstall it correctly later. Why: incorrect orientation can reduce filtration efficiency and airflow. Step 3: Inspect the filter for tears, excessive staining, or saturation. If the media is damaged or waterlogged, replace rather than attempt cleaning.
Tip: take a photo before removal to aid reinstallation.
Step-by-Step Cleaning Process: Part 2 — Clean, Dry, and Reinstall
Step 4: Rinse the filter under cool running water or gently brush away debris with the soft brush. If machine-washable per manufacturer, follow directions; otherwise avoid high-pressure jets that could damage media. Step 5: If you used a detergent, rinse thoroughly to remove soap residue. Step 6: Shake off excess water and allow the filter to air-dry completely in a warm, dry spot. Step 7: Reinsert the filter with the correct orientation and reseat any clips. Step 8: Restore power and run a short test cycle to verify airflow and performance.
Tip: never reinstall a damp filter; moisture can promote mold growth.
Post-Cleaning Checks and Maintenance
After reinstalling the clean filter, monitor the system for a few cycles to ensure proper airflow and no unusual sounds. Check for tight seals around the housing, and make sure the filter sits flush without gaps. Heatpump Smart recommends logging each cleaning in a maintenance journal and adjusting your schedule based on seasonal demand and household air quality needs. Regularly inspecting both the filter and the surrounding housing helps catch wear or damage early, preserving efficiency and comfort.
Safety, Common Mistakes, and When to Replace
This section highlights important safety reminders and common missteps. Always turn off power before touching any component, and never bypass the filter housing. Common mistakes include using hot water, applying harsh chemicals, or forcing the filter into place the wrong way, which can damage the media or seals. If you notice torn media, persistent moisture, or reduced airflow after cleaning, replace the filter or consult a professional for an in-depth check.
Tools & Materials
- Filter housing access panel(Identify the model’s access panel and remove the cover.)
- Soft brush or toothbrush(Use for gentle debris removal without damaging media.)
- Mild detergent or dish soap(Dilute if necessary; avoid harsh chemicals.)
- Microfiber cloth(Dry surfaces and filter media after cleaning.)
- Bucket or basin(For rinsing and soaking if needed.)
- Clean water(Tap water is usually sufficient.)
- Protective gloves(Keep hands clean and dry during cleaning.)
- Replacement filter(Have on hand if the filter is worn or damaged.)
- Screwdriver or coin(Used to remove clips on some models.)
Steps
Estimated time: 20-40 minutes
- 1
Power down and access the filter
Turn off the heat pump at the breaker or on the unit’s control panel. Open the filter access panel to reveal the filter. This step reduces electrical risk and prepares you for safe removal.
Tip: If the panel is stiff, use a small amount of penetrating oil on the hinges and wait a minute before opening. - 2
Remove the filter and note orientation
Carefully lift the filter straight out, paying attention to how it sits in the housing. Note the top and bottom so you can reinstall it correctly, preserving seal alignment.
Tip: Take a quick photo to guide reinstallation. - 3
Inspect for damage
Examine the filter media for tears, caking, or water exposure. Damaged filters should be replaced rather than cleaned to avoid bypassing contaminants.
Tip: If you see mold growth, discard the filter and replace. - 4
Rinse or brush off debris
Rinse the filter under cool running water or gently brush away debris with a soft brush. Do not use hot water or harsh chemicals that can degrade the media.
Tip: Avoid high-pressure jets that could tear the filter. - 5
Dry completely
Allow the filter to air-dry fully in a warm, dry spot before reinstallation. Do not reinstall a damp filter, which can promote mold and reduce efficiency.
Tip: If you’re in a hurry, use a clean towel to blot excess moisture and place the filter in a warm room to finish drying. - 6
Reinstall the filter
Place the filter back in the correct orientation and reseat any clips or seals. Ensure it sits flush and there are no gaps around the housing.
Tip: Double-check the seal to prevent air leaks. - 7
Power up and test
Restore power and run a short cycle to confirm airflow and system response. Listen for abnormal noises or reduced airflow as signs of improper installation.
Tip: If airflow is weak, re-check orientation and seals. - 8
Document and plan the next cleaning
Record the date of cleaning in your maintenance log and set a reminder for the next cleaning based on usage and environment.
Tip: Regular documentation helps you stay on schedule.
Your Questions Answered
How often should I clean the heat pump filter?
Most homes benefit from monthly checks during peak seasons and at least every few months otherwise. Always defer to manufacturer recommendations and assess based on dust exposure and usage.
Most homes do a quick monthly check, and adjust based on how dusty the environment is and how often the unit runs.
Can I wash a filter that is not labeled as washable?
Only wash filters explicitly labeled as washable. If you’re unsure, replace the filter rather than risk damaging the media or seals.
If you’re unsure whether the filter can be washed, replace it to avoid damage.
Is it safe to clean the coils while cleaning the filter?
Do not spray water directly onto coils while cleaning the filter. Use a gentle approach and avoid bending fins; coil cleaning is usually better left to professionals if needed.
No, avoid direct spray on coils; focus on the filter unless you’re trained to clean coils.
What should I do if the filter is damaged after cleaning?
If you notice tears or sagging media after cleaning, replace the filter. Damaged filters reduce filtration effectiveness and can harm the system.
If damaged, replace the filter rather than attempting to reuse it.
Should I clean other parts of the heat pump besides the filter?
Yes, periodically clean accessible exterior surfaces and check seals around the housing, but avoid disturbing electrical or refrigerant components.
You can clean the exterior and check seals, but leave electrical and refrigerant parts to a pro if you’re unsure.
When should I call a professional?
If you notice persistent airflow problems, ice buildup, unusual noises, or signs of refrigerant issues, contact a licensed technician.
If problems persist after cleaning, it’s best to call a technician for a thorough check.
Watch Video
Top Takeaways
- Clean heat pump filter regularly to sustain efficiency
- Always dry filters completely before reinsertion
- Install filters correctly to ensure proper airflow
- Maintain a simple log to guide seasonal maintenance