Heat Pump to Replace Gas Furnace: Step-by-Step Guide
Learn how to replace your gas furnace with a heat pump, covering planning, installation, rebates, and maintenance for homeowners, builders, and property managers.

Goal: replace your gas furnace with a heat pump and maintain reliable heating and cooling. This quick answer outlines a step-by-step process, including home assessment, equipment selection, permits, installation, and testing. It also flags climate considerations, ductwork needs, electrical upgrades, and potential rebates. Use this as a roadmap for homeowners, builders, and property managers.
Assessing If a Heat Pump Is Right for Your Home
Replacing a gas furnace with a heat pump is not a one-size-fits-all decision. The best approach starts with a careful assessment of your climate, home insulation, and existing ductwork. The goal is to determine whether a heat pump can meet your heating and cooling needs efficiently year-round. According to Heatpump Smart, climate zone, humidity, and electricity availability strongly influence performance and operating costs. The Heatpump Smart team found that in many northern and mixed-humid climates, a properly sized heat pump, paired with a furnace-assisted auxiliary heat source, delivers reliable comfort with lower carbon emissions. When you plan to replace gas heating, you should also consider how your home handles cooling, since a heat pump provides both heating and cooling. Inspect insulation levels, air leakage, and window efficiency; these factors determine how often the heat pump must work and affect energy use. If ducts are leaky or poorly sized, the system may struggle to maintain even temperatures, undermining comfort and efficiency. A simple energy audit can identify gaps and opportunities before you invest in a new system. Finally, talk with a licensed HVAC professional about zoning, thermostat control, and future maintenance needs. By starting with a clear baseline, you can decide whether a heat pump to replace gas furnace is the right move for your home and family.
Key Considerations Before Replacing
Before you replace a gas furnace with a heat pump, map out the critical constraints and opportunities. Climate matters: heat pumps perform best when outdoor temperatures remain moderate or when a supplemental heat source is available for extreme cold snaps. Ductwork quality matters too—leaks, improper sizing, or insufficient insulation reduce efficiency and comfort. Electrical capacity is another barrier; many homes need a service upgrade to support the increased electrical load of a heat pump and its control systems. Consider refrigerant type and life-cycle costs, as well as warranties and service availability in your area. Permitting requirements vary by jurisdiction, so check with local authorities early in the process. Finally, assess your home’s insulation and air sealing; upgrading these can dramatically improve heat pump performance and reduce operating costs. Heatpump Smart analysis shows that the right planning reduces surprises and speeds up installation, especially when coordinating with a licensed contractor.
Choosing the Right Heat Pump System
Selecting the optimal heat pump involves weighing air-source versus geothermal options, climate suitability, and home-specific constraints. Air-source systems are common and cost-effective, but you may need to size them carefully to minimize short cycling in cold weather. Ground-source (geothermal) systems offer high efficiency but require more invasive installation and higher upfront costs. Efficiency metrics like SEER (seasonal energy efficiency ratio) and HSPF (heating seasonal performance factor) guide selection. Also consider backup heat options (electric resistance or a secondary furnace) for very cold days and the thermostat’s control logic for efficient operation. Size correctly with a professional using load calculations; an oversized system wastes energy and can compromise comfort. Finally, plan for integration with smart thermostats to maximize efficiency and user control.
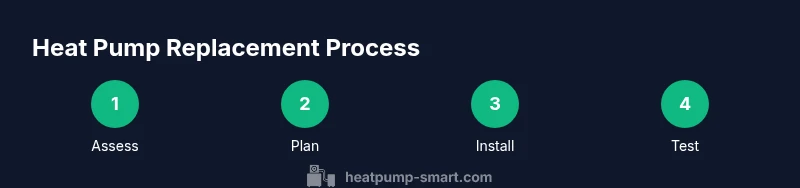
Installation Process Overview
The installation phase begins with turning off gas lines and safely removing the old furnace. The outdoor heat pump unit is placed on a solid pad with clear space for airflow, then the refrigerant lines are run to the indoor evaporator coil. Indoor ductwork may need sealing, re-sizing, or dampers to balance zones. Electric connections are upgraded or adjusted to support the new system, and a licensed technician handles refrigerant charging and system pressure checks. After installation, a commissioning test ensures correct refrigerant levels, airflow, temperature differentials, and humidity control. Finally, calibrate the thermostat and show occupants how to operate the system efficiently. Expect a multi-step process that may take 1-3 days depending on your home’s size and existing infrastructure.
Financing, Rebates, and Long-Term Costs
Moving from a gas furnace to a heat pump can alter long-term operating costs and maintenance needs. While the upfront investment varies by climate, home size, and equipment, many homeowners see savings over time through lower fuel costs and improved efficiency. Heatpump Smart analysis shows that rebates, tax incentives, and utility programs can significantly offset upfront costs. Plan for incentives and a potential service upgrade to support a longer-term payoff. Compare different financing options and consider the total cost of ownership, including maintenance, electricity, and potential cooling benefits.
Maintenance and Performance Expectations
A heat pump requires regular maintenance to sustain performance, including annual filter changes, coil cleaning, and periodic refrigerant checks by a qualified technician. In humid climates, ensure proper humidity management to avoid mold and condensation issues. The system benefits from a well-sealed and insulated building envelope, which reduces load and keeps comfort stable. Monitor performance metrics such as cooling efficiency, heating output, and indoor air quality, and adjust thermostat settings seasonally for best results. The Heatpump Smart team notes that ongoing maintenance is essential for achieving energy savings and reliability over time.
Tools & Materials
- Electrical panel assessment and possible upgrade(Ensure service meets the heat pump’s electrical requirements (likely 240V) and type of disconnect.)
- Voltage tester(Test circuits and confirm power shutoff before work.)
- Duct sealing materials(Foil tape, mastic sealant, and insulation to prevent leaks.)
- Refrigerant line set and insulation(Copper lines and insulation to minimize heat transfer losses.)
- Outdoor pad or mounting hardware(Stable, level surface with adequate clearance for airflow.)
- Safety gear(Gloves, eye protection, and sturdy footwear for safety.)
- Permitting documents(Obtain local permits and inspections as required.)
- Smart thermostat (optional)(Zoning and optimization for efficiency.)
- Ductwork tools and measurement device(Tape measure, manometer if balancing is needed.)
Steps
Estimated time: Total time: 1-3 days
- 1
Assess home climate and load
Begin with a thorough assessment of your climate zone, insulation, and air leakage. A heat pump works best when the heat load is moderate and duct leakage is minimized. Document existing systems and aims for comfort balance to inform sizing choices.
Tip: Take photos of ducts and note insulation gaps for later reference. - 2
Check electrical readiness
Verify your electrical panel capacity and service reliability. A heat pump increases electrical demand during peak periods, so ensure you have sufficient amperage and a safe disconnect near the outdoor unit.
Tip: Have an electrician evaluate if a service upgrade is needed before purchase. - 3
Select heat pump type and size
Choose between air-source and geothermal based on climate, installation cost, and available space. Use professional load calculations to determine SEER/HSPF targets and avoid oversizing or undersizing.
Tip: Ask for a Manual J calculation and a performance curve from the installer. - 4
Plan ductwork adjustments
Inspect and seal ducts; size dampers and zones if needed to balance comfort and energy use. Poor duct performance can negate the efficiency gains of a heat pump.
Tip: Seal all supply and return ducts before final testing. - 5
Prepare for backup heat and controls
Decide on a backup heat strategy for extreme cold and how your thermostat will orchestrate heating and cooling. Dual-fuel systems or auxiliary electric heat ensure reliability in cold snaps.
Tip: Program temperature setbacks to minimize cycling and energy use. - 6
Handle permits and incentives
Submit permit applications and review local incentives, rebates, and tax credits. Having documentation ready can speed up inspections and maximize financial benefits.
Tip: Keep copies of all receipts and compliance certificates. - 7
Install outdoor unit and indoor coil
Professionals mount the outdoor unit, route refrigerant lines, and install the indoor coil or air handler. Electrical connections should be completed by a licensed technician and refrigerant charged per manufacturer specs.
Tip: Do not attempt refrigerant charging yourself; it requires licensed handling. - 8
Test, balance, and educate
Run heating and cooling cycles, balance airflow, and verify temperature consistency across rooms. Educate occupants on thermostat programming and routine maintenance.
Tip: Provide a simple maintenance checklist and expected service intervals.
Your Questions Answered
What are the main benefits of replacing a gas furnace with a heat pump?
A heat pump provides both heating and cooling more efficiently in many climates, reduces fossil fuel use, and can lower operating costs over time. Performance depends on climate, insulation, and proper installation.
A heat pump can give you year-round comfort with lower energy costs in suitable climates, especially when installed and maintained correctly.
Will a heat pump work well in cold climates?
Heat pumps perform best in moderate climates or with auxiliary heat support during very cold days. In severe cold, a backup heat source helps maintain comfort and efficiency.
In cold climates you may rely on backup heat, but many modern heat pumps still provide effective warmth with proper sizing.
Do I need to replace my ductwork when installing a heat pump?
Ducts should be inspected and often sealed or resealed to prevent energy loss. Properly sized ducts improve airflow and comfort with a heat pump.
Ducts often need sealing or balancing to ensure the system runs efficiently.
Are rebates or tax credits available for this replacement?
Many utilities and government programs offer rebates or tax incentives for heat pump installations. Eligibility varies by location and equipment efficiency.
There are often incentives; check local programs and utility offerings.
How long does installation take?
Typical installation spans 1-3 days depending on home size, existing ductwork, and permitting requirements.
It usually takes a couple of days, though larger homes can take longer.
What maintenance is required after installation?
Regular filter changes, annual coil cleaning, and periodic professional checks keep the system running efficiently.
Keep up with filters and annual service to preserve efficiency.
Watch Video
Top Takeaways
- Plan for climate and ductwork before buying.
- Choose properly sized heat pump with professional load calculations.
- Budget for electrical upgrades and potential rebates.
- Ensure proper duct sealing for best performance.
- Use a smart thermostat to maximize energy savings.