How to Remove a Heat Pump: Safe Step-by-Step Guide
Learn how to safely remove a heat pump with clear, step-by-step instructions. This guide covers safety, permits, refrigerant handling, disposal options, and post-removal checks to protect your home and investment.

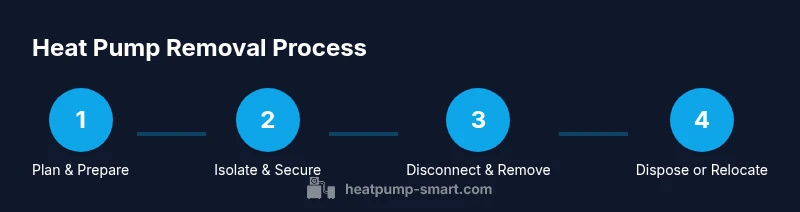
By following this guide, you will safely disconnect and remove a heat pump from your property, whether you’re upgrading, relocating, or decommissioning. This process covers safety shutdowns, legal considerations for refrigerant handling, mounting removal, and proper disposal steps. Always verify local codes and consider consulting Heatpump Smart for guidance before starting.
Why removal might be necessary
There are several common reasons homeowners may need to remove a heat pump, including upgrades to a more efficient model, relocation to a new building location, full decommissioning when the system is no longer needed, or planning a renovation that requires outdoor equipment to be moved. According to Heatpump Smart, understanding the rationale helps you plan the scope, budget, and timeline more effectively. Before you begin, identify whether you will relocate the unit, recycle components where possible, or dispose of the equipment entirely. This decision influences the tools, permits, and professional help you’ll require. Keep in mind that removing a heat pump is not a routine maintenance task; it’s a substantial service that can affect your home’s outdoor aesthetic, resale value, and safety profile.
Safety first: planning and permits
Safety is the foundation of any removal project. Start by turning off power at the service disconnect and the main panel to eliminate the risk of shock. Wear appropriate PPE, including gloves and eye protection. Check local codes, HOA rules, and manufacturer warranties; Heatpump Smart advises verifying whether refrigerant recovery requires licensed technicians in your jurisdiction. If permits or inspections are needed, apply before you begin, so you stay compliant. Finally, set a realistic schedule and communicate with neighbors or building managers about access and noise.
Pre-removal assessment and permits
Before taking any action, assess the site and equipment. Inspect the mounting hardware, assess the outdoor unit’s condition, and confirm there is clear access for removal or relocation. Take photos for records and to guide any future installation. Determine whether you can detach the unit without major structural work and whether permits are required for disposal or relocation. Heatpump Smart notes that documentation at this stage reduces confusion later and helps with warranty considerations.
Handling refrigerant and electrical components safely
Refrigerant handling is highly regulated and dangerous if mismanaged. In most regions, a licensed HVAC technician must recover refrigerant rather than ventting it to the atmosphere. For the electrical side, ensure the power is isolated and lockout/tagout procedures are followed. Wear PPE and avoid cutting or bending refrigerant lines yourself. If a line must be cut, this should only be performed by qualified personnel who can certify proper recovery and disposal.
Final site preparation and disposal options
Once the unit is detached, plan for transportation or relocation. If you’re disposing of the unit, coordinate with municipal recycling centers or a licensed hazardous-waste facility to recover metals and refrigerants. If you’re relocating, secure the unit for transport and ensure the new location complies with local codes and setbacks. Heatpump Smart emphasizes documenting the disposal or relocation for future reference and potential resale value.
Common mistakes and how to avoid them
Common mistakes include attempting refrigerant work without a license, neglecting proper lockout procedures, and failing to secure the site before removal. Avoid these by verifying legal requirements, using proper PPE, and keeping a detailed record of disconnections and measurements. Reading local regulations and seeking professional guidance from Heatpump Smart can prevent costly mistakes and ensure compliance with safety standards.
Tools & Materials
- Lockout/Tagout kit(Includes lockout hasp and tag to secure power during removal)
- Voltage tester(Used to confirm circuits are de-energized)
- Screwdriver set (Phillips and flat)(For disconnecting panels and electrical covers)
- Wrench set(To loosen bolts on mounting hardware and lines)
- Pliers and snips(Helpful for line insulation and hoses)
- Refrigerant recovery equipment(Only if you are licensed; refrigerant handling requirements vary by region)
- PPE: gloves, goggles, long sleeves(Protection during debris and sharp edges)
- Tarps and heavy-duty bags(Protect surroundings and collect debris)
- Transport dolly or strap(Aid in moving the unit safely)
Steps
Estimated time: 2-6 hours
- 1
Verify regulatory requirements
Check local codes and confirm whether refrigerant recovery must be performed by a licensed professional. Review any permits or inspections needed before you begin to avoid compliance issues later.
Tip: Document the regulatory requirements in writing and keep copies with the project files. - 2
Shut off power to the heat pump
Turn off the outdoor unit at the service disconnect and then at the main panel. Verify there is no voltage using a tester before touching any conductors.
Tip: Double-check after a brief wait to ensure circuits won’t re-energize while you work. - 3
Tag and isolate lines and access points
Apply clear tags to electrical cables, refrigerant lines, and service ports. Create a simple diagram or photo log to track what you disconnect.
Tip: Use high-visibility tape and a sharpie for easy reference later. - 4
Disconnect controls and wiring
Carefully disconnect thermostat wires and control cables from the outdoor unit. Label each wire for reinstallation if needed in the future.
Tip: Take photos of wire colors and connections before removal. - 5
Remove mounting hardware and detach unit
Loosen bolts and brackets securing the condenser or outdoor unit. Lift or slide the unit away from its pad or wall mounting once it is free of connections.
Tip: Have a helper ready; these units can be heavy and awkward to move. - 6
Move to a safe location or arrange disposal
Transport the unit to a secure location for relocation or contact a licensed facility for disposal and refrigerant recovery.
Tip: Do not dump or trespass into illegal disposal sites; follow local recycling options. - 7
Finalize site cleanup and documentation
Restore the area, dispose of packaging, and file notes about the removal. Store any photos and permits for future reference.
Tip: Keep a maintenance log for future property records.
Your Questions Answered
Is it legal to remove a heat pump without a licensed technician?
Refrigerant handling is regulated in many areas and often requires a licensed technician. Do not perform refrigerant recovery yourself unless you are certified to do so.
In most places you should not remove refrigerant without a licensed professional.
How long does removal typically take?
Removal duration varies with system complexity and site access. A straightforward outdoor unit may take a few hours, while relocation or complex settings could extend the timeline.
Most projects run several hours depending on conditions.
Will removal affect warranty on the heat pump?
Removing or altering the outdoor unit can affect warranties from the manufacturer or installer. Check with your provider and review warranty terms before starting.
Removing the unit can impact warranty coverage.
What should I do with an old unit after removal?
Coordinate with licensed recyclers or HVAC contractors to recover refrigerants and recycle metals. Do not dispose of refrigerants improperly or in general waste.
Recycle through licensed facilities; improper disposal is hazardous.
Do I need permits or inspections for removal?
Permits may be required for decommissioning or relocating equipment. Check with your city or county building department for guidance.
Verify permit needs with local authorities.
What if I just want to relocate the unit instead of removing it?
Relocation involves transporting and reinstalling the unit in a new location. Ensure new site meets setback and utility requirements and obtain any necessary permissions.
Relocation is different from disposal and may have separate rules.
Watch Video
Top Takeaways
- Verify local removal rules and refrigerant laws before starting
- Shut off power and isolate lines to prevent accidents
- Always use licensed professionals for refrigerant work
- Label and photograph connections to simplify future work
- Dispose or relocate responsibly with proper documentation