Heat Pump 7f62 Error: Quick Troubleshooting Guide
Urgent guide to diagnosing heat pump error code 7f62. Learn quick fixes, common causes, step-by-step repairs, safety tips, and when to call a pro from Heatpump Smart.

When your heat pump displays error code 7f62, it usually signals a fault in the control system, sensors, or communications between components. Start with a safe power reset, reseat connectors, and verify sensor status. If the code persists, don’t guess—follow the step-by-step guide and contact a professional if needed. Heatpump Smart recommends immediate triage and documenting any changes for techs.
What the 7f62 Error Code Means for Your Heat Pump
Error codes on heat pumps are designed to quickly point out where the system is having trouble. The code 7f62 is not a universal standard across all brands, but in many systems it indicates a fault in the control logic, sensor inputs, or a disrupted communication link between boards and peripherals. In practical terms, this usually means your unit is “seeing” something it can’t safely interpret or control, which triggers a protective shutdown. Because these faults can stem from several areas, it’s essential to approach diagnosis methodically, maintaining safety at all times. Heatpump Smart recommends viewing 7f62 as a red flag that should be investigated promptly to prevent further damage and reduce energy waste.
Immediate Checks You Can Perform Safely
Safety first: always switch off power at the circuit breaker before touching any internal components. With power off, inspect the outdoor unit and indoor air handler for obvious signs of trouble such as loose wiring, corrosion, or damaged insulation. Reseat all visible connectors gently, especially thermistor or pressure sensor cables, and check for signs of moisture inside control panels. If your unit has a service or diagnostic display, note any other codes or blinking patterns that accompany 7f62. A quick reset (power off, wait 30 seconds, power on) can sometimes clear transient faults. If the code reappears, proceed to structured troubleshooting rather than attempting complex repairs.
Environmental and Operating Conditions That Exacerbate 7f62
Temperature extremes, high humidity, or poor airflow can amplify sensor readings and trigger fault codes. On very hot days, some heat pumps may temporarily misread temperature differentials, while in cold seasons, frosting or icing on coils can affect sensors. Electrical supply stability also matters—voltage sags can confuse control modules. When diagnosing, compare current weather, building load, and recent usage with the unit’s normal operating profile. Consistent power quality and clean airflow are prerequisites for reliable operation. Heatpump Smart notes that documenting conditions during the fault helps technicians reproduce and fix the issue faster.
Likely Causes Ranked by Likelihood
- Sensor or thermistor fault (high): A degraded or loose sensor is a frequent trigger for 7f62-like codes because it feeds critical data to the controller.
- Control board communication issue (high): Faulty wiring, loose connectors, or a failing microcontroller can disrupt signals between boards.
- Wiring harness damage or corrosion (medium): Visible wear or water ingress can interrupt circuits.
- Refrigerant-related sensor misread (low): While less common, pressure or temperature sensor faults tied to refrigerant status can surface as 7f62 in some models.
How to Approach Diagnostics Without Damaging Your Unit
Begin with passive checks: ensure clear airflow around both indoor and outdoor units, confirm filters are clean, and verify that all panels are securely fastened. Use the system’s diagnostic menu or error history to identify recent fault patterns. Limit any DIY testing to non-invasive steps like reseating connectors and verifying sensor cables are intact. Avoid probing refrigerant lines or discharging refrigerant yourself. If the code persists after the above steps, it’s time to escalate to professional service.
What to Do If the Error Persists
If 7f62 remains after initial checks, a professional technician will typically perform a controlled electrical diagnosis, test sensors with calibrated tools, verify communication buses, and inspect the control board for faults. Replacement parts and service time can vary widely by model and market; Heatpump Smart estimates typical sensor replacements and board diagnostics can range from $150 to $650, with higher-end repairs potentially exceeding $1,000 if multiple boards or refrigerant work is required. Always obtain a written estimate before authorizing major repairs.
When to Call a Pro: Safety and Reliability Considerations
Higher voltage components and sealed refrigeration circuits carry real safety risks. If you smell burnt insulation, hear buzzing noises, or notice scorch marks, power down the unit immediately and call a licensed technician. For warranty-covered units, initiate a service request with your installer or manufacturer; attempting self-repairs can void warranties. Heatpump Smart emphasizes proactive service scheduling after a first confirmed 7f62 fault to prevent recurring issues and protect indoor comfort.
Long-Term Prevention: Maintenance for Reliability
Regular maintenance helps prevent 7f62 from recurring. Schedule annual precision inspections, clean or replace air filters every 1–3 months depending on use, and ensure electrical connections remain tight. Keep outdoor coils free of debris, verify drain lines are clear, and monitor refrigerant levels if your service history indicates past top-offs. By staying proactive, homeowners reduce the likelihood of sensor drift and board faults, maintaining efficiency and comfort while lowering energy costs over time.
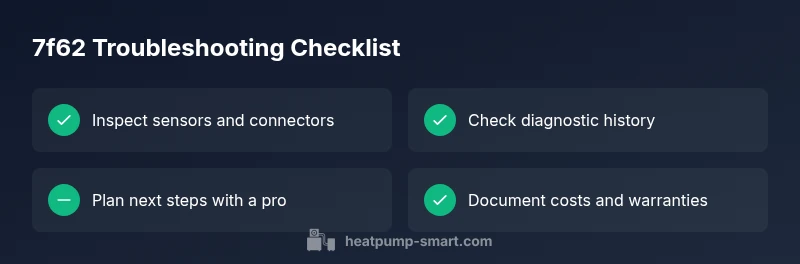
Steps
Estimated time: 30-60 minutes
- 1
Safety first and power down
Switch off power at the main breaker to eliminate risk of shock while inspecting panels. Confirm the unit is not receiving 120/240V before touching any components.
Tip: Use a non-contact voltage tester to double-check before opening any enclosure. - 2
Open panels and inspect connections
Remove access panels carefully and visually inspect sensor plugs and wiring harnesses for looseness or corrosion. Reseat any suspect connectors firmly but gently. Do not yank cables.
Tip: Take a photo before unplugging anything to aid reassembly. - 3
Reset the system and observe
Reconnect power and perform a controlled reset from the diagnostics menu. Note if 7f62 clears or reappears and record any other codes shown.
Tip: If the display restarts into a different fault code, document it for the technician. - 4
Check sensors and refrigerant indicators
Test thermistors and pressure sensor readings with the approved tools. If readings are out of range or unstable, suspect sensor failure or charging issues.
Tip: Do not attempt refrigerant charging yourself; this requires a licensed tech. - 5
Review recent changes or events
Consider whether recent maintenance, weather, or power outages could have triggered the fault. This context helps the tech reproduce the error.
Tip: Keep a log of events and temperatures around the fault window. - 6
Decide on next steps
If the fault persists after the above steps, schedule professional service. Prepare cost range expectations and warranty details for the tech.
Tip: Ask for a written estimate and expected timelines before work begins.
Diagnosis: Error code 7f62 displayed on heat pump, system not heating/cooling
Possible Causes
- highSensor or thermistor fault
- highControl board communication issue
- mediumWiring harness damage or corrosion
- lowRefrigerant sensor misread (rare)
Fixes
- easyInspect and reseat all visible sensors and connectors
- easyReset the thermostat/diagnostic module
- mediumTest control board with manufacturer tool or service port
- hardReplace faulty sensor or control board as recommended
Your Questions Answered
What does heat pump error code 7f62 mean?
Code 7f62 is a fault indicator that often points to sensor, control, or communication issues within the heat pump. It signals the system cannot safely continue normal operation until the fault is diagnosed and resolved.
7f62 usually means there’s a sensor or control issue; diagnose safely, then call a technician if needed.
Can I fix 7f62 myself?
You can perform safe, non-invasive checks such as reseating connectors and resetting the system, but avoid opening sealed refrigerant circuits or replacing major components unless you’re trained. If the fault persists, professional service is recommended.
You can try basic resets and checks, but don’t DIY major repairs.
How long does a typical 7f62 repair take?
Average service time ranges from 1 to 4 hours depending on the fault’s source, parts availability, and whether sensors or boards must be replaced. Heatpump Smart suggests planning for same-day service in urgent cases.
Most repairs take a few hours, but complex sensor or board work can take longer.
Will resetting clear the code permanently?
A reset can clear the fault code if it was a transient issue, but the code often reappears if the underlying fault isn’t fixed. Use reset as a diagnostic step, not a permanent fix.
Reset may clear it temporarily, but the real problem often remains.
What are typical costs to repair 7f62?
Costs vary by model and fault source. Expect a range from roughly $150 to $1,000 for sensor or control-board work, with higher costs if refrigerant handling or multiple parts are needed.
Repair costs usually sit in the low hundreds, but can rise with complex sensor or board work.
Is warranty coverage possible for 7f62?
Warranty eligibility depends on your policy and diagnosis. If the fault stems from manufacturing defects or covered components, warranty may apply; confirm with your installer or manufacturer before authorizing work.
Warranties may cover it if the fault is within the warranty terms.
Top Takeaways
- Act quickly on 7f62 to protect system efficiency
- Start with safe, non-invasive checks before calling a pro
- Keep notes on symptoms and conditions for accurate diagnosis
- Expect sensor or control-board faults as common causes
- Prepare for part replacement costs and service time when contacting a technician