Problem with heat pumps: Fast Troubleshooting Guide
A practical, urgent troubleshooting guide to diagnose and fix common heat pump problems. Learn safe checks, diagnostic flow, step-by-step fixes, and when to call a pro to restore comfort and efficiency in 2026.

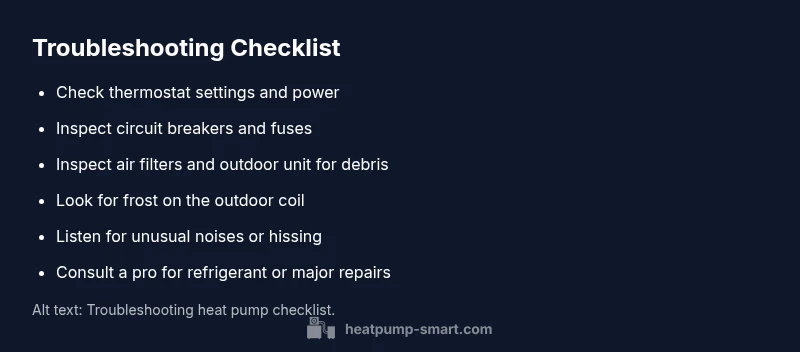
Most heat pump problems stem from simple, fixable causes like thermostat settings and power issues. First, confirm the unit is in the correct mode (heat/cool) and that emergency heat is off, then check the circuit breaker and outdoor unit for obstructions or frost. If unresolved, follow the detailed steps below for a safe, thorough diagnosis.
Understanding the problem with heat pumps
A problem with heat pumps can disrupt home comfort, especially during seasonal shifts. The quickest wins come from checking basic settings, power, and airflow before you reach for complex diagnoses. According to Heatpump Smart, many issues originate in user configuration or simple electrical hiccups rather than major component failures. This middle section guides you through practical checks, how to interpret results, and when to escalate to professional help in 2026, so you stay warm in winter and cool in summer without wasted energy.
Why heat pumps fail: common causes
Heat pumps are sophisticated systems that rely on several interdependent parts. In many homes, failures trace back to three zones: control and thermostat, electrical supply, and airflow across the coils. Heatpump Smart analysis shows thermostat misconfiguration and power interruptions as frequent culprits, with frost buildup on outdoor coils and dirty filters following closely. A loose or noisy fan, a blocked outdoor unit, or a refrigerant issue can masquerade as a simple fault. By recognizing these patterns, you can prioritize checks and minimize unnecessary service calls in 2026.
Safety first: when to call a pro
Some heat pump problems involve high voltage, refrigerants, or the potential for property damage. If you detect burning smells, see exposed wiring, hear loud banging, or notice a refrigerant odor, power down the unit and contact a licensed HVAC professional immediately. Do not attempt refrigerant charging or component replacement yourself. Professional inspection protects your family and keeps your system under warranty terms while avoiding risky DIY mistakes in 2026.
Quick checks you can safely perform
These checks require no specialized tools and can rapidly rule out common causes. Start with thermostat sanity: confirm mode is correct (heat or cool), the display shows the right temperature, and the system isn’t on emergency heat. Next, inspect the indoor air filter—a clogged filter throttles airflow and makes the system work harder, reducing efficiency. Then look at the outdoor unit for debris, ice, or snow buildup that blocks airflow. Finally, reset the system at the breaker or via the unit’s reset procedure if you know it. If you notice frost on outdoor coils, allow thawing before retesting. Keep children away from electrical components and avoid rearranging wiring during checks.
Diagnosing the most likely causes in simple terms
When symptoms appear, think in causes first and symptoms second. If the unit won’t start, prioritize power and thermostat checks. If it runs but doesn’t heat or cool effectively, inspect airflow and defrost cycles. A sudden loud noise often points to a loose fan or failing motor. Short cycling frequently indicates thermostat or refrigerant issues. If basic checks don’t resolve the problem, refrigerant testing or major component replacement will require a professional assessment. In 2026, a structured approach saves time and money by narrowing the field before calling for service.
Maintenance habits to prevent failures
Prevention beats repair. Create a simple seasonal maintenance routine: replace or clean filters regularly, keep the outdoor unit clear of leaves and debris, and visually inspect lines for insulation wear. Schedule an annual professional inspection to catch wear, refrigerant leaks, or electrical issues before they escalate. A consistent maintenance mindset helps preserve efficiency and comfort, reducing surprises during peak seasons in 2026.
Practical cost considerations and energy impact during troubleshooting
The goal of troubleshooting is to restore efficiency and reliability without unnecessary expenses. Many quick fixes require minimal cost—clean filters, reset procedures, and simple airflow adjustments can yield noticeable gains in comfort and efficiency. If professional service is required, costs vary with root cause and parts needed, from control system repairs to refrigerant handling. Early detection and proactive maintenance substantially lower lifetime energy costs and extend the system’s life in 2026.
Steps
Estimated time: 60-90 minutes
- 1
Power safety and initial reset
Turn off the heat pump at the breaker, wait 60 seconds, then turn it back on. Check the interior and exterior disconnects if present. This step often clears minor faults and re-establishes communication between components.
Tip: Always start with power to avoid shock or damage. - 2
Check thermostat settings
Ensure the thermostat is set to the correct mode (heat or cool), verify that emergency heat is off, and confirm fan is on auto. If your thermostat is programmable, review recent schedules that may override normal operation.
Tip: If you use a smart thermostat, a quick reboot can fix miscommunication with the system. - 3
Inspect electrical connections
With the power off, inspect accessible wiring and fuses for signs of damage or wear. Re-seat any loose connections and ensure breakers have not tripped. Do not open sealed electrical components beyond your comfort zone.
Tip: Loose connections can create intermittent faults that are hard to diagnose. - 4
Check airflow and outdoor unit
Clear any debris around the outdoor unit and remove snow or ice. Check that the outdoor coil is not blocked and that the fan spins freely when powered. Restricted airflow is a common cause of poor heating or cooling.
Tip: Keep at least two feet of clearance around the unit for optimal airflow. - 5
Inspect filters and indoor airflow
Replace or clean indoor air filters; dirty filters reduce airflow and system efficiency. Check supply and return vents to ensure they are not blocked by furniture or drapes.
Tip: A clean filter can dramatically improve system performance in a single afternoon. - 6
Test operation and plan next steps
After completing above checks, run a short test cycle to observe performance. If behavior is inconsistent or abnormal noises persist, document symptoms and prepare to contact a professional for advanced diagnostics.
Tip: Note down symptoms, sounds, and timing to help the technician diagnose faster.
Diagnosis: Heat pump won’t start or fails to heat/cool as expected
Possible Causes
- highPower issue or tripped circuit breaker
- highThermostat settings or faulty thermostat
- mediumOutdoor unit frost/ice buildup blocking airflow
- lowReversing valve issue or refrigerant leak
Fixes
- easyReset or fix power supply and ensure the breaker is on and wiring is intact
- easyVerify thermostat settings, replace batteries if needed, and recalibrate
- easyClear frost/ice and debris from the outdoor unit; ensure airflow paths are clear
- mediumIf issues persist, schedule professional refrigerant check or component replacement
Your Questions Answered
Why won’t my heat pump start?
Usually power or thermostat settings are the culprits. Check the breaker, confirm mode, and reset if needed. If it still won’t start, proceed with the diagnostic steps in this guide.
Heat pumps usually fail to start due to power or thermostat issues. Check the breaker and settings, then try a reset before seeking professional help.
Why is my heat pump not producing heat?
Likely thermostat settings, outdoor frost, or airflow restrictions. Verify mode, check defrost cycle status, and ensure outdoor and indoor filters are clean. If heat is still weak, a professional check may be needed.
If no heat is produced, start with thermostat and airflow checks; defrost cycles and filters matter a lot.
What does a blinking light on a heat pump mean?
Blinking indicators usually signal a fault code from the control board. Refer to your model’s manual to interpret the code; a reset often clears minor codes, but persistent blinking requires service.
A blinking light usually means a fault code—check the manual and reset, then call for service if it continues.
Can a dirty filter cause heat pump problems?
Yes. A clogged filter reduces airflow and efficiency, leading to poor heating or cooling and higher energy use. Replace filters regularly.
Dirty filters reduce airflow and efficiency, so replace them regularly to keep performance steady.
When should I call a professional?
If basic checks do not restore performance, if you notice refrigerant smells, or if you hear hissing or obvious electrical issues, contact a licensed HVAC technician.
Call a pro if basic checks don’t fix the issue or you detect refrigerant smells or electrical problems.
How can I prevent future problems with heat pumps?
Schedule annual maintenance, replace filters regularly, and keep outdoor airflow clear. A proactive maintenance routine reduces outages and saves energy.
Prevent future problems with routine maintenance, clean filters, and clear outdoor air paths.
Watch Video
Top Takeaways
- Start with thermostat and power checks to rule out common causes
- Ensure outdoor unit airflow is unobstructed for efficient operation
- Regularly replace filters and perform seasonal maintenance
- Call a licensed pro for refrigerant issues or electrical faults