rp14 Error Guide: Urgent Heat Pump Troubleshooting Today
An urgent, practical guide to rp14, the heat pump error code. Learn its meaning, quick fixes, diagnostic flow, cost ranges, and when to call a pro. Heatpump Smart provides clear steps to restore comfort safely.

rp14 indicates an overheating condition triggering the high-temperature safety circuit in many residential heat pumps. The quickest path to relief is to restore airflow, inspect filters, and clear any obstructions before testing the system again. If the error persists after basic checks, power down and contact a qualified technician promptly. Heatpump Smart recommends starting with safety-first steps and documenting findings for service.
rp14: What rp14 means for your heat pump
The rp14 error code typically signals an overheat condition or high-temperature limit circuit fault within a heat pump system. When the unit detects temperatures beyond its safe operating range, it triggers rp14 to stop the cycle and prevent damage. For homeowners, this usually points to airflow or heat rejection problems rather than a sudden internal failure. According to Heatpump Smart, the first actions are to verify airflow pathways, inspect filters, and ensure the outdoor condenser has unobstructed access to ambient air. Addressing these basics often resolves rp14 without specialized tools, especially in mild climates or during seasonal transitions when filters and vents accumulate dust quickly. Restoring correct airflow restores confidence that the system can safely operate, reducing the risk of repeated shutdowns due to overheating.
Top reasons rp14 appears and how to interpret them
- High-temperature limit tripped by restricted airflow: The most common trigger. Clogged filters, dirty coils, or blocked returns can raise indoor temperatures and trigger the safety shutoff.
- Outdoor unit airflow restriction: Debris, grass, or snow around the condenser reduces heat rejection and can cause the indoor loop to overheat.
- Sensor or control-board issues: A faulty temperature sensor or software hiccup can falsely indicate overheating and trigger rp14.
- Refrigerant problems: A leak or low charge can alter pressure and temperature relationships, contributing to overheat under load. Heatpump Smart notes that refrigerant issues are less frequent than airflow problems but still possible.
In practical terms, rp14 is a signal to check airflow first, then move to more technical diagnostics if airflow checks don’t restore normal operation. This approach minimizes unnecessary service calls and keeps the system operating safely. Heatpump Smart emphasizes documenting each step you take so technicians can quickly pinpoint the fault if the code reappears.
Quick-start diagnostic path for rp14
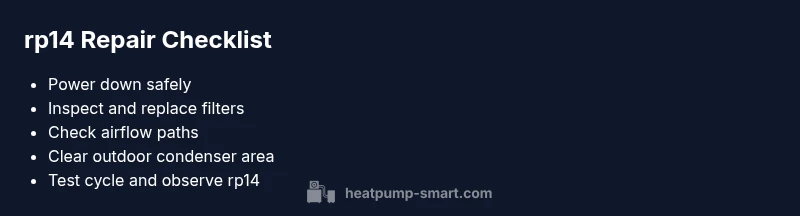
- Power down the unit at the thermostat and disconnect power to the outdoor unit if safe to do so. 2) Inspect and replace any dirty or saturated air filters. 3) Check all return and supply vents for blockages and ensure airflow is free. 4) Clear vegetation and debris from the outdoor condenser; ensure at least 2 feet of clearance on all sides. 5) Restore power and run a test cycle; observe whether rp14 recurs. If the code reappears after airflow fixes, proceed to deeper diagnostics or call a professional.
How to interpret rp14 after initial fixes
If rp14 disappears after you’ve cleared the airflow and replaced filters, monitor performance for 24–48 hours. If it returns during peak usage (e.g., very cold or hot days), the issue may be more complex and involve refrigerant balance, sensors, or the control board. Heatpump Smart suggests keeping a simple log of outdoor temperature, indoor comfort level, and any unusual noises or cycling patterns. This log helps a service technician quickly identify whether the problem is a transient condition or a persistent fault.
Common missteps to avoid when rp14 appears
- Don’t bypass the safety system by manually restarting the unit; this can lead to equipment damage or fire risk.
- Don’t ignore outdoor cleanliness; a dirty condenser reduces heat rejection and triggers overheating.
- Don’t assume a refrigerant leak is the first culprit; airflow and debris are far more common, especially in spring and fall.
- Don’t delay professional help if the unit continues to overheat after basic maintenance; persistent rp14 often requires a refrigerant check or control-system assessment.
Step-by-step preventive routine to reduce rp14 risk
- Schedule regular filter changes every 1–3 months depending on usage and household conditions.
- Inspect outdoor condenser surroundings quarterly and clean coils as needed.
- Verify thermostat and sensor calibration yearly; ensure proper configuration for your climate.
- Keep a maintenance log and trend rp14 occurrences with temperature and humidity data to catch drift before it becomes a fault.
The role of professional assessment in rp14 scenarios
When basic checks fail to resolve rp14, a licensed technician should perform an in-depth inspection. They will verify refrigerant charge, diagnose sensor integrity, inspect the control board for faults, and test safety switches. Cost considerations vary by region and problem complexity, but typical rp14 service can range from basic filter/coil cleaning costs to more extensive repairs. Heatpump Smart Analysis, 2026, recommends obtaining a written estimate before any refrigerant-related work and asking for a clear breakdown of parts and labor.
Steps
Estimated time: 60-90 minutes
- 1
Power down and ensure safety
Begin by turning off power at the thermostat and, if safe, switch off the outdoor unit at the disconnect. Waiting 5 minutes reduces the risk of electrical shock and helps stabilize sensor readings before you test any components. This step also prevents accidental restart while you inspect internal parts.
Tip: Always use a non-contact voltage tester before touching any wiring. - 2
Inspect and replace the air filter
Locate the air filter at the air handler or return duct. If dirty or saturated, replace with a correctly sized filter. A clean filter improves airflow and can resolve rp14 quickly in most homes. Reinstall the panel securely after replacement.
Tip: Choose a filter with the correct MERV rating for your system—higher isn't always better for every setup. - 3
Check indoor airflow paths
Ensure all supply and return vents are open and unobstructed. Move furniture if needed to improve air circulation and check for blocked return grilles. Poor airflow is a leading cause of overheating and rp14 triggers.
Tip: Vacuum grilles to remove dust buildup that reduces airflow efficiency. - 4
Inspect the outdoor condenser area
Clear debris and vegetation from around the outdoor unit. Remove any objects within 2 feet and gently rinse the coils with a hose, avoiding high pressure. Proper clearance and clean coils help the unit reject heat effectively.
Tip: Do not use metal tools on fins; use a soft brush to avoid damage. - 5
Power up and run a test cycle
Restore power and initiate a test heating cycle from the thermostat. Monitor for proper fan operation, airflow, and any unusual noises. If rp14 reappears, note outdoor temperature and cycle duration for the technician.
Tip: Record the exact time of cycle start and stop to provide precise data. - 6
Decide on next steps
If rp14 persists after basic maintenance, move to professional evaluation. A charged refrigerant line, faulty sensor, or control-board issue requires skilled service with potential cost implications.
Tip: Request a written estimate and ask for a parts-and-labor breakdown before approving work.
Diagnosis: rp14 error displayed, system overheats or shuts down during operation
Possible Causes
- highRestricted airflow due to dirty filters or blocked vents
- highOutdoor condenser blocked or dirty coils
- mediumFaulty temperature sensor or control board
- lowLow refrigerant charge or leak
- lowElectrical or wiring issue triggering safety shutdown
Fixes
- easyClean/replace air filters and remove vent obstructions
- easyClear around the outdoor unit and clean condenser coils
- mediumTest and recalibrate temperature sensor or replace faulty sensor
- hardCheck refrigerant charge and inspect for leaks (professional required)
- easyInspect wiring and safety switches; reset controller if applicable
Your Questions Answered
What does rp14 mean on a heat pump?
rp14 typically indicates an overheating condition or high-temperature limit fault. It stops operation to protect components. Start with airflow checks and filters, then proceed to deeper diagnostics if needed.
rp14 usually means the system is overheating and has shut down to protect itself. Begin with airflow checks and filters, then move to more detailed diagnostics if the fault continues.
Is rp14 dangerous to ignore?
Ignoring rp14 can lead to compressor damage or safety risks from overheating. Do not operate the unit repeatedly while the code persists; seek professional assessment if basic fixes don’t resolve it.
Yes, ignoring rp14 can be risky. Don’t run the unit if it keeps overheating; get a professional check if simple fixes don’t work.
Can I fix rp14 myself?
You can perform basic airflow and filter checks safely. More complex steps, like refrigerant checks or sensor replacements, require a licensed technician. Always prioritize safety and know your limits.
You can do basic checks yourself, but refrigerant and sensor work needs a pro. Safety first.
What are typical costs to fix rp14?
Costs vary by cause. Simple filter changes or coil cleaning may cost a few hundred dollars, while refrigerant work or board replacement can range from several hundred to over a thousand, depending on parts and labor.
Costs depend on the issue; basic fixes are cheaper, while refrigerant or board work can be significantly more expensive.
When should I consider replacing the unit rather than fixing rp14?
If the system is old, has frequent faults, or repair costs approach or exceed half the price of a new unit, replacement may be more economical in the long run. A professional can give a reliable recommendation.
If the unit is aging or frequently failing, replacement might be more cost-effective than ongoing repairs.
Does rp14 affect energy efficiency?
Overheating and blocked airflow can force the system to work harder, reducing efficiency and increasing energy use. Fixing rp14 promptly helps restore efficiency and lower operating costs.
Yes. Overheating can make the unit work harder, reducing efficiency and raising energy use.
Watch Video
Top Takeaways
- Identify rp14’s cause: airflow first, then deeper diagnostics.
- Prioritize safety; power down before inspection.
- Most rp14 fixes are quick and low-cost if addressed early.
- Professional help is essential for refrigerant or sensor faults.
- Regular maintenance reduces rp14 risk and improves efficiency.