Heat Pump Troubleshooting: Cold Air, Warm Air Fix
A comprehensive, urgent guide to diagnosing why your heat pump blows cold air then warm, with actionable steps, safety notes, and maintenance tips to restore comfort quickly.

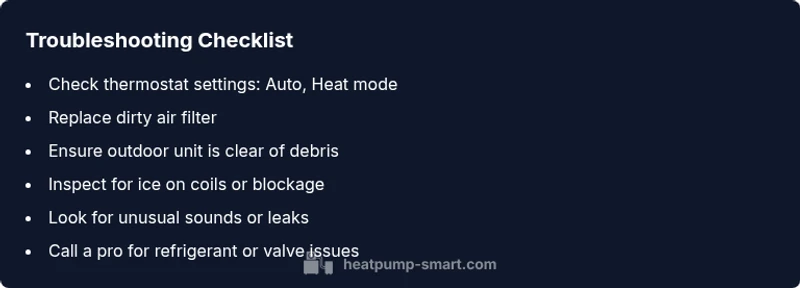
Most likely, the cold air is caused by a defrost cycle or a temporary reversing valve action. Quick fixes: set the thermostat to Auto, ensure the outdoor unit is free of debris or ice, and replace a dirty air filter. If cold air persists or the unit cycles abnormally, contact a licensed technician.
Understanding the symptom
When a heat pump blows cold air for a period and then switches to warm air, homeowners often worry about a failing system. In many cases the issue isn't a total failure, but a normal cycling behavior that manifests as cold air before warmth. According to Heatpump Smart, the most common triggers are a short defrost cycle, a temporary reversing valve action, or a simple control misread by the thermostat. Recognizing the pattern is the first step: note how long the cold spell lasts, whether it occurs during ice buildup outside, and if the unit later recovers to the expected comfort level. Documenting the behavior will help you distinguish a benign cycling event from a genuine fault needing service. Understanding this symptom helps you decide whether to retry a quick fix, adjust settings, or call for professional service.
Quick checks you can perform safely
Start with the simplest, low-risk checks. Make sure the thermostat is set to Auto and the mode is heat, not emergency heat or cool. Inspect and replace the air filter if it looks dirty, as reduced airflow can cause cold air drafts before warm air arrives. Ensure exterior debris, snow, or ice aren’t blocking the outdoor unit or the condenser fins. If the outdoor temperature is very cold, allow extra time for the defrost cycle to run. Finally, check that all supply vents are open and there are no major duct leaks that could steal warmth from living spaces.
Defrost cycle and reversing valve realities
Many heat pumps perform a defrost cycle to melt outdoor frost. During this cycle, cooling mode can briefly blow cooler air inside before warm air resumes. The reversing valve may momentarily switch, sending refrigerant flow in a way that feels like cold air for a short period. Look for a brief change in airflow, a slight change in indoor temperature, or a faint click when the system switches modes. If the defrost window extends beyond expected, an outdoor sensor or control board fault could be involved. In these cases, patience is key, but persistent long defrost periods warrant professional evaluation.
Thermostat and controls: getting accurate readings
Thermostats can misread room temperature, especially in large open spaces or rooms with poor insulation. Check that the thermostat wires are properly connected and the sensor is not located behind a heat source or directly in sunlight. If you have a smart thermostat, review scheduling, geofencing, and adaptive recovery features that can influence when the unit runs and how quickly it warms the space. Calibrating the thermostat to the actual room temperature can reduce unnecessary cycling and help the system reach comfort without a cold draw.
Outdoor unit and sensor checks
Inspect the outdoor unit for snow, ice, leaves, or other debris that impede performance. A blocked outdoor coil reduces heat transfer efficiency and may prolong the defrost cycle, causing a longer cold air phase indoors. Ensure the fan spins freely and there are no unusual noises that indicate mechanical binding. Outdoor temperature sensors should reflect ambient conditions; if a sensor is offset by freezing or wind exposure, the system may misjudge when to switch from heat to defrost and back.
Airflow and ductwork: why vent obstruction matters
Even with a healthy system, restricted airflow can make warm air feel delayed. Check all supply vents to confirm they are open and unobstructed by furniture or drapes. Listen for whistling or popping sounds that suggest duct leaks, especially along long runs or near damp areas. Duct sealing and insulation reduce heat loss, helping the indoor air reach set temperatures faster and more consistently. If you suspect leaks, a professional duct test can reveal the extent and guide repair priorities.
Refrigerant issues and why you should not DIY
Low refrigerant or improper charge can cause abnormal temperature swings, including cold air episodes when the system attempts to heat. Refrigerant leaks are a safety concern and require a licensed technician with proper gauges and handling protocols. If you notice service lights, hissing noises, oily residue near joints, or a persistent drop in cooling/heating performance, schedule a professional inspection promptly. Do not attempt to seal leaks or add refrigerant yourself.
Operating tips for winter and shoulder seasons
During cold seasons, run the heat pump in the most energy-efficient mode that maintains comfort, and avoid relying on emergency heat unless necessary. Keep insulation up to date, seal drafty windows, and use programmable thermostats to prevent oversized temperature swings. In shoulder seasons, allow the unit to complete normal cycling and defrost windows before assessing performance. A well-tuned system maintains comfort with minimal temperature fluctuations.
Safety considerations and professional help
Electrical components carry risks. Always power down the system at the disconnect before inspecting accessible parts, and never work on live circuits. If you smell burning, hear buzzing, or notice heat at non-contact points, evacuate and call emergency or a professional service. When in doubt, contact Heatpump Smart’s team for a professional assessment—sudden or recurring cold-air episodes can indicate a fault beyond typical DIY checks.
Prevention: maintenance that reduces cold-air teething
Schedule seasonal maintenance that focuses on air filtration, coil cleanliness, duct integrity, and thermostat calibration. Clean or replace filters every 1-3 months during heavy use. Schedule professional coil cleaning and refrigerant checks annually. By keeping the system clean and calibrated, you minimize the risk of unpredictable cycling and ensure warm air comes quickly after the initial cold air burst.
Final practical notes on comfort and efficiency
Summarizing practical steps: confirm thermostat mode, keep filters clean, ensure outdoor unit is clear, check ducts for leaks, and arrange professional refrigerant or valve diagnostics if issues persist. Regular maintenance is cheaper and faster than repeated emergency fixes. With these habits, you’ll reduce cold-start episodes and improve overall energy efficiency over the heating season.
Steps
Estimated time: 30-45 minutes
- 1
Check thermostat settings
Verify that the thermostat is in Heat and Auto mode, not Emergency Heat or Cool. Confirm that fan settings are appropriate and that the unit has power. This basic check often resolves strange cycling.
Tip: Document any surprising thermostat behavior for technician reference. - 2
Inspect the air filter and vents
A dirty filter or blocked supply vents can cause cold air bursts before warmth. Replace or clean the filter and ensure all vents are open and unblocked.
Tip: Replace disposable filters every 1-3 months during heavy usage. - 3
Look at the outdoor unit
Check for ice buildup, snow, or debris around the outdoor coil. Clear obstructions with the unit powered off and ensure the fan can rotate freely.
Tip: Never poke the fins; use a low-pressure spray and let the unit dry before testing. - 4
Observe the defrost cycle
Note if the defrost cycle begins and ends as expected. If it runs excessively, sensor or control board issues may be present.
Tip: Defrost cycles are normal but should not dominate heating cycles. - 5
Check the reversing valve operation
If accessible, verify the reversing valve actuates during mode changes. Listen for a click or feel a brief temperature shift when cycling between modes.
Tip: Valve faults require professional diagnosis and calibrated refrigerant handling. - 6
Assess indoor airflow
Ensure there are no significant duct leaks, and check for cold spots in rooms far from the unit. Seal leaks and improve insulation if needed.
Tip: Duct sealing can dramatically improve perceived warmth. - 7
Test sensor placement and calibration
Make sure indoor sensors aren’t positioned near heat sources or drafts. Recalibrate or relocate sensors if readings seem inconsistent.
Tip: Smart thermostats often have calibration options in settings. - 8
Inspect for refrigerant issues
Visible signs of refrigerant problems (hissing, oily residue) require a licensed technician. Do not attempt to adjust pressures yourself.
Tip: Only certified technicians should handle refrigerants. - 9
Schedule professional evaluation
If the issue persists after basic checks, book a service visit. A trained technician can assess defrost timing, valves, sensors, and refrigerant levels.
Tip: Regular maintenance prevents unexpected cold-air episodes.
Diagnosis: Heat pump blows cold air
Possible Causes
- highDefrost cycle active or lingering
- mediumReversing valve temporarily routing refrigerant for cooling
- lowThermostat misread or sensor misplacement
Fixes
- easySet thermostat to Auto and monitor defrost window; wait for it to complete.
- easyClear outdoor unit of ice/debris and ensure proper airflow to condenser
- mediumIf cycles persist or you notice refrigerant signs, contact a licensed technician for inspection
Your Questions Answered
Why does my heat pump blow cold air before warming up?
This usually occurs during a defrost cycle, when the outdoor unit is temporarily in cooling mode to melt frost. A brief swap in refrigerant flow via the reversing valve can also feel like cold air. If the cold spell is long or constant, there may be an issue with sensors or controls.
It usually happens during a defrost cycle or a reversing valve action; if it lasts long, get a professional check.
How long should a typical defrost cycle last?
Defrost cycles are normally short and should not extend beyond a few minutes. If you notice frequent or unusually long defrosts, there may be sensor or control issues.
Defrosts are usually brief; if they’re long, you should have it checked.
Can low refrigerant cause cold air when heating?
Yes, low refrigerant can lead to reduced heating performance and strange temperature changes. A leak is likely, and refrigerant charging requires a licensed technician.
Low refrigerant can cause poor heating; a professional should inspect and service it.
Is it safe to run emergency heat to solve the problem?
Emergency heat uses resistance heaters and is less efficient. It can help if a quick boost is needed, but it won’t fix underlying issues and can raise costs. Use it only temporarily.
Emergency heat is a temporary option, not a fix for root causes.
When should I call a professional?
If basic checks don’t restore warmth, if you notice refrigerant signs, or if you hear unusual noises or smells, contact a licensed technician promptly.
Call a pro if you still have cold air after checks or if you see signs of a refrigerant issue.
Watch Video
Top Takeaways
- Identify if defrost or valve action triggers cold air
- Check filters, vents, and outdoor unit first
- Avoid DIY refrigerant work—call a pro
- Regular maintenance prevents future cold-air episodes