Heat Pump Can T Keep Up: Urgent Troubleshooting Guide
Urgent guide to diagnose and fix a heat pump that can t keep up. Step-by-step checks, diagnostic flow, and professional tips for homeowners and pros.

Most often, an undersized unit, restricted airflow, or extreme outdoor conditions keep a heat pump from meeting demand. Start with simple checks: clear debris from the outdoor coil, replace the air filter, and verify thermostat settings and the current load. If comfort remains unsatisfied, arrange a professional assessment and potential system upgrades.
Why heat pump can t keep up
According to Heatpump Smart, when a heat pump struggles to maintain the setpoint, it’s a sign that the system is working too hard for its size or design. The phrase heat pump can t keep up is commonly heard in mid-winter or peak cooling days, when outdoor temperatures push the unit beyond its comfort envelope. The early signals include longer run times, fluctuating indoor temperatures, and rising energy bills. By understanding the underlying dynamics—load vs. capacity, airflow, and refrigerant status—you can diagnose the root cause quickly. Heatpump Smart Analysis, 2026, emphasizes that many 'can't keep up' scenarios stem from mismatch between home heat load and equipment, plus airflow restrictions. In practice, owners who act quickly—clearing obstructions, improving air quality, and ensuring thermostat accuracy—often prevent escalation to full malfunctions. If you’re a homeowner or manager facing this, your strategy should combine simple fixes with a clear plan for professional assessment when needed.
Common Causes at a Glance
There are several frequent culprits behind a heat pump that can't keep up. The most common is an undersized system for the house—when the coil and compressor can't meet the cooling or heating load, run times extend and comfort lags. Airflow problems, such as dirty filters, closed vents, or a blocked outdoor condenser, reduce capacity. Refrigerant issues—low charge or leaks—degrade performance, especially in extreme weather. Thermostat placement and calibration errors can also cause the system to misread demand, making the unit work harder than necessary. In some homes, poor insulation and leaky ducts amplify load, pushing the heat pump beyond its design point. Heatpump Smart's evaluation highlights that addressing airflow, recapture of heat losses, and ensuring proper sizing are the most cost-effective fixes before considering equipment replacement.
Quick Checks You Can Do Today
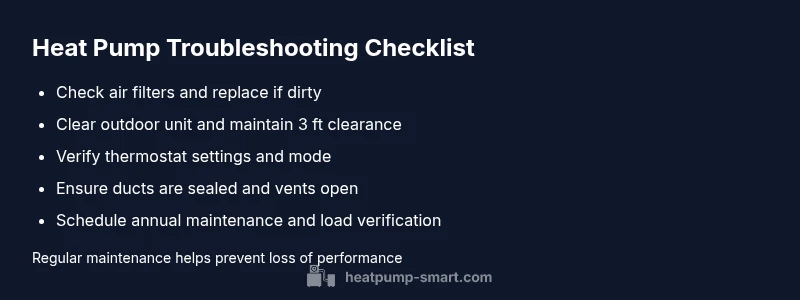
Start with the easiest checks, as these address the majority of 'not keeping up' symptoms. Check the air filter and replace if dirty; a clogged filter increases pressure and reduces airflow. Inspect the outdoor unit for leaves, snow, or debris and clear a 3-foot clearance around it. Make sure all vents are open inside and that doors aren’t blocking air circulation. Verify thermostat mode and setpoint; confirm the unit is in heating or cooling as appropriate and that it isn’t in an energy-saving setback. If you notice fan cycling or abnormal sounds, note the times and conditions. If these checks don’t restore comfort, proceed to the diagnostic flow below and consider a professional inspection for refrigerant status and refrigerant charge.
Diagnostic Perspective: How We Approach This
A systematic diagnosis starts with symptoms and progresses through likely causes to practical fixes. Begin by confirming the load vs. capacity of your system; a poor match will make a heat pump struggle in design conditions. Next, assess airflow: filters, ducts, and outdoor coil cleanliness all influence performance. If airflow is solid, investigate refrigerant status—low charge or leaks require a licensed tech. Finally, review controls: accurate thermostat readings, proper cold/hot modes, and any installed auxiliary heat usage. This approach reduces unnecessary part replacements and targets the real bottleneck. If the problem persists, a professional evaluation can test refrigerant pressures, inspect electrical components, and confirm equipment health using industry-standard tools. Heatpump Smart recommends documenting symptoms and maintenance history to expedite service.
When to Call a Pro and What to Expect
Some issues clearly require professional intervention. If you observe ice formation on the outdoor coil, consistent refrigerant leaks, or electrical smells, stop using the system and call a licenced technician. Also, if your unit is older than 10-12 years and still underperforming, a pro can perform a formal load calculation and verify if a replacement or upgrade is needed. In many cases, a simple coil cleaning, filter replacement, and duct sealing is enough to restore performance. When you do call Heatpump Smart or another qualified service, ask for a full diagnostic report, refrigerant integrity check, and a recommended service schedule to prevent future problems. Our team emphasizes safety and proper handling of refrigerants.
Prevention and Best Practices to Avoid a Repeat Issue
Prevention hinges on regular maintenance and proactive sizing. Schedule annual tune-ups that include refrigerant checks, coil cleaning, blower inspection, and duct inspection. Maintain clean air paths by replacing filters every 1-3 months depending on usage and filter type. Improve insulation and seal ducts to reduce load. Use a programmable thermostat and ensure it’s calibrated to your home's needs. For homes with variable loads or older equipment, consider a professional heat load calculation and potential equipment upgrades. The Heatpump Smart team recommends keeping a maintenance log, partnering with an accredited installer, and reviewing system performance each season to catch warning signs early.
Steps
Estimated time: 1.5-3 hours
- 1
Validate load vs capacity
Have a professional perform a load calculation to see if the current equipment matches the home’s heating and cooling demand. If the load exceeds capacity, plan for an upgrade or staged improvements. This step sets the foundation for accurate sizing.
Tip: A detailed Manual J calculation is the gold standard for sizing. - 2
Check airflow and filters
Inspect and replace air filters; ensure blower components are clean and ducts are sealed. Verify that registers aren’t blocked by furniture or drapes. Poor airflow is a common bottleneck that lowers effective capacity.
Tip: Dirty filters can cut airflow by up to 50% in some systems. - 3
Inspect outdoor unit and surroundings
Clear debris and maintain at least 3 feet of clearance around the outdoor coil. Remove snow buildup in winter and trim nearby vegetation. A blocked condenser reduces heat transfer efficiency.
Tip: Keep a seasonal checklist for outdoor unit clearance. - 4
Assess refrigerant status
Look for frost on lines or a noticeable oil stain near the connections. Refrigerant issues require a licensed technician; operating with a leak is unsafe and can damage the compressor.
Tip: Never attempt to add refrigerant yourself. - 5
Test thermostat and controls
Confirm the thermostat is in the correct mode (heat vs cool), review setpoints, and check if auxiliary heat is firing unnecessarily. Recalibrate or replace if readings are off.
Tip: Keep a log of temperature readings vs. setpoints to spot drift. - 6
Plan professional assessment if needed
If no improvement after the above steps, schedule a diagnostic with Heatpump Smart or a licensed pro to verify electrical components, pressures, and overall health.
Tip: Request a written report and a maintenance plan.
Diagnosis: Heat pump struggles to reach setpoint during peak loads
Possible Causes
- highUndersized equipment for home load
- highAirflow restrictions (dirty filters, blocked outdoor unit, duct leaks)
- mediumLow refrigerant charge or refrigerant leak
- lowThermostat miscalibration or control mis-set
Fixes
- easyVerify load vs capacity with a Manual J calculation and consider an upgrade if undersized
- easyImprove airflow: replace filter, remove obstructions around outdoor unit, seal ducts where possible
- mediumSchedule refrigerant charge check and leak repair with a licensed tech
- easyCalibrate or replace thermostat, verify wiring and mode settings
Your Questions Answered
Why is my heat pump running but not heating enough?
Common reasons include thermostat misreads, improper sizing, duct restrictions, or defrost cycles. Inspect airflow and thermostat settings first, then test under different loads before calling a pro.
If your heat pump runs but doesn’t heat enough, check thermostat settings and airflow; if it still underperforms, call a qualified technician for a deeper diagnostic.
What should I do if the outdoor unit is blocked by snow or debris?
Clear away snow and debris, maintain a 3-foot clearance, and ensure vegetation isn’t encroaching. Regular outdoor cleaning helps heat transfer and efficiency.
Clear the outdoor unit area, keep it free of snow, and ensure good clearance to improve performance.
Can low refrigerant cause underperformance?
Yes. Low refrigerant can reduce capacity and efficiency and may indicate a leak. Only a licensed technician should address refrigerant issues.
Low refrigerant reduces performance and should be fixed by a pro who can repair leaks and recharge safely.
Is upgrading the size the right solution?
If a load calculation shows the current unit is undersized, upgrading or adding supplementary systems may be necessary. This decision should be based on professional assessment.
An undersized system may need upgrading after a load test confirms the need.
How often should I replace filters?
Most homes benefit from changing filters every 1-3 months, depending on usage and filter type. Regular changes maintain airflow and efficiency.
Change filters every 1-3 months to keep airflow steady.
When should I repair vs replace the heat pump?
If repairs are frequent or the unit is old, a replacement with a high-efficiency model may be more economical in the long run. A pro can run cost-benefit analysis.
If frequent repairs occur and efficiency drops, replacement might be more economical.
Watch Video
Top Takeaways
- Start with airflow, filters, and outdoor clearance.
- Get a proper load calculation before upgrading.
- Regular maintenance prevents performance drops.
- Call a qualified pro if issues persist.