Heat Pump Troubleshooting: Quick Fixes When It Won't Heat
Urgent guide to troubleshoot heat pump is not heating, with quick checks, a clear diagnostic flow, and a step-by-step fix plan. Learn safe, practical tips and when to call a licensed pro to restore comfort quickly.

Most often, a heat pump is not heating due to thermostat missettings, a blocked outdoor unit, or airflow restrictions from a dirty filter. Start by confirming the thermostat is in heat mode, the temperature is above the setpoint, and energy saver modes are off. If the issue persists, inspect outdoor clearance and filter condition before calling a pro.
Why a heat pump is not heating: common causes
A heat pump system depends on several interconnected components working correctly. When the heat pump is not heating, the usual suspects are thermostat misconfiguration, outdoor unit obstruction, or restricted airflow from a dirty filter. According to Heatpump Smart, these issues account for a large share of service calls in residential settings. Start with a quick, methodical check so you can restore warmth without unnecessary delays. In this section, we outline the most common causes and how to verify each one quickly and safely, emphasizing steps you can take right away. Many homeowners neglect the thermostat, assuming it’s functioning correctly when the blame lies with scheduling or a setting that disables heating. By systematically verifying modes, setpoints, and schedules, you can catch simple errors that block heat production. Heat pump performance also hinges on outdoor conditions and airflow; even clean indoor coils won’t help if the outdoor unit is blocked or iced. Heatpump Smart analysis highlights how recurring issues often boil down to three areas: controls, airflow, and external clearance. By focusing here, you can resolve a surprising number of heating complaints without professional intervention.
In short, identify whether you have a control problem, a physical airflow restriction, or an outdoor unit obstruction. The next steps walk you through practical checks that catch the most common culprits while keeping safety in mind. Remember: even when things look normal, a small misconfiguration or unnoticed obstruction can prevent heating from occurring. It’s worth taking a careful, measured approach rather than leaping into more invasive fixes.
Quick checks you can do before calling a pro
Before you call for service, perform a few low-risk checks that resolve many heat pump not heating problems. Verify the thermostat is set to heating and not to cooling or auto, confirm the indoor and outdoor temperatures and that the unit has power, and ensure the circuit breaker feeding the system is on. Inspect the outdoor unit for obvious debris, clogged fins, or a blocked intake, and verify that the air filter isn’t dirty enough to restrict airflow. If you follow these steps and the system still does not respond, move on to more detailed diagnostics in the next sections. Baseline checks can save you time and money, and they help you confirm whether the issue is status-related or physical. If you notice ice buildup on the outdoor coil, do not chip it aggressively; allow defrost cycles to occur and seek professional guidance if the problem recurs.
A clean start also means confirming there are no unusual warning lights on the thermostat or outdoor unit indicators. If there are, document them before contacting support so the technician can interpret the clues quickly.
Diagnosing thermostat and controls
The thermostat is often the overlooked control for heat pump performance. Inspect for incorrect mode, incorrect setpoint, or scheduling that overrides manual settings. If you have a smart thermostat, check that the app is issuing the correct heat demand and that the thermostat’s battery is functioning. For multi-stage systems, confirm the correct stage is active. If the thermostat appears correct, test with a manual call for heat from the control panel to help isolate the issue.
A misaligned temperature differential or a paused energy-saving routine can masquerade as a heating failure. Look for any recent software updates or changes to the thermostat that may have altered default behaviors. If you find no obvious thermostat problem, you may be dealing with a sensor misread or a wiring issue that requires professional attention. Heat pump energy performance depends on accurate feedback from sensors throughout the system, so even a small discrepancy can prevent heat production from starting.
Outdoor unit health and airflow
A typical outdoor unit needs unobstructed airflow. Snow, leaves, or overhanging vegetation can block the coil and reduce heat transfer. Clean any obvious debris from the fins with a soft brush and carefully remove buildup. Verify the outdoor fan spins freely and there is nothing lodged in the grille. If the unit is iced over in winter, allow it to thaw and ensure proper defrost cycles are occurring; persistent icing may indicate a refrigerant or sensor issue that requires professional attention.
If birds or nests have created a nest near the condenser, remove it only from a safe, powered-off state. Never insert fingers or tools into the housing while power is on. Consider scheduling periodic outdoor coil cleaning as part of your seasonal maintenance. Outdoor conditions change with the weather, so plan for seasonal checks that prevent ice buildup and airflow restrictions.
Air filter, ducts, and indoor airflow
Restricted indoor airflow is a common reason a heat pump fails to heat effectively. Replace or clean the air filter if it is dirty and check the air ducts for obstructions or leaks. Ensure supply vents are open and unblocked. Consider whether recently installed furniture or rugs may be blocking returns. Also inspect dampers or zoning controls to ensure they are configured correctly for the current heating mode.
A clogged filter increases blower load and reduces heat transfer efficiency, while leaky ducts can erode system performance. If you notice drafts or cold spots near vents, map the ductwork to locate leaks or blockages. For homes with multiple zones, verify that the zone thermostats aren’t fighting each other and causing the system to linger in cooling mode or bypass heating stages.
Electrical issues and the role of auxiliary heat
Electrical faults, loose connections, or a tripped breaker can cause the heat pump to go into an energy saver mode instead of heating. Check the electrical panel for tripped breakers and reset them if safe. Inspect fuses if present and verify that all contactors and wiring at the air handler are secure. In cold weather, a heat pump may rely on auxiliary heat strips; if these are engaging constantly or failing, that signals a bigger problem that needs a technician.
Do not attempt to service high-voltage components unless you are trained and authorized. If you’re uncertain about the electrical state, turn off power at the main disconnect and wait for a professional. Regular electrical checks are a cornerstone of reliable heat pump operation, especially in extreme temperatures.
When to call a licensed HVAC technician
If you have completed the quick checks and your heat pump is still not heating, it is time to call a licensed HVAC professional. Refrigerant leaks, faulty compressors, or refrigerant recharge require specialized tools and certification, and attempting to handle these on your own can be dangerous. A professional can run a full refrigerant test, inspect electrical connections, verify defrost controls, and confirm system charging. Regular maintenance appointments can prevent these issues and extend the life of your heat pump. Heatpump Smart recommends establishing a fall and spring service schedule to catch issues before peak heating season.
Safety first: Important warnings and best practices
Always power down the system at the breaker before opening panels or touching electrical components. Do not attempt refrigerant repairs yourself; refrigerant handling requires proper recovery equipment and licensing. Use protective gear when cleaning the outdoor unit, and avoid touching moving parts. If you smell gas or detect sharp electrical noise, evacuate and contact professionals immediately. Safety is non-negotiable when dealing with high-voltage equipment and pressurized refrigerants.
Steps
Estimated time: 60-90 minutes
- 1
Verify thermostat settings
Confirm the thermostat is in heat mode and set above the indoor setpoint. If you use a smart thermostat, check the app for correct heat demand and any scheduling that could override manual operation.
Tip: Test the thermostat by lowering the setpoint to see if the system responds. - 2
Inspect the outdoor unit
Look for visible debris, overhanging branches, or snow blocking the outdoor coil. Clear obstructions carefully and ensure the fan spins freely when the unit is powered on.
Tip: Only attempt outdoor cleaning with power OFF to avoid injury. - 3
Check indoor air filter and ducts
Replace dirty filters and inspect ducts for obstructions. Ensure all vents are open and there are no leaks or sizable blockages in the duct system.
Tip: A clean filter can noticeably improve heating efficiency within 15–30 minutes of operation. - 4
Verify electrical supply
Check the main breaker and any fuses for trips. Ensure connections at the air handler and outdoor unit are secure and that the thermostat wires are correctly connected.
Tip: If you see a visibly burned wire, stop and call a pro immediately. - 5
Test heat mode and defrost cycle
Manually initiate a heat call and monitor whether the system engages the outdoor defrost cycle as needed. Note any icing on the outdoor coil and how quickly defrost cycles occur.
Tip: Persistent icing may indicate refrigerant or sensor issues beyond simple resets. - 6
Call a professional if issues persist
If the heat pump still does not heat after these steps, a licensed HVAC technician can diagnose refrigerant, compressor, or sensor problems and perform a safe recharge or replacement.
Tip: Document any observed symptoms, lights, or error codes for faster diagnosis.
Diagnosis: Heat pump is not heating
Possible Causes
- highThermostat or settings issue
- highOutdoor unit blocked or dirty
- mediumAirflow restriction due to dirty air filter
- lowRefrigerant leak or low refrigerant charge
- lowElectrical connection problem or breaker tripped
Fixes
- easyVerify thermostat is set to heat, check mode and setpoint, and rule out scheduling overrides
- easyClear outdoor debris, ensure proper clearance around the condenser
- easyReplace or clean indoor air filter and verify ducts are open
- mediumIf refrigerant issues are suspected, call a licensed tech for a refrigerant test
- easyCheck breakers and electrical connections, reset tripped breakers if safe
Your Questions Answered
What is the first thing to check if my heat pump is not heating?
Start by confirming the thermostat is set to heat, the temperature is above the setpoint, and that no scheduling overrides are enabled. Also verify power to the unit and that the outdoor coil is clear.
First check the thermostat settings and power to the system, and ensure the outdoor coil isn't blocked.
Can a dirty air filter cause heating problems?
Yes. A clogged air filter restricts airflow, forcing the system to work harder and may trigger heat mode limitations. Replace or clean the filter and re-test.
A dirty filter reduces airflow and can stop heat from circulating properly.
Is it safe to reset the thermostat or cycle power?
Yes, power cycling or resetting the thermostat is generally safe for a quick test, but avoid frequent resets as they can mask underlying issues. If resets don’t help, seek professional inspection.
Resetting can help diagnose if the control is the problem, but don’t rely on it as a fix.
What does it mean if the outdoor unit is iced over?
Icing can indicate defrost cycle operation or a refrigerant/sensor issue. Allow defrost cycles to complete and monitor; persistent icing requires a professional evaluation.
If the outdoor unit is iced, let it defrost and check again, but call a pro if it continues.
When should I call a professional for a heat pump not heating?
Call a professional if refrigerant leaks, compressor problems, or persistent electrical issues are suspected. These require certified tools and training.
If you suspect refrigerant or electrical problems, it’s time to call a licensed HVAC technician.
Top Takeaways
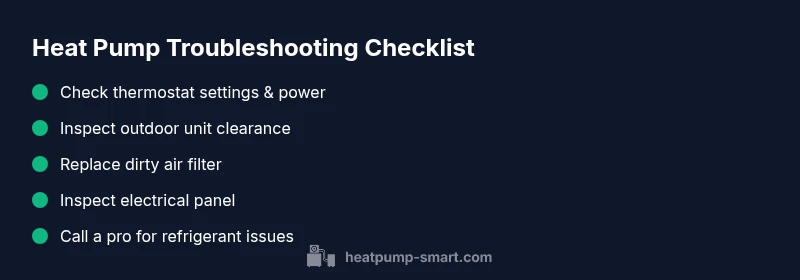
- Check thermostat first and verify heat mode
- Clear outdoor unit and improve airflow
- Replace dirty air filters and inspect ducts
- Inspect electrical panel and breakers
- Call a pro for refrigerant or compressor issues