Heat Pump Leaking Water Outside Unit in Winter: Troubleshooting Guide
Learn how to diagnose and fix a heat pump leaking water outside in winter. Quick checks, safe fixes, and prevention tips for homeowners and property managers.

The most likely cause is a blocked or frozen condensate drain that channels meltwater away from the outdoor unit. Start by turning off power to the heat pump, inspect and clear the condensate line, and thaw any ice around the drain. If water continues to leak after clearing, contact a qualified HVAC technician.
Understanding the Winter Water Leak
According to Heatpump Smart, a heat pump leaking water outside in winter is most often a drainage issue rather than a refrigerant problem. Condensate forms as the system removes humidity from indoor air, and in winter the condensate line is more vulnerable to freezing. When the line freezes or becomes clogged, meltwater can back up and spill over around the outdoor unit. You may notice water pooling at the base, a thin layer of ice on the drain tube, or water dripping from the pad where the unit sits. While a small amount of condensate is normal during operation, a steady or increasing leak usually signals a blockage or ice buildup that needs attention. The Heatpump Smart team found that blocked lines, improper slopes, and ice around the drain are the leading winter culprits homeowners can address with basic tools. However, never ignore a suspected refrigerant leak—if you hear hissing or see oily residue, evacuate and call a professional immediately.
In winter climates, outdoor components are more susceptible to temperature-driven changes. Ice can form at the drain outlet, and slushy meltwater may escape before the line clears. The goal is to restore proper drainage and ensure the line remains free of ice or debris. If you feel unsure at any point, prioritize safety and seek professional help to avoid electrical hazards or accidental refrigerant release.
Common Winter Causes of Exterior Leaks
Water leaking outside the unit during winter often points to condensate drainage issues rather than a refrigerant fault. The most frequent culprits include a frozen or blocked condensate drain, ice buildup around the drain outlet, and improper slope or damage in the condensate line. A clogged drain can be caused by algae, mineral deposits, or accumulated dust that restricts flow. Ice buildup around the outlet may freeze and then thaw unevenly, creating a small waterfall effect that drips near the base. Additionally, if the drain line does not slope correctly toward the wastewater line or if the pan is damaged, condensate can overflow to the exterior. Environmental conditions such as heavy snowfall or wind-driven moisture can exacerbate leaks by covering the drain or pushing melted water into unintended areas. Differentiating these issues from refrigerant problems is important; refrigerant leaks are not liquid water and are usually accompanied by other warning signs like odd refrigerant odors or reduced cooling/heating efficiency.
Understanding these common causes helps you prioritize the right checks and fixes without unnecessary repairs. Always begin with visible, non-invasive inspections before moving to more involved tasks.
Safety-First Checks You Can Perform
Before touching electrical components or disassembling any part of the unit, ensure safety by turning off power at the outdoor disconnect switch or the main breaker. Do not use metal tools near energized parts. Visually inspect the area around the outdoor unit for standing water, pooling, or ice buildup near the drain outlet. If you see water but no clear path to the drain, start by clearing snow or debris from the immediate area and widening the drain outlet to allow meltwater to escape freely. Do not attempt to modify the condensate pan or drain line beyond simple clearing. If you suspect a refrigerant issue (for example, hissing sounds or oily residue), do not continue testing—call a licensed technician. Finally, assess whether the condensate line is kinked or visibly damaged and note any signs of corrosion or leakage around the connection points. Safety and caution should guide every step of the process.
Diagnostic Flow At A Glance
Symptom: Water leaking from the outdoor heat pump during winter. Causes: Condensate drain frozen or blocked (high likelihood); Ice around the drain outlet or line (medium); Damaged slope or cracked condensate pan (low). Fixes: Clear the drain, thaw ice carefully, recheck slope, and assess for pan damage. If unsure, stop and consult a pro.
This flow helps you quickly narrow down the problem and decide whether a safe DIY fix is feasible or if professional service is warranted.
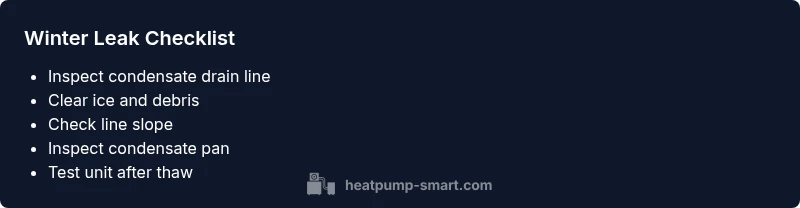
Step-By-Step Fixes For The Most Common Cause
- Locate and inspect the condensate drain line near the outdoor unit. Look for ice buildup, a blocked outlet, or visible kinks. 2) If you see ice, carefully remove it with warm (not boiling) water and a plastic spatula or brush; avoid metal tools. 3) Use a flexible brush or pipe cleaner to clear the line and, if safe, run warm water through the drain to flush debris. 4) Ensure the drain line slopes downward away from the unit toward a proper drainage area. 5) Recheck the condensate pan and connections for cracks or overflow indications. 6) Restore power and monitor the unit during a run cycle to confirm the leak has stopped. 7) If the leak returns or you notice refrigerant signs, call a professional immediately.
Prevention And Seasonal Maintenance
Implement ongoing maintenance to minimize winter leaks: keep the outdoor unit clear of snow and ice, maintain a proper slope for the condensate line, install a condensate trap or ventless drain if permitted by code, and schedule regular blower and drain inspections. Consider insulating exposed condensate lines to reduce freezing risk and improve drainage efficiency. Humidity control inside the home can also influence condensate production; use a humidistat to balance indoor humidity during dry winter periods. Finally, record any leak events and service visits to track performance and identify patterns that may indicate developing issues.
When To Call A Professional And What To Expect
If you observe persistent leakage after attempting safe clears, or if you notice hissing, unusual odors, or ice that returns quickly after thawing, contact a licensed HVAC technician. A professional can inspect refrigerant pressures, verify condensate drainage integrity, and check for pan damage or improper installation. Expect a diagnostic visit to include a visual inspection, a pressure test if warranted, and confirmation of system operation after service. Scheduling timely professional help can prevent water damage and ensure your heat pump operates efficiently during the winter season.
Steps
Estimated time: 30-60 minutes
- 1
Power down and secure the area
Turn off power to the outdoor unit at the disconnect or main breaker. Confirm the unit is not energized before touching any components. This is the first safety step to avoid shocks.
Tip: Use a battery-powered tester on visible switches to verify power is off. - 2
Inspect the condensate drain
Locate the condensate drain line and outlet. Look for ice, debris, or kinks. A blocked or frozen line is the most common winter culprit.
Tip: Clear debris gently with a plastic tool; avoid forcing the blockage. - 3
Clear ice and flush the line
If you see ice, carefully thaw it with warm water. Then flush the line with a gentle rinse to remove any buildup. Do not use boiling water.
Tip: Do not use sharp tools that could puncture the line. - 4
Check line slope and pan integrity
Ensure the condensate line slopes downward away from the unit toward a proper drain. Inspect the pan for cracks or overflow signs.
Tip: A small slope change can prevent future backups. - 5
Dry and test operation
Dry the area around the unit and re-energize the system. Observe for continued dripping and watch the condensate flow.
Tip: Run a short cycle to see if the leak recurs. - 6
Document and plan preventive steps
Note what you found, what you cleared, and any parts that needed repair. Plan a preventive maintenance schedule for winter.
Tip: Set a reminder for seasonal checks before the coldest months.
Diagnosis: Heat pump outside unit leaking water in winter
Possible Causes
- highFrozen or blocked condensate drain line
- mediumIce buildup around the drain outlet
- lowImproper condensate drain slope or damaged pan
Fixes
- easyClear the condensate drain line and remove ice from the outlet
- easyThaw ice around the drain and restore proper slope
- mediumInspect and repair damaged drain components or pan
- easyCall a professional if leak persists or refrigerant signs appear
Your Questions Answered
Why is my heat pump leaking water outside in winter?
Most often the leak is due to condensate drainage problems such as a frozen or blocked condensate drain. It is not typically a refrigerant issue. If you notice hissing, oil, or reduced efficiency, stop and call a pro.
Usually it's a condensate drain problem. If you hear hissing or see oil, stop and call a professional.
Is a frozen condensate line the most common cause?
Yes, a frozen condensate line is one of the most common winter causes of exterior leaks. Ice blocks the drain, causing meltwater to back up and spill outside.
Yes, a frozen condensate line is a common culprit in winter leaks.
Can I fix the leak myself?
Many minor leaks due to a frozen or blocked drain can be addressed safely with power off and careful clearing. Do not attempt repairs on damaged refrigerant lines or electrical components without training.
Some fixes are DIY-safe, but avoid touching refrigerant lines or electrical parts.
When should I call a professional?
If the leak persists after clearing the drain, or you notice operational signs like reduced heating, unusual noises, or refrigerant indicators, contact an HVAC technician promptly.
Call a pro if the leak continues after your checks or you notice signs of a refrigerant issue.
Will this leak damage my unit?
Chronic leaks can lead to water damage around the unit and surrounding structure. Repeated freezing and thawing can also degrade electrical components if water enters connections.
Persistent leaks can cause water damage and potential electrical issues; monitor and act quickly.
How can I prevent leaks in winter?
Keep the area clear of snow, ensure proper drain slope, inspect lines annually, and insulate exposed pipes. Regular maintenance reduces the chance of blockages and ice buildup.
Prevent leaks by clearing the area, checking slopes, and keeping lines insulated.
Watch Video
Top Takeaways
- Identify condensate drainage as the leading winter leak cause
- Turn off power before inspecting and start with the drain line
- Clear ice and debris; ensure proper line slope to prevent backups
- If leaks persist, call a professional promptly
- Implement seasonal maintenance to minimize future leaks