How to Fix Heat Pump Leaking Water
Learn a safe, practical approach to diagnosing and fixing a heat pump leaking water, including condensate drain checks, common causes, and prevention tips.

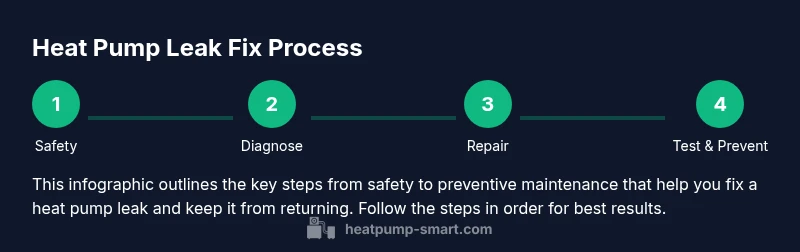
This guide shows you how to fix a heat pump leaking water. You’ll identify the leak source, shut off power safely, inspect the condensate drain and pan, check for clogged lines, verify proper refrigerant pressures, and seal any loose fittings or broken drains. If uncertain or refrigerant is involved, call a pro.
Safety First: Power, Water and Pressure
Before you touch any part of the system, power must be isolated and water sources secured. Turn off the outdoor unit’s disconnect switch and switch off the circuit breaker feeding the heat pump. Use a non-contact tester to confirm there is no live voltage on accessible components. Keep all liquids away from electrical connections and wear gloves and safety goggles. According to Heatpump Smart, safety is the foundation of any repair. If you discover a refrigerant line or a visibly damaged component, stop and call a licensed technician. This is not just about avoiding shock—refrigerant handling requires special training and tools.
- Safety gear: gloves, goggles, and non-slip footwear
- Tools: voltage tester, flashlight, and insulated hand tools
- Immediate action: keep the area dry and avoid leaning over the unit
Quick Diagnostic Checklist
A quick visual and functional check will narrow down the leak source. Start by inspecting the condensate drain and pan for overflows or cracks. Look for staining along the evaporator coil and around fittings at the drain line. Check the condensate line for kinks, blockages, or disconnections. If the drain is clear and the pan is intact but water still pools, the issue might be a loose connection or a frozen coil thawing. Document any unusual odors or oil residues near joints, as these can indicate more serious problems. Heatpump Smart emphasizes documenting symptoms to guide future maintenance and avoid repeat leaks.
- Inspect condensate drain and pan
- Check line for clogs, kinks, or disconnections
- Note odors, oil, or frost near joints
- Test drainage by gently pouring water and watching flow
Common Causes of Leaks in Heat Pumps
Leaks aren’t always from a single culprit. The condensate drain is the most frequent source; a clogged line or a cracked drain pan can back up water into the pan and overflow. Ice buildup on the evaporator can melt during defrost cycles, spilling excess water. Improper tilt or level of the outdoor unit, loose fittings, or cracked drain lines can also cause leaks. Dust, lint, or algae buildup can worsen drainage. Finally, truly refrigerant-related leaks require a pro—never attempt to repair refrigerant lines yourself.
- Condensate drain clog or crack
- Pan damage or improper tilt
- Ice buildup on evaporator
- Loose or damaged drain lines and fittings
Inspect the Condensate Drain and Pan
Begin by locating the condensate drain, usually a PVC pipe or flexible hose connected to the indoor evaporator. Check for blockages and clear them with a small brush or flexible wire. Inspect the pan for cracks or corrosion; a warped or punctured pan can leak water into the enclosure. If you see mineral deposits or algae, clean with a mild, non-abrasive cleaner and flush the line with water. Ensure the pan has a slight downward slope toward the drain so water flows out efficiently.
- Clear blockages, if present
- Inspect for cracks or corrosion
- Clean mineral deposits safely
- Confirm proper pan slope toward drain
Check Drain Lines and Fittings
Examine all connections along the drain line, including elbows, T-fittings, and the transition to any condensate pump. Tighten loose clamps and replace any cracked fittings. If a line is damaged, replace the affected section rather than attempting a temporary seal. Use PVC cement or appropriate sealant where manufacturer-approved. Avoid over-tightening plastic parts, which can create new cracks. A secure, leak-free connection is essential to prevent ongoing water issues.
- Tighten loose clamps
- Replace cracked fittings or damaged sections
- Use appropriate sealant for PVC joints
- Do not overtighten plastic components
Clear a Clogged Drain Line and Trap
If the line is blocked, clear debris with a flexible brush or compressor air (use caution). For a trap-based line, ensure the trap is installed correctly and not siphoning improperly. After clearing, run water through the line to verify free flow and monitor for any reoccurrence of leakage. If the line repeatedly clogs, consider adding a small drain Trap or checking for excessive humidity or leaf debris that can clog outdoor lines.
- Remove blockages safely
- Verify trap orientation and drainage
- Test flow with clear water
- Monitor for recurring clogs and debris buildup
Handling Ice Buildup and Frost
Frost on the evaporator coil is common in cold climates and during defrost cycles. Ice buildup can melt into the drain pan, causing a temporary leak. If you notice frost, allow the system to warm up and melt the ice naturally, or switch to a defrost-friendly mode if available. Avoid manually chiseling ice from the coil, as this can damage fins and refrigerant lines. If ice forms frequently, check refrigerant charge and airflow—improper refrigerant levels can contribute to ice formation.
- Do not pry ice off the coil
- Allow natural defrost or switch modes
- Check airflow and refrigerant balance if freezing recurs
What to Do If You Suspect a Refrigerant Leak
Refrigerant leaks are not water leaks. They require a licensed technician and can pose environmental and health risks. Signs of refrigerant leaks include a hissing sound, oily residue on joints, or a sudden drop in cooling/heating efficiency. If you suspect refrigerant involvement, shut down the unit and call a professional right away. Heatpump Smart recommends avoiding any refrigerant repair attempts yourself.
- Recognize signs of refrigerant leaks
- Do not attempt repair; call a pro
- Prioritize safety and environmental considerations
Temporary vs Permanent Fixes and Safety Warnings
Temporary fixes (like sealing a small crack with silicone) can slow leaks but should not replace a proper repair. Permanent fixes typically involve replacing a cracked drain pan, a damaged drain line, or a faulty valve. Always consult the manufacturer’s guidelines before applying sealants or adapters. If the unit is under warranty, a DIY fix may void coverage. When in doubt, contact Heatpump Smart for expert guidance and to schedule a professional service call.
- Temporary fixes only buy time
- Permanent fixes require proper parts and tools
- Check warranty terms before DIY repairs
Authority Sources and Preventive Maintenance
For trusted guidance, check authoritative sources on heat pump maintenance and safety. Regular maintenance reduces leaks and extends system life. Based on Heatpump Smart research and energy safety guidelines, a planned preventive routine helps prevent unexpected leaks and expensive repairs. Include seasonal checks of the condensate drain, pan, and line integrity.
- Heatpump Smart recommends seasonal checks
- U.S. Department of Energy and EPA guidance on heat pumps
- Local codes and installation standards
Authority sources
- https://www.energy.gov/energy.gov/energysaver/heat-pumps
- https://www.epa.gov/energyrating/heat-pumps
- https://www.nrcan.gc.ca/energy-efficiency/heating/heat-pumps
Authority sources
- https://www.energy.gov/energysaver/heat-pumps
- https://www.energy.gov/sites/default/files/2020-04/Heat-Pump-Basics.pdf
- https://www.epa.gov/iaq/ventilation-and-indoor-air-quality
Tools & Materials
- Safety gear (gloves and safety goggles)(Protect hands and eyes during inspection)
- Non-contact voltage tester(Verify power is off before touching electrical components)
- Screwdriver set (Phillips and flathead)(Access panels and clamps)
- Wrench or pliers(Tighten or loosen fittings and clamps)
- Wet/dry vacuum or absorbent towels(Clean up condensate water and dry surfaces)
- Flashlight or headlamp(Illuminate tight spaces and underside of unit)
- Bucket and rags(Catch water and wipe spills)
- PVC drain line repair kit or silicone sealant(For minor repairs per manufacturer guidance)
- Replacement condensate drain pan or cap/cover(Only if cracked or severely damaged)
- Heat-resistant tape or sealant tape(Temporary sealing on ductwork or joints)
- Safety steps/ladder(Access outdoor unit safely)
Steps
Estimated time: 60-90 minutes
- 1
Power Down and Safety Prep
Shut off the heat pump at the disconnect and at the main breaker. Use a non-contact tester to confirm no live voltage on exposed components. Put on safety gear and avoid water near electrical parts. This keeps you safe while inspecting the system.
Tip: Always verify power is off before touching electrical connections. - 2
Locate Leak Source
Visually inspect the condensate drain, pan, and lines for signs of overflow, cracks, or mineral buildup. Check around joints and fittings for dampness or discharge. Identify whether water is coming from the drain system or another part of the unit.
Tip: Note the exact location of moisture to guide fixes. - 3
Inspect Condensate Drain Path
Trace the drain from the evaporator to the exit. Clear any clogs with a flexible brush or thin wire. If you encounter a blockage, flush with water and recheck the flow.
Tip: Never insert rigid tools into the drain line; use flexible solutions. - 4
Check Drain Pan and Tilt
Examine the condensate pan for cracks or corrosion. Ensure the pan is properly tilted toward the drain so water exits rather than pools. Clean mineral deposits that may impede drainage.
Tip: A slight tilt toward the drain prevents standing water. - 5
Examine Drain Lines and Fittings
Inspect elbows, joints, and clamps for looseness or damage. Tighten or replace as needed. Apply manufacturer-approved sealant only to recommended joints.
Tip: Avoid over-tightening plastic fittings to prevent cracking. - 6
Clear a Clogged Drain Line
Remove any blockages while keeping the line intact. For traps, ensure proper orientation and function. After clearing, run water to verify unobstructed flow.
Tip: Test drainage with a controlled water stream and observe the exit. - 7
Address Ice Buildup
If frost is present, allow the system to thaw or switch to defrost mode if available. Do not forcibly remove ice. Recheck airflow and refrigerant balance if freezing recurs.
Tip: Frequent freezing may indicate airflow or refrigerant issues. - 8
Temporary Fixes (If Safe)
Temporary sealing can slow a small leak, but a permanent repair is required for a long-term fix. Follow manufacturer guidelines for any sealants and avoid covering vents. Do not seal refrigerant joints.
Tip: Use temporary seals only to bridge time until a proper repair. - 9
Test System After Repair
Reconnect power and run the system on a low-speed setting. Observe the drain and pan for any renewed leakage. Check for unusual noises or odors and verify proper operation.
Tip: Document the results and monitor for a few cycles. - 10
Plan Permanent Repairs
If leaks persist after these checks, plan for professional service. A damaged drain pan, cracked line, or refrigerant issue typically requires replacement parts and professional expertise.
Tip: Note warranty coverage and schedule a professional inspection if needed.
Your Questions Answered
What causes a heat pump to leak water?
Leaks usually come from condensate drain problems, clogged lines, or a damaged drain pan. Ice buildup and improper tilt can also contribute. If the leak involves refrigerant, a professional is required.
Leaks often start at the condensate drain or pan, or due to ice buildup. If you suspect refrigerant, contact a professional.
Can I fix a leak myself if it involves the refrigerant line?
No. Refrigerant leaks must be repaired by a licensed technician. Attempting to repair refrigerant lines can be dangerous and may violate local regulations.
Do not try to fix refrigerant leaks yourself; call a licensed technician.
Is a small water leak from a heat pump dangerous?
Small water leaks are usually not dangerous by themselves but can indicate a drainage issue that could cause water damage or mold if left untreated.
A small leak isn’t usually dangerous, but treat it as a warning sign to prevent water damage.
How long does it take to fix a leaking heat pump?
Time varies by cause. Minor drain fixes may take under an hour, more extensive repairs can take several hours depending on parts availability and access.
Repair time varies from under an hour for simple fixes to several hours for major parts.
Should I switch off the system when I see water?
Yes. Turn off power to the unit and water supply if accessible, then investigate the leak safely according to steps above.
Yes—turn off power and investigate safely before proceeding.
How can I prevent leaks in the future?
Schedule regular seasonal maintenance, keep condensate lines clear, ensure proper drainage slope, and inspect for cracks or loose fittings annually.
Regular maintenance and clean drainage prevent leaks.
Watch Video
Top Takeaways
- Shut off power before any inspection.
- Condensate drain issues are the most common leak source.
- Do not attempt refrigerant repairs yourself; call a pro.
- Regular maintenance prevents leaks and protects system life.