What to Do If Your Heat Pump Is Leaking
Step-by-step instructions to diagnose, stop, and prevent leaks from your heat pump. Learn safety tips, when to call a pro, and maintenance strategies to protect home comfort and efficiency.

Shut off power to the heat pump at the breaker and, if safe, stop any flowing water. Identify whether the leak is condensate-related or refrigerant-related, then follow a simple plan: inspect the condensate line, catch runoff, clear clogs, and avoid refrigerant contact. If the leak persists or you suspect refrigerant, call a licensed HVAC pro.
What causes leaks in heat pumps
Heat pumps are designed to move heat, but they can leak water, refrigerant, or both. The most common indoor leaks come from condensate systems: a clogged drain line, a failed condensate pump, or a cracked drain pan can allow water to escape and damage floors or ceilings. Indoor leaks might also appear as damp spots around the unit, musty odors, or mold growth. Refrigerant leaks are rarer but serious in their health and environmental impact. They typically show as oily stains along copper lines, a noticeable refrigerant smell, or a sudden drop in cooling performance. The Heatpump Smart team notes that leaks are usually a symptom of a system that needs inspection rather than an occasional anomaly. Understanding the difference between condensate leakage and refrigerant leakage helps you respond quickly and safely.
According to Heatpump Smart, quick recognition and proper initial actions can prevent water damage and protect indoor air quality. This emphasis on rapid assessment is especially important for families with children, pets, or sensitive occupants. In many cases, a simple condensate-line blockage is the root cause, and a quick cleaning or line rerouting resolves the symptom without costly downtime. Keep a calm approach, document what you observe, and avoid guesswork about refrigerant safety.
Distinguishing condensate leaks from refrigerant leaks
Distinguishing condensate leaks from refrigerant leaks begins with observation: condensate leaks are typically water-focused, appear near the indoor unit or along the drain line, and may occur during high humidity or in humid seasons. Refrigerant leaks may cause a sweet, ether-like odor, oily residue on copper lines, frost on outdoor coils, or a sudden drop in cooling capacity. For homeowners, moisture is not always a sign of impending refrigerant loss; moisture can come from humidity or plumbing leaks. Heatpump Smart analysis shows that most leaks in residential systems are condensate-related, often stemming from a clogged drain or a misaligned condensate pump. If you notice oily residue or a persistent gas-like smell, the system requires professional evaluation for refrigerant levels and potential leaks in the sealed refrigerant circuit.
Take note of the location of any damp spots and the time of year the leak occurs (for example, during heavy air conditioning use or in humid weather). Logging these details provides helpful context for a technician and can speed up diagnostics.
Safety considerations and immediate actions
Safety comes first. If you discover a leak, shut off the heat pump at the breaker and, if accessible, the water supply to the condensate drain. Do not attempt to seal or repair refrigerant lines yourself; refrigerant handling requires licensed certification and special equipment. Keep children and pets away from the area and avoid inhaling any fumes. If there is standing water near electrical components, do not touch anything that could conduct electricity. After power is off, use a dry cloth to gauge moisture levels and decide whether you can safely inspect the drain line. If you smell refrigerant or see bright oily residues, treat it as a refrigerant issue and call a professional immediately. Heatpump Smart emphasizes documenting the scene (photos, notes) to aid the technician and ensure thorough service.
In many homes, leaks that involve electricity and water together pose a higher risk of damage or injury, making a cautious, staged response essential.
Inspecting the system safely: what to look for
Begin with a visual sweep of the indoor unit and the immediate area around the condensate drain and pan. Look for signs of a clog, such as a blocked drain line or a full or cracked pan. Check the condensate pump if your unit uses one, ensuring it runs when the system is in cooling mode. Inspect the outdoor unit for frost buildup on coils, damaged refrigerant lines, and any oily spots near connections. If you see ice on the outdoor coil, it can indicate airflow issues or low refrigerant that require professional diagnosis. Note the color and clarity of any liquid: clean water is normal condensate, while oily residue points to refrigerant-related concerns. By keeping measurements and observations organized, you give technicians precise starting points.
Always wear gloves and eye protection when examining parts and avoid touching copper lines if you suspect refrigerant release.
When to call a professional and what to expect in service
If you confirm or suspect a refrigerant leak, or if the condensate cleanup doesn't resolve the issue, contact a licensed HVAC technician promptly. Refrigerant leaks require EPA-certified technicians and specialized recovery equipment. When you call, provide your unit’s model and age, symptoms, and any photos you took. The technician will typically perform a pressure test, check for refrigerant line damage, inspect electrical connections, and evaluate the condensate system. Expect a leak diagnosis, possible repair or component replacement, and a test run to verify that the system operates without further leaks. If a refrigerant issue is found, the technician will advise on refrigerant recharge or partial repair, and discuss potential warranty coverage. Heatpump Smart recommends routine post-service testing to ensure no hidden leaks persist.
In some cases, a leak is a symptom of a larger system problem, such as improper installation or aging components. A professional evaluation helps prevent recurring leaks and maintains energy efficiency.
Maintenance and prevention tips to avoid leaks
Proactive maintenance is your best defense against leaks. Schedule annual or biannual HVAC checkups with a licensed technician. Regularly inspect and clear the condensate drain line and trap; ensure the line slopes correctly toward the pan and drain. Replace or repair damaged drainage components promptly and verify that the condensate pan is intact and properly sealed. Clean the outdoor unit’s coils to optimize airflow, reducing the risk of ice formation that can cause leaks. Use a high-quality air filter and keep the surrounding area free of dust and debris that could clog the drain. Consider installing a condensate overflow alarm or a float switch for early warning of blockages. Finally, document any changes in performance; early signs of a problem saved many homeowners from major repairs. Heatpump Smart’s ethos emphasizes prevention through routine checks and timely professional intervention when needed.
Tools & Materials
- Nitrile gloves(protect hands from contaminants)
- Flashlight(for dark access areas and panels)
- Bucket or towels(to catch and contain water during inspection)
- Wet/dry vacuum(optional for clearing condensate line if safe)
- Camera or smartphone(document leaks and damage for the technician)
- Basic tools (screwdrivers, adjustable wrench)(only if you need to open panels or inspect connections)
- Safety goggles(eye protection when handling leaks or cleaning)
- Sealant or duct tape(temporary containment if safe and necessary)
Steps
Estimated time: Total time: 60-90 minutes
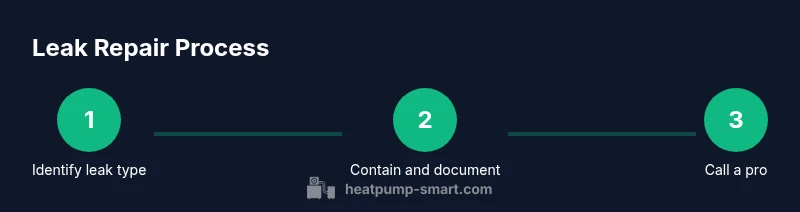
- 1
Power down and secure area
Shut off the heat pump at the breaker and, if accessible, close the water supply to the condensate drain to prevent further flow. Verify the area is dry before touching components.
Tip: Always verify power is off with a tester before touching electrical components. - 2
Inspect condensate line and pan
Follow the condensate line from the indoor unit to the drain. Look for clogs, kinks, or a cracked pan. Clear blockages if you can do so safely with a wet/dry vacuum or by flushing with water.
Tip: Take photos of the line and pan to show the technician. - 3
Contain and document runoff
Place towels or a bucket to catch any remaining runoff. Photograph damp areas and note location, color, and whether the leak coincides with HVAC cycling.
Tip: A clear evidence trail helps the technician diagnose faster. - 4
Check refrigerant lines visually
Look for oily residue on copper lines, damaged insulation, or loose fittings. Do not attempt to seal or repair refrigerant lines yourself.
Tip: If you see oil, treat it as a refrigerant issue and contact a pro immediately. - 5
Decide on temporary containment only if safe
If you can do so safely, place a temporary barrier to minimize spread, but never work on active electrical components or pressurized lines.
Tip: Never use household sealants on refrigerant lines. - 6
Prepare information for the technician
Record model/serial numbers, last service date, observed symptoms, and any photos. This helps the tech diagnose more quickly.
Tip: Bring a checklist to the service visit to ensure all concerns are addressed. - 7
Schedule professional inspection
Contact a licensed HVAC technician promptly for refrigerant issues or unresolved condensate leaks. Discuss warranty coverage and next steps after the visit.
Tip: Ask about cabin warranty, air filter changes, and expected timelines for repair.
Your Questions Answered
Is a leaking heat pump dangerous?
Leaks can cause water damage and mold growth; refrigerant leaks are hazardous and require immediate professional assessment. If you suspect refrigerant, evacuate the area and call a licensed HVAC technician.
Leaks can be dangerous, especially if they involve refrigerant. If you suspect refrigerant, leave the area and contact a licensed HVAC technician right away.
What should I do first when I notice a leak?
Shut off power to the unit at the breaker and, if safe, stop any water flow from the condensate line. Document what you see and noises you heard, then decide whether to call a pro.
First, switch off power and stop water flow if safe. Then document observations and contact a professional if the leak continues.
Can I fix a condensate leak myself?
Simple clogs or misdirected lines can sometimes be cleared by a homeowner, but any persistent leak or signs of damage should be handled by a professional.
Small clogs might be fixable, but persistent leaks require a pro to avoid water damage or electrical risks.
What maintenance helps prevent leaks?
Regular condensate line cleaning, proper pan drainage, clean outdoor coils, and annual HVAC inspections significantly reduce leakage risk.
Regular maintenance and line cleaning greatly reduce leak risk.
Should I recharge refrigerant myself if a leak is found?
No. Refrigerant charging and leak repair require EPA certification and specialized equipment. Have a licensed technician perform the work.
Don’t try to recharge refrigerant yourself; call a licensed technician.
What information should I provide to the technician?
Provide unit model/age, symptoms, photo evidence, locations of leaks, and any noises or odors observed to speed up diagnosis.
Tell the technician the model, age, symptoms, and share photos if you have them.
Watch Video
Top Takeaways
- Shut off power and stop water flow if safe.
- Differentiate condensate vs refrigerant leaks before acting.
- Document and photograph the leak area for the technician.
- Avoid DIY refrigerant repairs; call a licensed pro.
- Schedule regular maintenance to prevent future leaks.