Heat Pump Leaks Water: Essential Troubleshooting Guide
Diagnose and fix a heat pump that leaks water with this urgent, step-by-step guide. Learn common causes, safe checks, and when to call a pro.

Most heat pump leaks come from drainage and icing issues, not a refrigerant problem. The quickest fix is to shut off the unit, inspect the condensate drain line and pan, then clear any clogs and verify the pan is draining correctly. If water continues to pool, check airflow and filter condition, then call a pro for a refrigerant or seal repair.
Why heat pump leaks water
When a heat pump leaks water, the likely culprits are condensation from humidity, a blocked condensate line, or the defrost cycle causing temporary water discharge. According to Heatpump Smart, many leaks originate from drainage problems rather than refrigerant issues, which are typically more dangerous. The evaporator coil in the indoor air handler condenses moisture from warm air, and that water must be carried away through a properly sloped drain line into the condensate pan and out of the building. If any part of this drainage path is clogged, damaged, or frozen, water can back up and pool around the unit. The first sign is often a damp floor near the air handler or a soggy ceiling tile in a finished basement. In the outdoor unit, ice on the coil during cold weather can melt and release water as the system cycles, contributing to visible leaks.
Common sources of moisture around heat pumps
Moisture around a heat pump can come from several points along the drainage and cooling cycle. The condensate drain line is the most frequent failure point—look for blockages, kinks, or a displaced line. The condensate pan and float switch prevent overflow, but a cracked pan or stuck float can overflow. Ice buildup on the outdoor coil in winter can melt and drip water when the defrost cycle ends. Poor insulation and dusty filters reduce airflow and encourage excessive condensation. Finally, a refrigerant leak may cause frost but is less likely to produce standing water; if you suspect a refrigerant issue, stop using the unit and call a pro for a leak check.
Safety first: turn off power and prep for inspection
Before touching any wiring or components, switch off power at the breaker and, if possible, at the outdoor disconnect. Water and electricity are a dangerous combination, so wear non-slip footwear and avoid standing in water. With power off, visually inspect accessible drain lines for visible clogs, check the condensate pan for cracks, and verify that the indoor air filter is clean and not restricting airflow. If you feel unsure at any point, stop and proceed under professional guidance.
Diagnostic approach: narrowing down the leak source
A systematic approach helps distinguish condensate-related leaks from more serious failures. Start with drainage: confirm the condensate line runs downhill to the drain and that the pan has a proper slope. Then inspect for ice or frost around the evaporator; if present, cleaning or replacing a dirty filter and improving airflow can resolve it. If the water appears near the outdoor unit, check for ice buildup and ensure proper clearance and drainage. Finally, listen for unusual sounds—hissing or bubbling can indicate refrigerant issues.
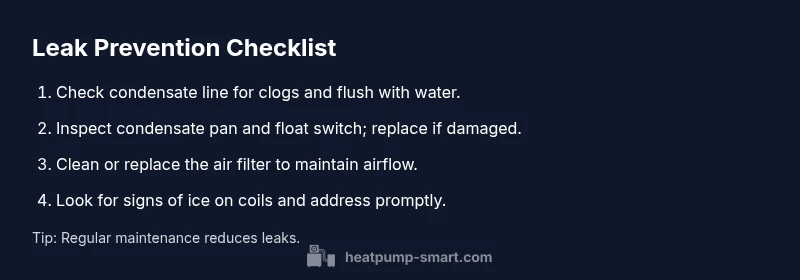
Maintenance tips to prevent leaks
Regular maintenance dramatically reduces leak risk. Clean or replace the air filter every 1–3 months, depending on usage and dust levels. Keep the condensate line clear by flushing it with water or using a mild cleaning solution periodically. Inspect the condensate pan and float switch annually and replace any damaged parts. Schedule professional inspections before winter and after major weather events to catch problems early.
When to call a professional and what to expect
If basic checks do not stop the leak, or you suspect a refrigerant leak, contact a licensed HVAC technician immediately. A pro will perform a pressure test, inspect refrigerant lines, and verify electrical connections safely. Expect a thorough diagnosis, a clear estimate, and, if needed, coil, pan, or line replacements. The Heatpump Smart team emphasizes proactive maintenance to prevent costly repairs and ensure long-term efficiency.
Steps
Estimated time: 60-90 minutes
- 1
Power off and secure the area
Switch off the heat pump at the thermostat and the main breaker. Verify the outdoor unit is safe to touch and remove any water from the immediate area to avoid slipping. This initial safety step protects you from shocks and shorts as you inspect drainage components.
Tip: Always start with safety; never work on live electrical components. - 2
Inspect condensate drain line for clogs
Trace the drain line from the indoor evaporator to the exterior outlet. Look for visible blockages, kinks, or a displaced line. Use a dry vacuum or a small brush to loosen debris and flush with warm water.
Tip: A clogged line is the most common leak source; a simple flush often resolves it. - 3
Check condensate pan and float switch
Examine the pan for cracks or standing water nearby. Ensure the float switch moves freely and hasn’t stuck in the 'overflow' position. If damaged, replace the pan or switch per the manufacturer instructions.
Tip: A stuck float switch is an easy fix but may indicate a larger drainage issue. - 4
Assess airflow and filter condition
Remove the air filter and inspect for dust buildup. A clogged filter reduces airflow, forcing more moisture to condense. Clean or replace the filter and run the system to see if the leak persists.
Tip: Clean, not reuse, dirty filters; set a reminder for routine changes. - 5
Check for ice on coils and outdoor unit
If you see frost on the outdoor coil, turn off the outdoor unit for a few minutes to thaw, then restart. Ensure adequate clearance around the unit for proper airflow.
Tip: Frequent icing usually means airflow restriction or low refrigerant; investigate further. - 6
Test operation and confirm leak source
Once you’ve addressed the drainage and airflow, run a short cycle. Look for water pooling near the pan or line. If leakage continues, document conditions and prepare to call a professional.
Tip: Take photos of the leak area to help the tech diagnose faster.
Diagnosis: Heat pump leaks water
Possible Causes
- highBlocked condensate drain line
- mediumCracked condensate pan or faulty float switch
- lowIce buildup on outdoor coil causing meltwater
- lowRefrigerant leak leading to icing or condensation
Fixes
- easyClear the condensate drain line and ensure proper slope to the drain
- easyInspect and replace cracked condensate pan or faulty float switch
- easyClean or replace dirty air filter and improve airflow
- hardCall a licensed tech for refrigerant leaks or coil repairs
Your Questions Answered
Why is my heat pump leaking water?
Leaks are usually due to condensate drainage issues. A blocked drain line or pan can overflow, especially if airflow is restricted. Refrigerant leaks are rare and typically accompanied by other symptoms.
Leaks are usually from drainage problems, not refrigerant. Check the drain line and pan first.
Is a water leak from a heat pump dangerous?
Water by itself is not typically dangerous, but electrical components and refrigerant are. If you see moisture near wiring or hear buzzing, stop and call a professional immediately.
Moisture near wiring is hazardous; shut off power and call a pro.
Can a clogged drain cause leaks?
Yes. A clogged condensate drain line is the most common cause of indoor leaks. Clearing the line and ensuring proper slope usually stops the leak.
A clogged drain is the most common leak cause; clearing it often fixes the issue.
When should I call a professional for a leak?
If basic checks don’t stop the leak or you suspect refrigerant issues, contact a licensed HVAC technician. A pro can safely diagnose and repair leaks and verify refrigerant levels.
If in doubt, call a licensed HVAC technician to inspect for refrigerant leaks.
What’s the difference between a water leak and a refrigerant leak?
Water leaks come from condensate lines, pans, or ice. Refrigerant leaks may cause icing and reduced cooling and require professional handling due to safety and environmental regulations.
Water leaks are condensate issues; refrigerant leaks require a professional and are more serious.
Watch Video
Top Takeaways
- Check condensate line first for clogs.
- Shut power off before any inspection.
- Call a licensed pro for refrigerant or coil issues.
- Regular maintenance prevents future leaks.
- Monitor for ice buildup as a warning sign.