How can you tell if your heat pump is leaking
Spot heat pump leaks early with practical signs, safe checks, and step-by-step fixes. Heatpump Smart guides homeowners and managers to protect efficiency and avoid costly damage.

The most common sign is moisture or droplets near the outdoor unit and frost on the outdoor coil, often with a drop in heating efficiency. Start by inspecting the condensate drain, pan, and refrigerant lines for pooling or damp spots. If you suspect a refrigerant leak, contact a licensed HVAC technician immediately.
Why leaks matter for heat pumps
According to Heatpump Smart, understanding how can you tell if your heat pump is leaking is essential to protect efficiency and indoor comfort. A leak wastes energy, raises electricity bills, and can damage components over time. Unseen refrigerant leaks may reduce heating or cooling performance and pose environmental hazards. Timely detection matters for homeowners, builders, and property managers who rely on consistent comfort and predictable operating costs. Leaks can originate from loose fittings, corroded lines, or compromised evaporator coils, and the consequences scale with system size and usage. In a typical home, a small refrigerant loss can degrade performance gradually, while larger leaks may trigger noticeable temperature swings and more frequent cycling. Regular checks and a clear leak-reporting routine help your team act fast and minimize downtime. Heatpump Smart recommends proactive inspection as part of a quarterly maintenance plan and before seasonal shifts when demand is highest.
Why leaks matter for heat pumps
Why it matters — A leak reduces efficiency, increases energy costs, and can cause equipment damage if not addressed promptly. Routine inspections catch problems before they escalate, protecting comfort and resale value. Heatpump Smart cautions that refrigerant leaks are hazardous both to health and the environment, so never attempt to seal or repair unless you are licensed. Proactive checks help homeowners, builders, and property managers maintain performance, keep warranties valid, and avoid emergency repairs during peak seasons. The cost of a small leak is often offset by the savings from early intervention, so establishing a simple, repeatable inspection habit is worth the effort.
What you’ll learn here
- Signs of possible leaks and how to verify them safely
- A practical diagnostic flow that prioritizes safe checks
- Step-by-step fixes for common leak sources that you can perform or prepare for a professional
- Maintenance habits to prevent leaks from returning
- When to escalate to a professional and what to expect during service
Steps
Estimated time: 60-90 minutes
- 1
Power down and safety check
Turn off the heat pump at the breaker to prevent starting unexpectedly. Confirm there is no standing water near electrical panels and wear protective gloves before touching any components. This step reduces risk as you move through inspections.
Tip: If you smell refrigerant or see hissing noises, leave the area immediately and call a professional. - 2
Inspect condensate drain and pan
Locate the condensate drain line and pan under the indoor air handler. Clear any clogs, ensure the pan is intact, and verify the drain is unobstructed so water can flow freely. A blocked drain can mimic leak symptoms by causing overflow and moisture on the floor.
Tip: Run a small amount of water through the drain with the system off to confirm drainage works. - 3
Check refrigerant lines and joints visually
Look for oil residue on copper lines, corroded fittings, or staining around connections. Any dampness or discoloration could indicate a leak near a joint. Do not attempt to seal joints—this requires a licensed technician.
Tip: Use a bright flashlight and a mirror if needed to inspect hard-to-see areas. - 4
Assess the outdoor coil and defrost cycle
Inspect the outdoor unit for frost buildup on the coil, which can indicate improper defrost cycling and moisture accumulation. Verify that the outdoor fan runs smoothly and the defrost timer engages appropriately.
Tip: If frost is persistent, avoid running the unit until a tech checks refrigerant levels and defrost control. - 5
Watch for ice, frost, and unusual sounds
Persistent ice on the coil or hissing sounds near service ports can signal a refrigerant issue. Note any unusual vibrations or changes in noise level during operation as these can help a tech pinpoint the source.
Tip: Document dates and symptoms to share with the technician for faster diagnosis. - 6
Contact a licensed HVAC professional
If you detect any sign of a leak or if the unit continues to operate with frost, call a pro. They will conduct a leak test, verify refrigerant charge, and perform safe repairs with proper equipment.
Tip: Provide model and serial numbers, and describe symptoms to speed up the service call.
Diagnosis: Frequent ice on the outdoor unit, increased energy bills, or visible moisture around the system
Possible Causes
- highRefrigerant leak within the refrigerant loop or joints
- highClogged condensate drain or overflowing pan
- mediumLoose fittings or corrosion on copper lines
- lowDefective or blocked defrost cycle causing abnormal moisture
Fixes
- hardSchedule refrigerant leak testing with a licensed tech; do not attempt repair yourself
- easyClear condensate drain, clean tray, and ensure proper drainage
- mediumTighten fittings and inspect joints for oil residue or corrosion
- easyInspect defrost controls and outdoor fan operation; ensure proper cycle timing
Your Questions Answered
What are the common signs a heat pump is leaking?
Look for frost on the outdoor coil, damp spots around the system, ice buildup, strange odors, and a drop in heating or cooling performance. These signs warrant a closer inspection by a professional to confirm any refrigerant leaks.
Common signs include frost on the outdoor coil, damp spots, ice buildup, and reduced performance. If you notice these, contact a licensed tech.
Can water pooling around the unit mean a leak?
Water pooling can indicate a clogged condensate drain or overflow. It may not always be refrigerant-related, but it should be checked promptly to prevent water damage.
Water pooling often means a drain issue, but it should be checked to rule out leaks.
Is a leaking heat pump dangerous?
Yes. Refrigerant leaks can be hazardous to health and the environment. Do not attempt repairs yourself; evacuate the area and call a licensed HVAC technician.
Yes. Refrigerant leaks are hazardous—leave the area and call a pro.
Can I fix a leak myself?
No. Leaks require professional leak testing, proper handling of refrigerant, and verified recharging. Attempting DIY repairs can be unsafe and illegal in many jurisdictions.
Repairing refrigerant leaks is not a DIY job—call a licensed technician.
How long does a professional leak repair take?
Repair time varies with the leak location and system type. A typical inspection and leak repair can take a few hours, with testing to ensure proper refrigerant charge afterward.
It varies, but expect a few hours for inspection, repair, and testing.
Will fixing a leak improve energy savings?
Yes, repairing leaks restores proper refrigerant charge and airflow, which improves efficiency and can reduce energy costs over time.
Fixing leaks improves efficiency and can lower energy costs.
Watch Video
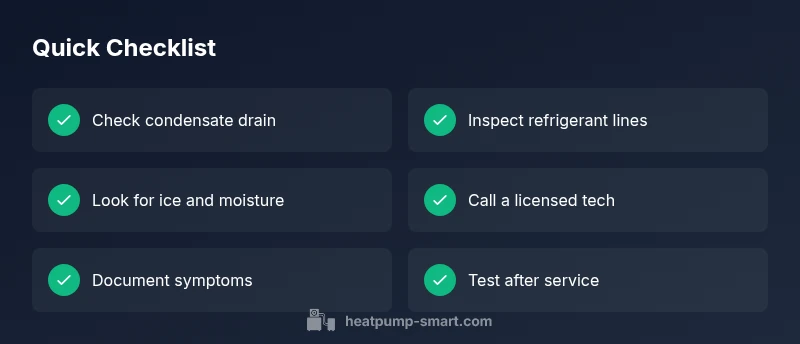
Top Takeaways
- Check condensate drain routinely
- Look for frost and moisture signals
- Do not reseal refrigerant lines yourself
- Call a licensed pro for leaks
- Maintain a regular service schedule