Heat Pump Water Heater Repair: A Complete Step-by-Step Guide
Learn safe, practical methods to diagnose and repair common heat pump water heater issues, with DIY steps, essential tools, and guidance on when to call a licensed technician for refrigerant or electrical issues.

You’ll diagnose and repair common heat pump water heater issues by following a structured DIY approach: inspect electrical connections, verify thermostat settings, check the condensate path, and assess airflow. This guide emphasizes safety, proper tools, and when to escalate to a professional for refrigerant or complex electrical faults.
Common causes of heat pump water heater repair needs
In many homes, heat pump water heaters fail to perform optimally due to a handful of recurring issues. According to Heatpump Smart, most DIY repairs focus on straightforward electrical checks, drainage, and thermostat settings before escalating to professional service. The unit’s reliability depends on proper sizing, air flow, and clean condensate pathways. If your unit is producing insufficient hot water, running continuously, making unusual noises, or triggering fault codes, you likely face one of several common faults: faulty thermostat, blocked evaporator coil, dirty air filters, condensate pump problems, or refrigerant pressure concerns. Understanding these faults helps you plan the right course of action and avoid unnecessary parts replacement. This section lays the groundwork by outlining typical symptoms, how to verify them safely, and how to prioritize repair steps in a logical, measurable way. We’ll also discuss how to document symptoms for future reference or for a technician.
The Heatpump Smart team emphasizes that careful observation and documentation often prevent unnecessary service visits and help technicians diagnose faults faster when you do reach out for professional help. Weather and usage patterns in 2026 can influence heat pump behavior, so noting outdoor temperatures and water usage during a fault can be valuable for a technician.
wordCountForBlock":null
markdownRendering":true}
Diagnosing symptoms and gathering data
A methodical approach to diagnosing problems starts with symptom collection. Begin by noting when the issue occurs (time of day, duration, and water temperature changes). Check for fault codes displayed on the unit’s control panel, taking photos if possible. Listen for unusual noises like banging or squealing, which can indicate loose components or mechanical wear. Record water temperature readings at different draws to determine if the heating cycle is meeting setpoints consistently. During diagnosis, compare observed behavior against the manufacturer’s service literature for your specific model. If the unit is relatively new, review recent installation notes—misconfigurations or improper wiring from installation are common root causes of early faults. Heatpump Smart suggests maintaining a symptom log for quick reference when you contact support.
wordCountForBlock":null
markdownRendering":true}
Safety first: power off, water isolation, and environment
Safety tops the list when performing any repair on a heat pump water heater. Before touching any electrical components or accessing the unit’s service panel, shut off the power at the main breaker and use a non-contact tester to confirm there is no voltage present. Close the cold-water supply and, if possible, drain a small amount of water from the tank to inspect for leaks. Ensure the unit is in a dry, well-ventilated space with clear access to the condensate drain. Wear protective eyewear and insulated gloves to guard against sharp edges and hot surfaces. If you detect a refrigerant smell or suspect a refrigerant issue, stop immediately and contact a licensed technician—refrigerant handling requires proper certification. Heatpump Smart’s guidance reinforces that safety is not negotiable and that many steps should be halted if you feel uncertain.
wordCountForBlock":null
markdownRendering":true}
Step-by-step troubleshooting by symptom
This section walks you through a practical, symptom-driven approach. Start with the simplest checks and progress to more involved diagnostics. Use the included tools to verify electrical integrity, thermostat accuracy, and drainage performance. If the unit is not delivering hot water, confirm the setpoint on the thermostat matches your household needs and verify there is no interruption in the heat pump’s power supply. If the unit runs continuously, inspect the condenser coil for dirt buildup and ensure air is circulating adequately. For noises, tighten loose panels and inspect fans for obstruction. If you notice leaks or water pooling, inspect seals, hoses, and fittings for signs of wear. Each step emphasizes safety, documentation, and a clear path to escalation if the fault persists. Heatpump Smart notes that persistent faults often indicate worn components or incorrect configuration rather than a single quick fix.
wordCountForBlock":null
markdownRendering":true}
Core components and how they function
Understanding how a heat pump water heater works helps pinpoint where faults arise. The system relies on an evaporator coil to absorb heat from the surrounding air, a condenser coil to release heat into the water, a refrigerant loop, a compressor, a fan, and a smart control board. If any of these components fail or become dirty, efficiency drops and faults can appear as reduced hot water, longer heating cycles, or strange sounds. The thermostat acts as the training wheel for the system, setting the target water temperature. Clean air filters and unobstructed airflow keep the evaporator working efficiently. By knowing the function of each part, you can better decide which part to inspect first and what tests to perform with your basic tools. The Heatpump Smart team highlights that routine checks of air flow and thermostat settings often solve minor issues without needing professional service.
wordCountForBlock":null
markdownRendering":true}
When to replace components versus calling a pro
Some issues are within the scope of a DIY repair, such as cleaning filters, clearing simple drainage blockages, or adjusting thermostat settings. Other problems require professional service, especially refrigerant leaks, sealed refrigerant circuits, or electrical faults beyond basic tests. If you observe persistent fault codes, hear unusual noises after reassembly, or detect an electrical smell, pause and contact a licensed technician. For refrigerant-related concerns, refrigerant handling is regulated and must be performed by certified technicians. In 2026, many jurisdictions require professional service for complex repairs to guarantee system safety and efficiency. This section helps you decide when DIY work is appropriate and when to bring in a pro.
wordCountForBlock":null
markdownRendering":true}
Maintenance to prevent future repairs
Preventive maintenance reduces the likelihood of sudden, costly failures. Schedule an annual inspection with a qualified technician and perform monthly checks on filters, condensate line, and drain pan. Regularly inspect seals and hoses for signs of wear or cracking. Clean the evaporator coil and ensure the air intake is unobstructed. Check electrical connections for signs of looseness or corrosion and verify voltage consistency. Maintaining a clean, well-ventilated space around the unit also protects the system from dust buildup and moisture-related issues. Heatpump Smart’s guidance for homeowners emphasizes proactive maintenance to maximize efficiency and extend equipment life. Remember, consistent maintenance can yield noticeable energy savings and more reliable hot water delivery.
wordCountForBlock":null
markdownRendering":true}
Quick-start safety checklist and next steps
Before attempting any repair, prepare a simple safety checklist: power off, verify no voltage, close water supply, and ensure the space is dry. If you’re ever unsure about a step, pause and consult a professional. This section provides a practical, at-a-glance checklist you can print and keep near the unit. After you complete the DIY steps, test performance by running a normal hot water draw and monitoring temperature and cycle times. If the problem persists after all safe checks, contact a licensed technician for a thorough diagnostic. The Heatpump Smart team recommends using professional help when electrical or refrigerant issues exceed your comfort level or safety concerns.
wordCountForBlock":null
markdownRendering":true}
Tools & Materials
- Voltmeter or multimeter(Test electrical components safely; verify voltage levels on control board and sensors.)
- Non-contact voltage tester(Confirm power is off before touching any wiring.)
- Screwdrivers (Phillips and flathead)(Access covers and panel screws; have a small Phillips and a small flathead on hand.)
- Non-conductive gloves(Grip and insulation when handling panels and hoses.)
- Bucket and towels(Contain condensate and prevent spills during drain checks.)
- Wrench or pliers(Disconnects or hoses if needed for draining or coil access.)
- Safety glasses(Eye protection against debris and splashes.)
- Unit model manual or service literature(Model-specific procedures and safety warnings.)
- Thermometer or temperature strip(Verify water temperature during tests.)
Steps
Estimated time: 90-150 minutes
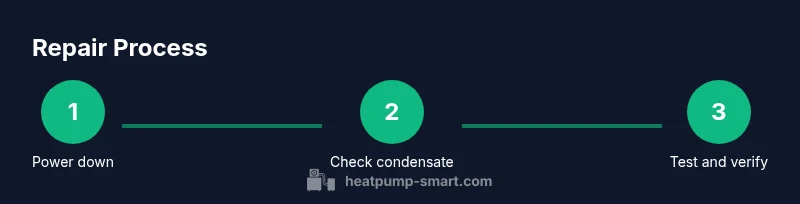
- 1
Power down and verify isolation
Turn off the unit at the breaker panel and disable the dedicated power switch if present. Use a non-contact tester to confirm no live voltage at control panels and sensors before touching any wires. Why: prevents electric shock and protects sensitive electronics during inspection.
Tip: Always double-check with a tester even if you believe power is off. - 2
Shut water supply and drain
Close the cold-water inlet and place a bucket under the drain valve to catch any residual water. Slowly open the drain valve to release pressure and inspect the drain path for blockages. Why: safe drainage prevents unexpected leaks while you inspect coils and fittings.
Tip: Do not open hot water valves while the system is pressurized. - 3
Inspect external components
Visually inspect the fan, condenser coil, and access panels for dust, debris, or loose parts. Clean dust buildup with a soft brush or vacuum; ensure airflow is unobstructed. Why: dirty coils reduce heat exchange efficiency and trigger faults.
Tip: Do not use water directly on electrical components. - 4
Check thermostat and controls
Verify the water temperature setting aligns with your household needs and the unit’s high-limit safety setting. Check for recent changes or firmware updates that might affect performance. Why: incorrect settings are a common source of under-heating or over-cycling.
Tip: If settings are unfamiliar, refer to the model manual for approved ranges. - 5
Test electrical connections
Tighten loose wires on the control board, contactors, and sensors if you observe any signs of arcing or corrosion. Use the multimeter to verify continuity and resistance where applicable. Why: loose connections can cause intermittent faults and reduced efficiency.
Tip: Only test with the device powered down unless you’re trained. - 6
Inspect condensate path and pump
Clear the condensate drain line, check the pump (if present) for proper operation, and ensure the drain pan is dry and unobstructed. Why: condensate issues can trigger fault codes and reduce efficiency.
Tip: If the pump is noisy or failing, do not bypass it; replace or repair as needed. - 7
Assess refrigerant-related concerns
Look for any hissing sounds or oily residue around refrigerant lines and valves. Do not attempt to repair refrigerant leaks yourself—this requires licensed service. Why: refrigerant damage can be hazardous and is regulated by law.
Tip: If you suspect a refrigerant issue, stop and call a pro immediately. - 8
Reassemble and test
Secure all access panels, reconnect power, and run a controlled test cycle to verify hot water delivery and cycle times. Note any abnormal readings or noises. Why: confirms whether the faults were resolved or persist.
Tip: Document readings and codes for future reference.
Your Questions Answered
What are common signs that a heat pump water heater needs repair?
Common signs include inadequate hot water, frequent cycling, unusual noises, leaks, or fault codes on the control panel. These symptoms guide which area to inspect first, such as the thermostat, condensate system, or airflow path. If symptoms persist after basic checks, consider professional assessment.
Look for weak hot water, unusual sounds, or fault codes to decide the next steps and whether to call a pro.
Is adjusting the thermostat safe as a first step?
Yes, as a first step, verify that the thermostat is set to a safe, manufacturer-recommended temperature. Do not exceed recommended limits, and recheck after any adjustment to confirm results.
You can start with adjusting the thermostat within safe limits, then test the water temperature.
Can I repair refrigerant leaks myself?
No. Refrigerant handling and repairs require licensed technicians due to safety and environmental regulations. If you suspect a leak, shut down power and contact a professional.
No DIY refrigerant work—call a licensed technician for leaks.
How often should I perform maintenance on a heat pump water heater?
Annual professional inspection is recommended, with monthly checks of filters, condensate drain, and general cleanliness. Regular checks help prevent major faults.
Annual professional checks plus monthly simple maintenance.
What safety precautions are essential during DIY repairs?
Shut off power, verify zero voltage, avoid touching hot surfaces, and never bypass safety components. If unsure at any point, stop and seek professional help.
Turn off power, avoid live wiring, and don’t bypass safety parts.
When should I call a professional?
If you suspect refrigerant issues, electrical faults beyond basic checks, or persistent fault codes after basic troubleshooting, contact a licensed technician.
If in doubt or if it involves refrigerants or complex wiring, call a professional.
Watch Video
Top Takeaways
- Start with safety: power off and water isolation.
- Document symptoms to guide diagnosis and professional help.
- DIY fixes cover basic electrical checks, drainage, and thermostat settings.
- Call a licensed tech for refrigerant or complex electrical faults.