What Goes Wrong with Heat Pumps: A Troubleshooting Guide
Identify and fix the most common heat pump problems with a fast, structured approach. This expert guide from Heatpump Smart covers electrical faults, airflow issues, refrigerant leaks, defrost problems, and when to call a pro.

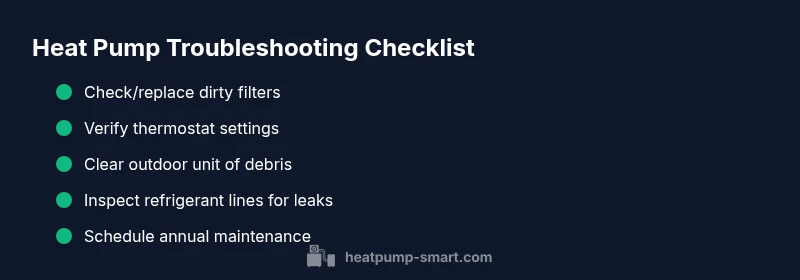
Most heat pump problems come from simple, fixable causes: dirty filters, thermostat miscalibration, blocked outdoor unit, refrigerant leaks, frozen evaporator coils, or faulty contactors. According to Heatpump Smart, start with basic checks: clean or replace filters, ensure vents are clear, verify thermostat settings, and inspect the outdoor unit. If issues persist, contact a technician.
According to Heatpump Smart: Common Malfunctions Fall into Clear Categories
According to Heatpump Smart, most heat pump malfunctions fall into a handful of categories that you can recognize with simple checks. Electrical and control faults, airflow limitations, refrigerant or pressure issues, outdoor unit obstructions, and defrost-related problems are the typical culprits. Each category has a set of telltale signs and safe checks you can perform before calling a professional. This section breaks down each category, lists common symptoms, and offers practical steps to triage safely. By understanding the category, you can avoid chasing symptoms that won’t address the root cause and keep downtime to a minimum. If you notice rapid cycling, sudden loss of heating, or unusual noises, document the symptoms before you begin troubleshooting.
Key takeaways: The most common malfunctions are grouped by cause, making triage faster and safer. Regular checks reduce downtime and energy waste. Always prioritize safety and know when to escalate to a pro.
Steps
Estimated time: 30-60 minutes
- 1
Verify power and control signals
Begin by confirming the system is powered. Check the main breaker, disconnect switch, and the thermostat. If the system is unresponsive, try resetting the thermostat and the breaker. Note any error codes or flashing LEDs.
Tip: Keep the thermostat in a known good mode (e.g., Heat) while testing power. - 2
Inspect and clean air filters and indoor airflow
Remove and inspect all air filters; replace dirty filters. Check that supply and return vents are open and unobstructed. Listen for airflow after replacement to confirm the system is pulling air through the evaporator.
Tip: Replace disposable filters every 1–3 months, or as recommended by the manufacturer. - 3
Check outdoor unit clearance and cleanliness
Inspect the outdoor unit for leaves, dirt, or snow buildup. Clear a 24–36 inch radius around it. Ensure the coils look intact and undamaged. A clogged condenser coil reduces efficiency and can trip safety sensors.
Tip: Do not use metal tools to scrape coils—use a soft brush or vacuum. - 4
Look for ice, frost, or unusual noises
Ice on the outdoor coil or refrigerant lines indicates a defrost problem or airflow issue. Listen for grinding or buzzing noises that could signal a failed fan motor or compressor components.
Tip: Turn off the unit and thaw ice gently by allowing it to melt; never poke at ice with sharp objects. - 5
Assess thermostat and sensor readings
Verify the thermostat setting matches the desired temperature and mode. Check for any calibration issues or sporadic sensor readings; a misreading thermostat can keep the system from delivering heat properly.
Tip: If your thermostat is old or wireless, consider replacing with a programmable model for stable readings. - 6
Evaluate refrigerant-related signs
If you notice a hissing or bubbling sound, oily residues, or a sudden drop in cooling/heating efficiency, refrigerant issues may be present. Refrigerant leaks require professional service and cannot be safely fixed DIY.
Tip: Low refrigerant is illegal to vent; only a licensed tech should handle charges and leaks. - 7
Check ductwork and refrigerant piping insulation
Inspect visible duct sections for leaks, gaps, or disconnections. Ensure insulation around refrigerant lines is intact to prevent heat loss or condensation that reduces performance.
Tip: Seal obvious leaks with approved duct sealant and schedule a full duct inspection if issues persist. - 8
Test system response and safety interlocks
With basic checks done, observe how the system responds to demand: does it start, run, and shut off normally? Confirm safety interlocks are engaged and no critical fault codes appear on the control board.
Tip: Document fault codes for the technician to diagnose faster.
Diagnosis: Heat pump shows poor heating, unusual cycling, or won’t start
Possible Causes
- highElectrical/control fault (tripped breaker, faulty contactor or capacitor)
- highThermostat/calibration issues
- highBlocked airflow or dirty filters
- mediumOutdoor unit blocked by debris, snow, or vegetation
- mediumRefrigerant leak or incorrect charge
Fixes
- easyCheck breakers, fuses, and all wiring; inspect the contactor and capacitor for wear
- easyClean or replace air filters; ensure vents and returns are unobstructed
- easyClear debris around the outdoor unit and trim vegetation; remove snow/ice
- hardHave a licensed tech check refrigerant levels and detect leaks
Your Questions Answered
What are the most common heat pump problems?
The most frequent issues are electrical faults, airflow restrictions, refrigerant leaks, and thermostat miscalibration. Many problems stem from dirty filters or blocked outdoor units. Early basic checks often resolve symptoms without calling a technician.
Common heat pump problems include electrical faults, airflow issues, and thermostat miscalibration. Start with filters, outdoor unit clearance, and thermostat settings, then call a pro if unresolved.
Why is my heat pump not heating even though it runs?
This usually points to airflow issues, refrigerant pressure, or thermostat calibration. Check filters and ensure proper airflow; verify the outdoor unit isn’t blocked; read any error codes on the control board to guide further steps.
If the unit runs but won’t heat, check airflow and thermostat settings, then have a tech inspect refrigerant and controls if needed.
Is ice on the outdoor coil a big problem?
Ice buildup often indicates airflow problems or low refrigerant pressure. Do not force defrost; turn the unit off and allow it to melt, then schedule a professional inspection to identify the underlying cause.
Ice on the outdoor coil usually means airflow or refrigerant issues; turn it off safely and get a pro to diagnose.
Can dirty filters cause my heat pump to fail?
Dirty filters restrict airflow, reduce efficiency, and can cause the system to work harder, leading to premature wear. Replace filters regularly and keep vents clear to prevent problems.
Yes, dirty filters can cause poor performance and strain the system; replace them and clean vents often.
When should I replace my heat pump?
If the unit is over 10–15 years old and requires frequent repairs, or if efficiency has dropped significantly, it’s wise to consider replacement. A professional can assess remaining life and potential energy savings from upgrading.
If it’s old and failing often, replacement might be the better long-term choice.
What maintenance can I do to prevent problems?
Schedule annual professional maintenance, clean filters monthly, check outdoor clearance, inspect ductwork, and monitor performance for signs of trouble. Regular servicing helps catch issues early and extend life.
Regular maintenance and quick DIY checks keep heat pumps running reliably.
Watch Video
Top Takeaways
- Triage with categories and start with simple checks
- Regular maintenance reduces downtime and failures
- Call a pro for refrigerant, electrical, or refrigerant-related issues
- Document fault codes to speed up diagnosis