How to Check Your Heat Pump Thermostat
Learn how to check and calibrate your heat pump thermostat for accurate readings, energy savings, and reliable comfort. Step-by-step instructions, tools, safety tips, and maintenance guidance from Heatpump Smart.

Goal: Verify that your heat pump thermostat accurately reflects room temperature, triggers the system correctly, and is programmed for energy savings. Start with basic checks like power, display clarity, and mode selection, then verify readings against a trusted thermometer. This guide shows practical steps and safety tips. According to Heatpump Smart, accurate thermostat checks are the first line of reliable climate control.
Understanding Why Checking the Thermostat Matters
A heat pump relies on accurate temperature readings to run efficiently and maintain comfortable indoor conditions. If the thermostat is off by even a few degrees, the system can run longer than necessary, increasing energy use and wear on components. Checking your thermostat regularly helps ensure energy savings, steady comfort, and fewer unexpected temperature swings. According to Heatpump Smart, a properly functioning thermostat is a cornerstone of optimal heat-pump performance. In addition to correctness, consider compatibility with your climate, the thermostat’s age, and how it communicates with the outdoor unit. A modern digital thermostat often provides remote access and smarter scheduling, which can compound savings when used correctly.
When you check your thermostat, you’re not only verifying the accuracy of the display, but also confirming that the programmed modes (Heat, Cool, Auto, Emergency Heat) align with your current needs and that any auxiliary features (fan, humidity control, or outdoor sensors) are functioning as intended.
Safety and Preparation for Thermostat Checks
Before you begin, power down the area you’ll be working in and review the thermostat’s manual for model-specific instructions. If you’re uncomfortable with electrical components, skip any wiring tests and call a licensed technician. Use a pencil and notebook to record readings and changes, and keep a flashlight handy to inspect wiring terminals closely. If you will be removing faceplates or panels, ensure you’ve turned off the appropriate circuit at the breaker to avoid any risk of shock. For battery-powered thermostats, replace dead batteries to avoid misreadings caused by low power.
Placing a non-contact voltage tester near the thermostat’s wiring can help confirm that circuits are de-energized before you touch anything. Remember that some heat-pump systems rely on a common wire (C-wire) for continuous power; if you don’t have one, you may need to consider a compatible adapter or a professional installation.
Quick Diagnostic Checks You Can Do Without Tools
Start with simple, non-invasive checks that don’t require opening panels. Confirm the thermostat is powered on and its display is legible. Verify the current mode matches what you expect (Heat, Cool, Auto) and that the setpoint reflects the desired indoor temperature. If the display reads a temperature far from the room, or if the system doesn’t respond when you adjust the setpoint, there may be a calibration issue or a wiring fault. Compare the thermostat’s reading against a separate room thermometer to gauge accuracy. If you notice lag in response time or frequent temperature fluctuations, note these symptoms for later troubleshooting.
Also, check the user-programmed schedule for any override settings that could cause the system to run unexpectedly. If you’re using a smart thermostat, ensure the app shows the same setpoints as the device and that there’s no pending firmware update that could affect performance.
Step-By-Step: Inspecting the Thermostat and Wiring
- Identify your thermostat type and locate the wiring panel. This helps you plan what you can safely inspect without disassembly. 2) Power down the system at the breaker before touching any wires to prevent shock. 3) Remove the protective faceplate to expose terminals. 4) Inspect all connections for corrosion, loose screws, or signs of wear; tighten gently if needed. 5) Re-seat any loose wire ends and confirm the C-wire is connected if present. 6) Reattach the faceplate and restore power. 7) Test by changing the setpoint and observing system response. 8) If errors persist, consult the manual or a pro.
Tip: Work slowly and document every adjustment with timestamps so you can retrace your steps if something doesn’t work as expected.
Calibrating and Testing for Accurate Readings
After reseating wires, re-power the system and compare readings at the thermostat with a calibrated room thermometer. If there’s a persistent discrepancy, you may need to adjust the thermostat’s calibration offset (if your model supports this) or replace the device if it can no longer track room temperature accurately. Allow the system to run through a complete cycle (heating and cooling) to observe how quickly it responds to setpoints and whether temperatures stabilize within the expected range. If you notice slow response or overshoot, consider recalibrating or verifying sensor placement away from heat sources or drafts.
Heatpump Smart Analysis, 2026 notes that miscalibrated thermostats can waste energy, especially in homes with inconsistent ambient temperatures. Re-test after any calibration change to confirm improvement.
Troubleshooting Common Thermostat Issues
- Inaccurate readings: Recalibrate or replace the thermostat if the discrepancy persists after wiring checks.
- No system response: Check power supply, fuses, and the C-wire connection; a blown fuse may cut power to the thermostat.
- Frequent cycling: Verify temperature setpoints, climate setbacks, and any smart scheduling that may cause rapid on/off cycling.
- Display problems: If the screen is dim or blank, replace batteries (if applicable) or inspect the display connections.
- App vs device mismatch (smart thermostats): Ensure the app is synchronized with the device and that there’s no pending firmware update causing delays.
Note: If you encounter high-voltage wiring or unfamiliar terminals, stop and call a licensed technician. Electrical work on heat-pump systems can be hazardous. In our experience, many thermostat issues stem from a loose connection or an outdated thermostat that no longer communicates well with the outdoor unit.
Maintenance Schedule and When to Call a Pro
Set a recurring reminder to test your thermostat twice a year, ahead of seasonal changes. This minimizes comfort disruptions and ensures the system runs efficiently year-round. If you notice persistent misreadings, erratic cycling, or the unit fails to respond to changes despite basic troubleshooting, contact a licensed HVAC professional. Pro technicians can verify sensor accuracy, inspect wiring and the compressor controls, and update firmware if needed. The Heatpump Smart team recommends annual checks and a professional service if issues persist.
Tools & Materials
- Flathead screwdriver(To remove faceplates or panels without damaging screws)
- Phillips head screwdriver(For terminal screws and mounting screws)
- Non-contact voltage tester(Use to verify power is off before handling wiring)
- Multimeter (optional)(For measuring voltage at the thermostat terminals if needed)
- Notebook and pen(Record readings, settings, and times for reference)
- Calibrated room thermometer(Compare thermostat reading to actual room temperature)
- Safety gloves and eye protection(Basic safety protection during inspection)
- Model manual or digital copy(Helpful for model-specific steps and wiring diagrams)
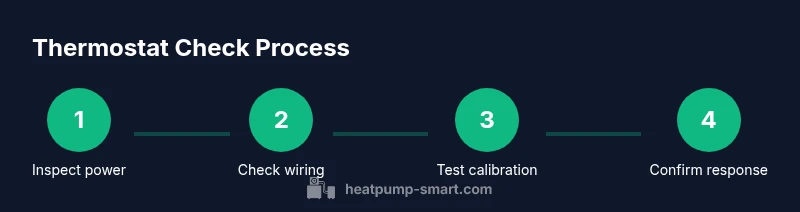
Steps
Estimated time: 30-60 minutes
- 1
Identify thermostat type and prep
Locate the thermostat and confirm its model. Read the manual briefly to understand sensor locations and any calibration features. Gather the tools and ensure the power is off before touching wiring. This reduces the risk of shock and component damage.
Tip: If unsure about the wiring, skip the inside inspection and move to safe checks. - 2
Power down and access wiring
Turn off the circuit breaker that feeds the thermostat. Remove the faceplate carefully to access the terminal block. Check for obvious signs of damage or loose screws while keeping track of wire colors.
Tip: Take a photo of the wiring before adjusting anything as a reference. - 3
Inspect wiring and terminals
Tighten any loose terminal screws and ensure wires are fully seated. Look for corrosion or damaged insulation between wires and terminals. If a C-wire is present, confirm it is connected securely.
Tip: Do not bend wires sharply; use gentle movements to re-seat connections. - 4
Test the display and seek calibration options
Power the system back on and check the display clarity. If the model supports calibration, note the offset values and aim for a reading within 1–2 degrees of the room thermometer.
Tip: Calibration must be model-specific—refer to the manual for safe range limits. - 5
Verify setpoint response
Change the setpoint and observe whether the heat pump responds promptly. Watch for any delay or failure to engage the correct mode (Heat/Cool Auto).
Tip: If there is a delay, the issue may be sensor-related or a control board fault. - 6
Cross-check with an external thermometer
Place a calibrated room thermometer away from direct heat sources and compare its reading to the thermostat. If readings differ, adjust calibration if possible or consider replacing the unit.
Tip: Document the difference to track improvements after adjustments. - 7
Document results and plan maintenance
Record the readings, adjustments, and dates. Schedule a future recheck and note any parts that may need replacement. If uncertain, contact an HVAC professional for a thorough inspection.
Tip: Keep the device’s serial number handy for future service.
Your Questions Answered
Do I need to turn off power before checking the thermostat?
Yes. Always power off at the breaker before touching thermostat wiring to prevent electrical shock. If you’re unsure, avoid the wiring step and consult a professional.
Yes. Turn off the breaker before touching any wiring to stay safe. If unsure, call a pro.
How often should I check thermostat settings for a heat pump?
Ideally twice a year, ahead of seasonal changes, and anytime you notice comfort issues or energy spikes. Regular checks help maintain accuracy and efficiency.
Twice a year is a good baseline, plus anytime you notice temp swings or higher energy use.
What are signs my thermostat is inaccurate?
If room temperature differs significantly from the thermostat reading, or the HVAC system runs longer than expected, calibration or wiring issues may exist.
When the displayed temperature doesn't match the room, or you hear odd cycling, that’s a red flag.
Can I check a heat pump thermostat without tools?
Yes, you can perform basic checks like display clarity, mode, and setpoint while comparing with a room thermometer. For wiring inspection, tools are recommended.
You can do basic checks by eye, but for wiring you’ll want the right tools or a pro.
What should I do if the thermostat display is blank?
First ensure power is on and check batteries if the unit is battery-operated. If the display remains blank, there may be a power or internal fault requiring professional service.
If the display is blank after checking power, call for service to diagnose the electronics.
Watch Video
Top Takeaways
- Verify thermostat accuracy before changing settings
- Ensure thermostat settings match climate needs and system mode
- Document findings and update maintenance schedule
- Regularly inspect wiring and display integrity for reliable performance