Why Is My Heat Pump So Loud? A Practical Troubleshooting Guide
Discover why heat pumps get loud, diagnose common noise causes, and follow practical fixes to restore quiet, efficient operation.

Most heat pump noises come from worn fan bearings, loose panels, or debris near the outdoor unit. Begin by switching off power, then inspect for loose screws, obstructions, and ice. If you hear grinding, banging, or screeching, stop and call a professional right away. Regular maintenance prevents most loudness issues.
Why Heat Pumps Get Loud
If you're wondering why is my heat pump so loud, the answer often points to mechanical wear, loose components, or outdoor debris. The Heatpump Smart team notes that most noisy behavior develops over time as parts loosen and insulation shifts. Understanding the main noise sources helps you target fixes quickly and safely. This guide blends practical checks, safety steps, and professional guidance to keep your system quiet and efficient. By tackling small issues early, homeowners can prevent bigger, costlier problems down the line. Heatpump Smart’s ongoing analysis shows that regular maintenance is one of the most effective defenses against escalating noise.
Common Noise Types and Their Causes
Heat pumps can exhibit several distinct noises, each signaling a different issue. A rattling sound usually means a loose panel or debris stirred by the outdoor fan. Grinding or squealing points to worn fan bearings or a failing motor. Hissing or gurgling can indicate refrigerant flow or pressure changes. Thumps or bangs often come from ductwork or mounting vibrations. Recognizing the type of noise helps narrow the culprit quickly. In many cases, addressing simple culprits like a loose screw or obstructing vegetation reduces noise immediately. The Heatpump Smart team emphasizes that consistent checks during seasonal transitions dramatically reduce unexpected loudness.
Quick Safety Check You Can Do
Before you touch anything, switch off the unit at the breaker to avoid electric shock. Check for obvious hazards: damaged wiring, ice buildup on the outdoor coil, or obstructions around the unit. Ensure the outdoor unit has at least 1-2 feet of clearance and that all access panels are secure. If you notice ice on the coil, avoid scraping it; instead, thaw the ice and inspect airflow. For most homeowners, these steps extract obvious noise culprits without specialist tools. According to Heatpump Smart, keeping the area around the unit clean and clear is a simple, powerful step toward quieter operation.
Diagnostic-First Steps: What to Inspect
This flow starts with simple checks that often resolve the issue. Step 1: Tighten and secure any loose panels or screws on the cabinet. Step 2: Clear leaves, dirt, and vegetation from around the outdoor unit. Step 3: Inspect the fan blades for chips or wobble. Step 4: Check for ice on coils, restricted airflow, or dirty filters inside the indoor unit. Step 5: Confirm the mounting brackets are solid and the unit sits level. If the noises persist after these checks, you may be dealing with a more serious mechanical or refrigerant issue that requires professional attention.
In-Depth Causes and Fixes
Loose cabinet panels and loose screws can cause rattling and vibration. Tighten fasteners and replace any missing hardware. Debris or overgrown vegetation around the outdoor unit is a frequent source of noise; trim back plants and keep the area clean. Worn fan bearings or a defective motor produce grinding or screeching noises and typically require replacement or professional service. Ice buildup on the outdoor coil interrupts airflow and can amplify noise; thaw the coil, verify airflow, and check for proper refrigerant charge if needed. Refrigerant leaks or compressor issues are serious and must be handled by a licensed technician. Finally, vibration from ductwork or incorrect mounting can transmit noise into living spaces—consider anti-vibration mounts or reinstallation by a pro.
Prevention and Maintenance to Keep Noise Down
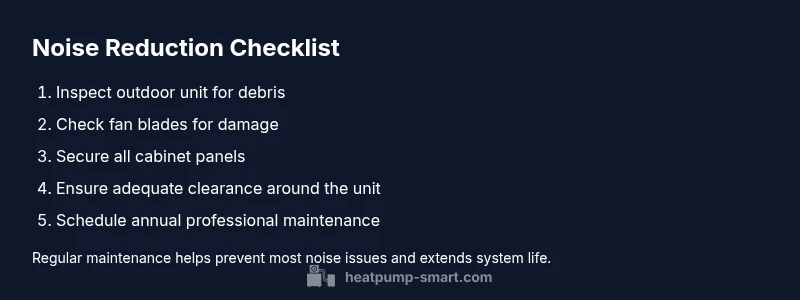
Schedule annual professional maintenance to catch wear and alignment issues early. Clean or replace air filters regularly, and ensure ducts are sealed and insulated. Keep the outdoor unit clear of leaves and snow, and ensure there is adequate clearance around it. Use vibration-damping pads and verify proper mounting to minimize cabinet vibration. Heatpump Smart analysis shows that consistent maintenance reduces noise by addressing common culprits early, helping you preserve comfort and efficiency year-round.
Steps
Estimated time: 60-120 minutes
- 1
Power down and safety check
Switch off the outdoor unit at the main breaker and verify there is no power to the system. Wear gloves and safety glasses if you inspect components up close. This prevents shocks and injuries while you investigate visible issues.
Tip: Always de-energize before touching electrical components. - 2
Inspect outdoor area
Look for debris, leaves, or overgrown plants that might be brushing against the unit. Clear a clear zone to reduce turbulence and noise amplification.
Tip: Keep a 1–2 ft clearance around the entire unit. - 3
Check cabinet and fasteners
Tighten any loose screws or panels on the cabinet. Look for missing gaskets that may let air escape and create rattling sounds.
Tip: Use a screwdriver and a flashlight; don't over-tighten. - 4
Inspect the fan and ductwork
Spin the fan by hand to check for wobble or rubbing; inspect duct connections for loose joints that might vibrate.
Tip: If the blade wobbles or contacts the housing, stop and call a pro. - 5
Ice and airflow check
If you see ice on the outdoor coil, thaw it and verify there’s adequate airflow across the coil after warm-up. Dirty filters can aggravate icing.
Tip: Never scrape ice aggressively; thaw and reevaluate airflow. - 6
Professional follow-up
If noises remain after these steps, contact a licensed HVAC technician for a diagnostic and possible refrigerant, motor, or mounting issue.
Tip: Professional service can prevent further damage and preserve efficiency.
Diagnosis: Heat pump makes loud banging or grinding noises during operation
Possible Causes
- highLoose panels or screws causing cabinet vibration
- highWorn fan bearings or motor issues
- mediumDebris, vegetation, or ice restricting airflow around the outdoor unit
Fixes
- easyTighten cabinet screws and secure panels; replace missing fasteners
- mediumInspect and, if needed, replace the outdoor fan motor or bearings
- easyClear debris and ensure 1-2 feet of clearance around the unit
- hardIf noises persist, schedule professional diagnostic and repair
Your Questions Answered
What’s the most common reason a heat pump becomes noisy?
Loose panels and debris near the outdoor unit are the top culprits. Addressing these often quiets the unit quickly.
Loose panels and debris near the outdoor unit are the most common noise culprits.
Is startup noise normal for heat pumps?
A small hum at startup is common, but loud banging is not and warrants inspection.
A small startup hum is normal, but loud banging isn't.
Can I fix fan bearings myself?
Replacing bearings is complex and hazardous; best left to a licensed tech.
Bearings replacement is complex; call a pro.
When should I call a professional?
If you hear grinding, banging, or if ice persists, schedule service.
If you hear grinding or ice persists, call a pro.
How can I reduce noise without hurting efficiency?
Keep filters clean, seal ducts, and secure mounting; avoid blocking airflow.
Keep filters clean and ducts sealed to quiet without hurting efficiency.
Does heat pump location affect noise?
Yes, installation site, distance to living spaces, and nearby obstacles influence perceived noise.
Location choices affect how loud it sounds inside.
Top Takeaways
- Identify the noise type to target the fix
- Tighten panels and clear debris to reduce vibrations
- Check airflow and ice buildup; thaw if present
- Schedule annual maintenance to prevent future noise