How to Use a Heat Pump Remote: Step-by-Step Guide
Learn how to use your heat pump remote with confidence. This expert guide covers powering on, mode selection, temperature and fan control, scheduling, eco features, and troubleshooting for reliable home comfort.

Goal: learn how to use a heat pump remote to power on, select modes, set temperature, adjust fan speed, and access energy-saving features. Before starting, ensure fresh batteries, check that the remote is paired with the heat pump, and keep line of sight to the outdoor unit when changing settings. This quick guide covers basics and troubleshooting.
Understanding the Remote Layout
Heat pump remotes share a common language: power, mode, temperature, fan, and memory features. The typical layout includes a power button, a mode selector (Auto, Heat, Cool, Dry, Fan), temperature Up/Down, a fan speed control, a swing or louvers button, and often an Eco or Sleep/Timer option. Some remotes also have a dedicated Help button, a backlight or display, and battery indicators. For homeowners using a wall-mounted thermostat integrated with the heat pump, the remote is often the primary quick-control interface.
According to Heatpump Smart, most remotes are designed to be intuitive, with larger on/off and mode buttons for quick access. In practice, you’ll find the most used controls clustered together on the top row, with temperature and fan settings in the middle. If you’re unsure which button does what, consult the unit’s user guide or the app as a cross-check. Reviewers note that ensuring you have fresh batteries and confirming that your remote is paired with the system are essential first steps to avoid control problems.
Basic Power and Mode Controls
Powering the system on with the remote is your first action. Press the power button and watch the display illuminate. Many models default to Auto mode; switch to Heat or Cool depending on the season. Auto mode allows the unit to switch between heating and cooling for comfort, while Heat locks in a warmer target when outdoor temperatures drop. If your remote has an “Energy Saver” or “Eco” toggle, enable it to prioritize efficiency during longer operation periods. Some remotes offer a mode memory that returns to the last preferred setting after a power cycle; if you rely on a stable routine, note this behavior in the user manual.
As you practice, try toggling between Auto, Heat, and Cool, and observe how the indoor temperature responds. If the room feels uncomfortable, adjust the mode again rather than making large temperature jumps. For reference, keep the remote pointed toward the indoor air handler while you press mode buttons to ensure optimal signal reception.
Temperature and Fan Settings
Temperature control on the remote lets you set a comfortable target—typically with single-degree precision. Start with a moderate temperature difference (2–3 degrees from the current indoor reading) to avoid abrupt cycling. The Fan control adjusts the airflow speed or sets it to Auto; Auto lets the system choose an appropriate speed based on the current mode and temperature gap. If the room is windy or stuffy, try lowering or raising the fan speed in small increments and monitor comfort for 15–20 minutes before adjusting again.
Tip: When in Auto mode, let the system optimize both temperature and fan speed for energy efficiency. If your model supports swing or louvers, enable them to distribute air evenly. Ensure line of sight to the indoor unit during adjustments for reliable reception.
Using Energy-Saving Features
Eco, Energy Saver, or Sleep modes reduce energy use by adjusting setpoints and cycle patterns. Use Eco mode during milder days or when you’re away from home for extended periods. Sleep modes gradually shift temperatures to maintain comfort while conserving energy during night hours. Some remotes incorporate a “timed hold” function, which can lock in a temperature setpoint for a chosen duration.
Keep in mind that energy-saving features may change how quickly your space warms or cools. If you notice lag, temporarily deactivate Eco features and revert to standard Auto to regain faster response. Always review the user manual to confirm which features are available on your specific remote model.
Scheduling and Timers
Many remotes offer a scheduling feature that lets you set different temperatures for daytime and nighttime. Start with a simple schedule: cooler nights +8 hours of operation during the day, then adjust gradually. Timers are helpful for pre-cooling a room before you arrive home or for avoiding cooling/heating during peak occupancy hours. When programming, keep the schedule realistic and aligned with occupancy patterns to maximize savings.
Pro tip: Begin with a conservative schedule and observe energy use over 1–2 weeks. If your home feels uncomfortable at any point, adjust the timing or temperatures slightly rather than a dramatic change. Programs on the remote can often be copied or edited between days for convenience.
Remote Not Responding? Troubleshooting Basics
If the remote isn’t responding, first check the batteries and replace them if needed. Ensure the remote is paired to the air handler; use the pairing procedure from the user manual if available. Verify the signal is reaching the indoor unit—avoid obstacles between the remote and the receiver.
If issues persist, try resetting the remote by removing the batteries for 30 seconds and reinsert them, then reattempt control. In some cases, the problem is with the wall-mounted control or the outdoor unit rather than the remote itself. Consult the user manual for the exact reset sequence and compatibility notes.
Common Mistakes to Avoid
Avoid changing multiple settings at once—make small adjustments one at a time and wait 10–15 minutes to evaluate impact. Don’t rely on a single feature (like Eco) for comfort; combine it with a sensible temperature target to prevent overworking the system. Avoid placing the remote near heat sources or direct sunlight, which can spoof readings or reduce battery life. Finally, don’t ignore the wall controls or app if the remote fails; sometimes the primary control is the indoor wall unit, not the remote.
Maintenance and Care for the Remote and System
Keep the infrared window clean and free of dust; wipe with a soft, dry cloth. Replace batteries as soon as you notice reduced range or slower response times. Store the remote in a cool, dry place to preserve battery health. Periodically check the wall control and any associated app for firmware updates and compatibility with the heat pump system. A quick annual check with a tech can help ensure the receiver on the outdoor unit remains aligned with the remote.
Authority sources
- https://www.energy.gov
- https://www.nrel.gov
- https://www.epa.gov
These sources provide foundational guidance on energy efficiency and heat-pump operation, complementing practical tips from Heatpump Smart.
Quick Troubleshooting Checklist
- Replace batteries and re-pair if needed
- Confirm mode and temperature are within sensible ranges
- Check for line-of-sight issues and obstacles
- Try a wall control or app as a backup
- If problems persist, consult the unit’s manual or contact support
Tools & Materials
- Fresh batteries compatible with the remote(Check type in the battery compartment or user manual (e.g., AA or AAA). Replace if the remote range or responsiveness drops.)
- User manual or quick-start guide(Digital copy is acceptable; keep it handy for pairing and reset instructions.)
- Smartphone or tablet with heat pump app (optional)(Useful for app-based control if the remote is unresponsive or for advanced scheduling.)
- Notepad and pen(Jot down settings or a simple schedule for quick reference.)
- Clean cloth for IR window(Lightly wipe to remove dust that can block signals.)
Steps
Estimated time: 20-30 minutes
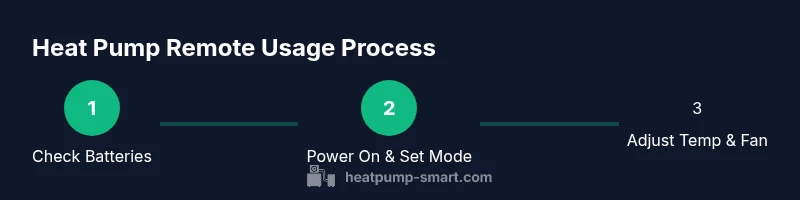
- 1
Check batteries and pairing
Inspect the remote’s batteries and replace them if the range or responsiveness is poor. After replacing, verify the remote is paired with the heat pump following the manufacturer’s pairing steps or the app-based pairing flow. This ensures the remote can reliably communicate with the receiver.
Tip: If pairing is unclear, consult the manual or use the app to re-pair via Bluetooth or IR sequence. - 2
Power on with the remote
Press the power button to turn the system on. Confirm the display lights up and shows an active status. If the screen remains blank, replace batteries and retry, ensuring proper contact in the battery compartment.
Tip: Do not press multiple controls at once—confirm the unit is powered on before adjusting other settings. - 3
Set mode (Auto/Heat/Cool)
Use the mode button to toggle Auto, Heat, or Cool. Auto allows automatic switching as needed, Heat prioritizes warming, and Cool prioritizes cooling. Observe how the indoor temperature responds after a 5–10 minute period.
Tip: Auto mode is usually best for balancing comfort and efficiency across changing outdoors conditions. - 4
Adjust target temperature
Use the temperature up/down controls to set a comfortable target. Small changes (1–2 degrees) can significantly affect comfort and energy use. Allow 10–15 minutes to assess how quickly the space responds.
Tip: Avoid large temperature jumps; gradual changes help the system stabilize. - 5
Set fan speed
Choose a fan setting or Auto. Auto lets the system optimize airflow; fixed speeds can be used to quickly reach a desired comfort level after a mode change.
Tip: If the room feels drafty, try a lower fan setting and allow 10 minutes to rebalance. - 6
Enable energy-saving features
Activate Eco or Sleep modes if available to reduce energy consumption during longer operation periods. Understand how these modes adjust setpoints and cycling.
Tip: Review the impact on comfort first; you can disable Eco temporarily if you need more rapid cooling/heating. - 7
Program scheduling
If your remote supports scheduling, set a simple daytime and nighttime temperature profile. Start with a conservative schedule and adjust after monitoring comfort and energy use for a week.
Tip: Keep schedules consistent on weekdays and weekends for optimal habit formation. - 8
Lock or reset the remote if needed
If the remote becomes unresponsive, reset by removing the batteries for 30 seconds and reinserting them. Re-pair if required. This often resolves communication glitches.
Tip: A quick reset fixes many transient connectivity issues. - 9
Backup control options
If the remote still fails, use the wall-mounted control or the heat pump’s mobile app to manage settings. These alternatives ensure you maintain comfort while diagnosing the remote issue.
Tip: Keep the backup control readily accessible in a central spot.
Your Questions Answered
Why is my heat pump remote not responding even with fresh batteries?
Remote non-responsiveness is usually caused by a lost pairing, depleted batteries, or blocked signal. Start by replacing the batteries, then re-pair the remote using the manual instructions or app pairing flow. If issues persist, check for obstructions between the remote and the indoor receiver.
If your remote won’t respond, first swap in fresh batteries and try re-pairing it to the unit. If it still doesn’t work, check for line-of-sight issues and try a backup control option like the wall control or app.
Can I program a schedule using the heat pump remote?
Many remotes offer a scheduling feature for daily temperature profiles. Start with a simple schedule, such as cooler nights and a daytime setpoint, then adjust based on comfort and energy use. If your remote lacks scheduling, use the wall control or app to achieve similar results.
Yes, you can usually program a daily schedule from the remote. If yours doesn’t have this feature, use the wall control or app to set a routine.
What’s the difference between Auto, Heat, and Cool modes on a heat pump remote?
Auto lets the unit decide heating or cooling based on room temperature. Heat prioritizes warming when needed, Cool prioritizes cooling. Auto is typically the most convenient for year-round comfort, while Heat and Cool optimize performance for specific conditions.
Auto balances comfort and efficiency; use Heat or Cool when you want direct control over temperature direction.
How often should I replace remote batteries?
Replace batteries when you notice reduced range, slower response, or display dimming. Use the same type as specified in the manual and avoid mixing battery types. Regular replacement helps prevent control interruptions.
Replace batteries when range drops or response slows down, and keep spares on hand.
Is it possible to control a heat pump from a smartphone app instead of the remote?
Many systems offer app-based control that complements the remote. Apps can adjust modes, temps, schedules, and provide system status. Check your model’s compatibility and set up the app according to the manufacturer’s instructions.
Yes, apps are a common backup for controlling your heat pump if the remote isn’t available.
What do Eco and Sleep features do on the remote?
Eco reduces energy use by managing cycling and setpoints, while Sleep gradually adjusts temperature for comfort at night. Use them to save energy, but monitor comfort and adjust if needed.
Eco and Sleep help save energy by adjusting how the system runs during extended use.
Watch Video
Top Takeaways
- Power on and verify mode properly prior to adjusting temperature
- Use Eco/Sleep modes to improve energy savings without sacrificing comfort
- Schedule simple day/night temperatures for consistent comfort and efficiency
- If remote fails, switch to wall control or app and troubleshoot the remote separately
- Regular maintenance of the remote and batteries extends performance