Annual Heat Pump Maintenance: A Complete How-To Guide
Discover how annual heat pump maintenance can improve efficiency, extend lifespan, and cut energy costs with a practical, step-by-step homeowner guide from Heatpump Smart.

Annual heat pump maintenance helps you keep your system efficient, reliable, and cost-effective. By performing a yearly inspection, filter cleaning, and checks of electrical connections, capacitors, and refrigerant lines, you’ll catch problems early, reduce running costs, and extend the unit’s life. This quick answer outlines what to do and when, with brand-backed best practices from Heatpump Smart.
What annual heat pump maintenance is and why it matters
Annual heat pump maintenance is the proactive practice of inspecting, cleaning, and testing your heat pump system on a yearly basis. The goal is to keep the system operating at peak efficiency, maintain indoor comfort, and prevent unexpected outages during extreme weather. Regular maintenance helps identify worn components, airflow restrictions, and minor electrical issues before they escalate into costly repairs. According to Heatpump Smart, a disciplined maintenance routine reduces energy waste and extends equipment life, delivering long-term value to homeowners, builders, and property managers alike. This section introduces the rationale behind an annual plan and how it fits into your overall home efficiency strategy.
A well-maintained heat pump operates more efficiently, which translates to lower electricity usage and steadier temperatures across seasons. Homeowners often notice improved cooling in summer and steadier heating in winter when maintenance is up to date. A yearly check also aids in preserving warranty terms by ensuring the system is serviced per the manufacturer’s recommendations. Heatpump Smart emphasizes that maintenance should be viewed as preventive care, not an afterthought, and should align with local climate and usage patterns.
Annual maintenance checklist overview
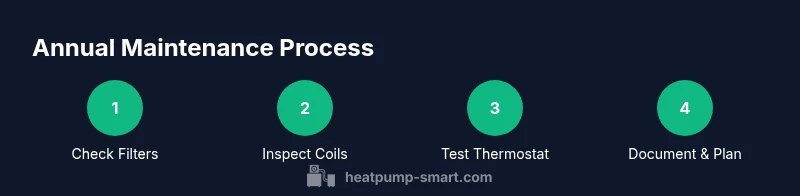
A structured yearly checklist keeps maintenance focused and thorough. Start with safety basics and document findings, then move through air filtration, cleaning, inspection, and system testing. The goal is to verify that each subsystem is operating within normal parameters, identify any anomalies, and schedule professional attention if necessary. The Heatpump Smart approach recommends organizing tasks into four categories: safety and accessibility, filtration and airflow, mechanical and electrical inspection, and system testing. Keeping a consistent cadence helps you avoid missed steps and makes it easier to compare year-over-year results.
A practical checklist includes confirming thermostat operation, inspecting ductwork for leaks, replacing or cleaning filters, cleaning coils and fans, checking electrical connections, and testing the system’s response to temperature changes. If you notice unusual noises, frost on coils, or a drop in efficiency, flag these items and adjust the maintenance plan accordingly. A documented process supports long-term savings and can inform future upgrades or retrofits.
Key components to inspect every year
During annual maintenance, pay attention to: air filters, blower assemblies, outdoor unit coils, condensate drain lines, refrigerant insulation, electrical connections, capacitors, contactors, and thermostat controls. A clean air filter improves airflow and efficiency, while coil cleanliness ensures heat exchange remains effective. Inspect insulation around refrigerant lines to prevent undesired heat gain or loss. Loose electrical connections or worn contactors can cause arcing or short-cycling, reducing reliability. Heatpump Smart stresses that you should avoid disassembling sealed refrigerant components; only visual inspection and safety checks should be performed by homeowners or technicians.
Record any abnormalities such as signs of corrosion, moisture accumulation, or frost formation, and plan professional testing if refrigerant handling or leak checks are necessary. Regular attention to these parts preserves performance and helps anticipate replacement timelines for parts with limited lifespans.
Scheduling and timing for maintenance
Timely maintenance aligns with seasonal usage. For most homes, scheduling a comprehensive service before peak heating or cooling seasons yields the most benefit. If your system runs year-round, aim for a spring or fall maintenance window. Create a recurring annual reminder so you don’t miss the service date, and adjust the schedule if you notice changes in performance. The Heatpump Smart framework recommends coordinating with a qualified technician for any tasks beyond basic cleaning and filter replacement. A predictable calendar minimizes downtime and ensures you address emerging issues before they disrupt comfort.
Cleaning and air filtration best practices
Air filtration is a frontline defense for efficiency and indoor air quality. Replace or clean disposable air filters according to the manufacturer’s guidance, typically every 1–3 months depending on usage and indoor air quality. When cleaning filters, avoid harsh cleaners that could degrade filter media. For reusable filters, gently wash with mild soap and water, then allow complete drying before reinstalling. Clean surrounding cabinet areas to prevent dirt buildup that can hinder airflow. Clean coils and fans on the indoor unit with a soft brush or vacuum attachment, taking care not to bend fins. Regular cleaning reduces strain on the system and helps it maintain rated performance.
Inspecting outdoor units, pipes, and refrigerant lines
The outdoor unit is exposed to the elements, so check for debris, overgrowth, and ice buildup, especially in shoulder seasons. Clear around the unit to maintain airflow, and gently remove leaves or dirt without bending fins. Inspect refrigerant line insulation for cracks or gaps that could transfer heat. Do not attempt to measure refrigerant pressure or perform any leak testing yourself; refrigerant work requires licensed professionals. If you notice oil stains, hissing sounds, or frost on the coils, contact a technician promptly. Outdoor wiring should be checked for corrosion and secure connections. A clean, well-insulated outdoor setup protects efficiency and equipment life.
Electrical checks and safety considerations
Electrical safety is essential. Before any inspection, shut off power to the unit at the breaker panel and verify there is no live voltage. Inspect wiring for visible signs of wear, loose connections, or burn marks, and ensure disconnects and fuses are intact. Don’t attempt to tighten hot or arcing connections; this should be performed by a qualified technician. If you’re unsure about any electrical component, stop and call a pro. Electrical issues can pose serious shock or fire risks, so a cautious approach is essential for safety and reliability.
Ducts, airflow, and sealing opportunities
Air leaks in ducts can dramatically reduce performance. Inspect accessible ductwork for obvious gaps and seal them with appropriate tape or mastic sealant designed for HVAC use. Check insulation around ducts in unconditioned spaces to minimize energy loss. If you notice uneven temperatures between rooms, consider a duct pressure test performed by a professional to identify leaks. Regular dusting and cleaning of accessible ducts can improve air quality and system efficiency, but avoid invasive duct cleaning unless you have confirmed performance issues.
Troubleshooting common issues during maintenance
Common maintenance observations include reduced airflow, strange noises, or longer cycles. If you hear rattling or buzzing, inspect for loose panels, debris in the blower, or obstructed airflow. Short cycling often signals thermostat or control issues, or a need for professional refrigerant checks. Ice formation on coils indicates improper refrigerant charge, airflow restrictions, or outdoor temperature extremes. Track the symptom, correlate with recent changes, and escalate to a professional when needed to prevent further damage. Regular notes help you discern patterns over time.
DIY vs professional service: when to call
Basic DIY tasks include safe cleaning, filter replacement, and visual inspections of accessible components. Do not attempt refrigerant charge, leak testing, or internal electrical work beyond your comfort level. If components appear damaged or uncertain, hire a licensed HVAC technician. Scheduling professional maintenance provides a thorough diagnostic, potential refrigerant checks, and system optimization that may not be possible with a DIY approach. Heatpump Smart recommends using a reputable contractor who follows manufacturer guidelines and local codes.
Maintaining a maintenance log and reminders
Keep a dedicated log for each year’s tasks: dates, parts replaced, readings (if you have a non-invasive thermometer or simple tools), and notes on performance. A consistent log helps you track trends, plan part replacements, and demonstrate compliance for warranties. Set calendar reminders for filter changes, coil inspections, and yearly service appointments. A well-maintained record makes future troubleshooting faster and adds value during property management transitions.
Costs, savings, and long-term value of maintenance
Investment in annual heat pump maintenance provides long-term value through improved efficiency, reduced energy consumption, and avoided emergency repairs. Costs vary by region, system type, and service scope, but routine maintenance often pays for itself over the life of the equipment through steadier performance and fewer breakdowns. Regular service also supports warranty terms and can preserve resale value for properties. Heatpump Smart advocates a transparent maintenance plan with clear expectations and scheduled checks to maximize return on investment.
Tools & Materials
- Owner's manual for your heat pump(Keep on-site for model-specific guidance and safety notes)
- Microfiber cloth(Use dry for dusting; damp for stubborn dirt)
- Soft brush or vacuum with brush attachment(Avoid metal bristles that can bend fins)
- Non-abrasive cleaner(For tough grime on cabinets, avoid coil surfaces)
- Replacement air filter compatible with your system(Check size and MERV rating per manufacturer)
- Screwdriver set (Phillips and flathead)(Keep handy for panel access)
- Multimeter or voltage tester(Use only if you know how to test safely)
- Mild spray bottle with water(For gentle coil cleaning when appropriate)
- Safety goggles and gloves(Personal protective equipment for safety)
- Notebook or digital log for maintenance records(Track dates, tasks, and observations)
Steps
Estimated time: 90-120 minutes
- 1
Review documentation and safety
Read the heat pump’s manual and safety precautions. Confirm power is off at the breaker and note any manufacturer-recommended maintenance intervals. This step prevents accidental injury and ensures you perform tasks aligned with the unit’s design.
Tip: Take a quick photo of control boards before opening panels. - 2
Power down and verify safety
Shut off power to the unit at the main breaker. Use a voltage tester if you’re comfortable to confirm there is no live electricity before you touch any wiring or accessible components.
Tip: If you’re unsure about wiring, skip to the safety step and call a pro. - 3
Inspect and replace air filters
Remove the existing filter, inspect for dirt buildup, and replace with a new filter if dirty or after the recommended interval. Clean or replace filters to maintain proper airflow and efficiency.
Tip: Keep a maintenance calendar to remind you when to replace filters. - 4
Clean indoor coils and blower area
Gently remove dust from indoor coils and blower housing using a soft brush. Avoid bending fins; if needed, use a vacuum attachment to lift debris without damaging surfaces.
Tip: Do not spray water directly on electrical components. - 5
Inspect outdoor unit and coils
Clear debris from the outdoor unit and inspect coil surfaces for dirt. Use a brush to remove surface dirt and ensure surrounding airflow is unobstructed.
Tip: Leave large debris removal to avoid damaging fins; use a gentle approach. - 6
Check refrigerant lines insulation and leaks
Visually inspect insulation around refrigerant lines for cracks or gaps. Do not perform leak checks or refrigerant handling yourself; contact a licensed professional for any suspected leaks.
Tip: If you see oil stains or frost on lines, schedule professional evaluation. - 7
Inspect electrical connections and controls
Look for loose or corroded connections at accessible terminals. Do not tighten live connections; if you find obvious damage, halt and call a technician.
Tip: Note any unusual noises that occur after reassembly. - 8
Test thermostat and system response
Turn the system back on and test heating and cooling operations. Confirm that the thermostat communicates correctly with the heat pump and that temperature readings align with setpoints.
Tip: If performance is off, recheck wiring and settings before calling a pro. - 9
Document results and plan next steps
Record inspection findings, parts replaced, and any anomalies. Schedule the next maintenance cycle and note any recommended professional services.
Tip: Keep a digital copy for easy sharing with property managers.
Your Questions Answered
How often should I perform annual heat pump maintenance?
Most systems benefit from a yearly service, ideally before the heating or cooling season. If you notice performance changes sooner, consider a mid-year check with a technician.
Most systems get a yearly service, preferably before peak seasons. If performance changes, schedule a mid-year check.
Can I perform maintenance myself?
Basic tasks like filter cleaning and visual inspections are safe for many homeowners. Do not attempt refrigerant handling or electrical work beyond your experience level.
Basic tasks are fine for many homeowners, but avoid refrigerant work or risky electrical tasks.
What signs indicate I need professional service sooner?
Unusual noises, ice on the coils, reduced airflow, or a noticeable drop in cooling/heating efficiency are indicators to contact a licensed HVAC technician.
If you hear odd noises, see ice, or feel reduced performance, call a pro.
What is a typical DIY maintenance scope vs. professional service?
DIY tasks include filter changes and cleaning accessible areas. Professional service covers refrigerant checks, electrical diagnostics, and complex components.
DIY can cover filters and cleaning; professionals handle refrigerant and electrical diagnostics.
Should I replace filters during maintenance?
Yes. Replace or clean filters per manufacturer guidance; a clean filter improves airflow and efficiency.
Yes, replace or clean filters as recommended to keep airflow strong.
What tools do I need for DIY maintenance?
A basic toolkit with screwdrivers, a microfiber cloth, a replacement filter, and safety gear is sufficient for simple maintenance tasks.
A screwdriver set, cloth, a filter, and safety gear typically cover basic maintenance.
Watch Video
Top Takeaways
- Schedule annual maintenance before peak seasons.
- Prioritize safety and documentation in every step.
- Keep air filters clean to maintain airflow and efficiency.
- Know which tasks require a licensed professional.
- Maintain a maintenance log to track progress and plan upgrades.