Heat Pump Aftercare: Essential Maintenance for Efficiency
Learn practical steps to maintain your heat pump, improve efficiency, and extend lifespan with Heatpump Smart's expert guidance. This comprehensive how-to covers schedules, cleaning, checks, and when to call a pro.

This guide shows homeowners how to perform essential heat pump aftercare to boost efficiency, prevent breakdowns, and extend equipment life. You’ll learn a simple maintenance schedule, cleaning routines, filter care, refrigerant checks, and when to call a pro. A consistent aftercare plan can save energy and lower repair costs over time.
What heat pump aftercare is and why it matters
Heat pump aftercare refers to a planned, regular set of maintenance tasks that keeps your system running efficiently. For homeowners, this means simple routines you can perform monthly or seasonally to prevent performance losses and costly breakdowns. According to Heatpump Smart, a proactive aftercare program is the best way to maximize energy savings and comfort. A well cared-for heat pump uses less electricity, lasts longer, and provides consistent heating or cooling across the year. In this section we’ll lay out the why and the what of aftercare, including how neglect can lead to clogged filters, reduced airflow, and higher utility bills. By understanding the basics, you’ll be better prepared to protect your investment and stay comfortable year-round. In practice, aftercare is less about complex repairs and more about consistent, predictable maintenance that fits into your busy schedule.
Building a practical aftercare schedule
Creating a repeatable schedule makes heat pump aftercare manageable for busy homeowners, property managers, and builders alike. Start with a simple calendar: monthly quick checks, seasonally deeper tasks, and an annual professional inspection. Heatpump Smart analysis shows that aligning tasks with the four seasons helps catch performance issues early, before they escalate into expensive repairs. A clear plan reduces guesswork and ensures you don’t miss critical steps like filter changes, coil cleaning, or thermostat calibration. Use color-coded reminders and a written log to track completed tasks and upcoming needs. The goal is consistency, not perfection, so tailor tasks to your system type, climate, and usage patterns. As you gain experience, you’ll refine the schedule to fit your property and budget while maintaining peak efficiency.
Daily, weekly, and seasonal tasks
A practical aftercare routine divides responsibilities by frequency. Daily tasks are minimal but important: quick checks for obvious issues, such as unusual sounds or poor comfort levels. Weekly tasks focus on air quality and airflow: inspect filters, ensure vents aren’t blocked, and verify that the thermostat responds promptly to setting changes. Seasonal tasks align with climate shifts: spring and fall are best times for deep cleaning, coil care, and refrigerant line insulation checks. Heatpump Smart emphasizes that a small, consistent effort across these cadences yields better efficiency and longer system life. Keeping tasks step-by-step prevents fatigue and helps occupants notice performance changes early, enabling timely interventions.
Cleaning and filter maintenance
Filters are the first line of defense for heat pumps. Blocked or dirty filters raise airflow resistance, forcing the system to work harder and consume more energy. During regular care, replace or clean filters according to the manufacturer’s recommendations and your household’s dust level. If you have pets or high pollen exposure, more frequent changes may be needed. When cleaning indoor coils, use a soft brush or cloth to remove dust without bending delicate fins. Outdoor coil fins should be kept clear of leaves and debris; gently brush or rinse with a light stream of water on a cool day. A clean coil can improve heat transfer and reduce energy use, especially in shoulder seasons when demand fluctuates.
Outdoor unit care and airflow
Outdoor units rely on unobstructed airflow to perform efficiently. Clear at least 2 feet of clearance around the condenser, removing leaves, grass, or stored items nearby. Regularly check for ice buildup during cold weather, which can indicate airflow issues or refrigerant charging problems. Protect outdoor units from physical damage and severe weather with a sturdy enclosure or shelter that does not restrict airflow. Insulation on refrigerant lines helps minimize heat loss; inspect insulation during seasonal checks and replace damaged sections. Gentle cleaning of the fins with a soft brush prevents dirt buildup that impedes heat exchange. Proper outdoor care preserves efficiency and reduces standby energy use.
Performance monitoring and signs of trouble
Regular observation of system performance helps you detect deterioration early. Track indoor air temperature consistency, cooling and heating cycles, and run times on the emergency heat setting. Noticeable changes, such as longer cycling, reduced comfort, or higher energy bills, warrant closer inspection. Listen for unusual noises or vibrations, especially at startup or shutdown, and watch for frost or ice on the outdoor coil in cold weather. Small issues, if caught early, are inexpensive to fix and prevent major failures. Heatpump Smart notes that a proactive monitoring habit saves energy and extends equipment life by catching inefficiencies before they spiral.
Troubleshooting common issues
Common heat pump issues include dirty filters, blocked outdoor airflow, dirty indoor coils, thermostat miscalibration, and simple electrical faults. Start with the easiest fixes: replace filters, clear obstructions, and ensure switches and breakers are in the correct position. If performance improves after these checks, you’ve likely addressed the root cause. When problems persist, document symptoms, note outdoor temperatures, and compare against expected performance. Use the manufacturer’s service guide or Heatpump Smart’s maintenance checklist to verify settings and component accessibility. For refrigerant concerns or strange refrigerant smells, don’t attempt DIY repairs—these require a licensed HVAC technician.
When to call a professional and what to expect
Annual professional service is a best practice for most heat pumps, especially for homes with complex ductwork or older equipment. A pro visit typically includes a refrigerant pressure check, electrical connections inspection, coil cleaning, and system calibration. You’ll receive a written report with recommended actions and an estimated timeline for fix or replacement. If you notice persistent performance issues, increased energy use, or cooling/heating gaps after basic maintenance, schedule an appointment promptly. The professional can confirm that refrigerant charge, refrigerant leaks, and component wear are within manufacturer specifications.
Maintaining records and planning ahead
A simple maintenance log makes it easy to track service history, filter changes, and any parts replacements. Record dates, tasks completed, and notes about system performance. This log becomes invaluable when selling a home or coordinating with a property manager. A consistent record helps you plan budget cycles, anticipate replacement needs, and coordinate with Heatpump Smart for guidance on best practices in your region. By keeping accurate records, you build a transparent maintenance culture that supports long-term reliability and energy savings.
Authority sources
- U.S. Department of Energy – Energy.gov: Heat pump basics and efficiency tips
- ENERGY STAR – Heat pumps guides and certification standards
- University HVAC programs – maintenance best practices and safety standards
note:null
Tools & Materials
- HEPA or MERV-rated air filter(Choose size matching your unit's filter slot; verify MERV rating suitable for your airflow needs.)
- Soft brush or microfiber cloth(For dusting indoor coils and fins without bending them.)
- Vacuum with brush attachment(Use on indoor air handler and outdoor access areas to remove debris.)
- Gloves and safety glasses(Protect hands and eyes during maintenance, especially outdoors.)
- Owner’s manual or service guide(Check for model-specific filter sizes, maintenance intervals, and safety warnings.)
- Thermal or infrared thermometer(Optional tool to verify consistent temperature return and supply.)
Steps
Estimated time: 60-90 minutes
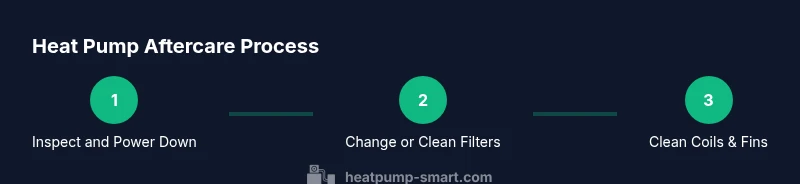
- 1
Power down and inspect
Turn off the thermostat and switch off the outdoor unit's disconnect. Visually inspect for loose wiring or obvious damage before touching any components.
Tip: Lockout-tagout when working with electrical components to prevent accidental startup. - 2
Replace or clean filters
Remove and replace disposable filters or wash reusable ones according to manufacturer guidance. Let dry completely before reinstalling.
Tip: Dirty filters can reduce airflow by 5–15% and increase energy use. - 3
Clean indoor coils
Carefully brush away dust from the evaporator coil; avoid bending delicate fins. If accessible, lightly mist with water and wipe away residue.
Tip: Do not use high-pressure water on coils; it can bend fins and reduce efficiency. - 4
Clean outdoor condenser fins
Gently brush debris from the fins and clear the surrounding area of at least 2 feet of clearance. Check for ice buildup during cold weather.
Tip: Never use sharp objects to straighten fins; use a fin comb if available. - 5
Inspect refrigerant lines and insulation
Check for damaged insulation or visible leaks; ensure lines are properly insulated and protected from physical damage.
Tip: Only licensed technicians should handle refrigerant-related issues. - 6
Test thermostat and controls
Test mode changes, fan speed, and setpoints to ensure proper responsiveness. Calibrate if readings drift from actual temperature.
Tip: If your thermostat is wireless, replace batteries and re-pair as needed. - 7
Inspect electrical connections
Check the main service panel and the equipment disconnect for signs of wear or arcing; tighten connections if you have the proper training.
Tip: Turn off power before touching electrical components; use a non-contact tester to verify absence of voltage. - 8
Run the system and observe
Restart the unit and monitor for normal cycling, noise levels, and adequate airflow. Note any unusual sounds or smells.
Tip: If you hear hissing, buzzing, or banging, stop and call a pro. - 9
Document maintenance
Record date, tasks performed, and any observed issues in your maintenance log. This helps track progress and plan future service.
Tip: Keep the log in a visible spot or digital calendar for reminders. - 10
Schedule professional service
Plan an annual tune-up with an HVAC technician and discuss any recurring issues or efficiency concerns.
Tip: Pro service often includes refrigerant check, duct inspection, and system calibration.
Your Questions Answered
What is heat pump aftercare and why is it important?
Heat pump aftercare is a routine maintenance plan that keeps your system running efficiently, extends its life, and reduces energy use. Regular checks prevent small problems from becoming costly failures.
Heat pump aftercare is a routine to keep your system efficient and reliable, saving you energy and money over time.
How often should I change the air filter on a heat pump?
Most homes should change or clean filters every 1-3 months, depending on usage, pets, and dust levels. Check manufacturer guidance and adjust accordingly.
Change filters every one to three months; more often with pets or dusty environments.
Can I clean the outdoor condenser fins myself?
Yes, gently remove debris and dust with a soft brush. Do not use sharp tools or high-pressure water, which can bend fins and reduce efficiency.
You can clean the outdoor fins with a soft brush, but avoid anything sharp or a strong spray.
What are signs my heat pump needs professional service?
Persistent poor cooling or heating, unusual noises, frost on the outdoor coil, or rising energy bills despite maintenance are signs you should call a technician.
If performance stays off after basic checks or you hear odd noises, call a pro.
Is an annual professional tune-up necessary?
An annual tune-up is highly recommended to verify refrigerant charge, electrical safety, and overall performance, especially on older or complex systems.
A yearly professional tune-up helps ensure safety and efficiency.
How should I document heat pump maintenance?
Keep a written log or digital record of dates, tasks, and observations. This helps track performance and can support warranty claims.
Maintain a maintenance log with dates and notes to track your heat pump health.
Watch Video
Top Takeaways
- Maintain a regular aftercare schedule
- Clean and replace filters promptly
- Keep outdoor airflow clear and coils clean
- Document maintenance and seek professional help when needed