How to Clean Heat Pump: A Practical Guide for Homeowners
Learn how to safely clean your heat pump to boost efficiency, extend lifespan, and reduce energy costs with a practical, step-by-step home guide for outdoor and indoor units.

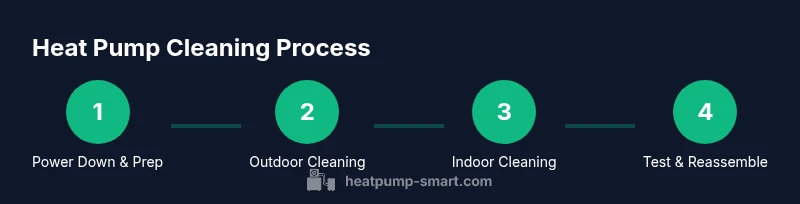
This guide shows homeowners how to safely clean a heat pump to improve efficiency and extend its life. You'll learn how to prepare, clean both outdoor and indoor components, maintain filters, and create a seasonal maintenance plan. According to Heatpump Smart, regular cleaning supports reliable heating and cooling with less energy waste.
Why Regular Cleaning Matters
A heat pump is a compact system with outdoor condenser coils and indoor air handler coils. Debris, dirt, and grime reduce airflow, forcing the system to work harder and raising energy use. Regular cleaning can improve efficiency by ensuring clear airflow, reducing wear on the fan motor, and preventing ice build-up on outdoor coils in cold weather. Heatpump Smart notes that even small debris can cause a measurable energy penalty and shorten component life. A clean unit runs more quietly and distributes conditioned air more evenly, increasing comfort for homeowners and property managers. For new installations, establishing a seasonal cleaning routine is part of a broader maintenance plan that includes filter checks, refrigerant checks if needed, and thermostat calibration. In short, cleaning isn’t a one-off task; it’s a proactive practice that maintains performance, saves energy, and reduces the risk of expensive repairs. By treating the heat pump as a living system that benefits from care, you can maintain home comfort with less noise and fewer hot/cold spots.
Safety First: Before You Start
Safety comes first when cleaning any HVAC equipment. Begin by powering down the system at the main breaker and, if you have one, the outdoor disconnect switch. Wait a few minutes for capacitors to discharge before touching electrical components. Wear eye protection and gloves, and keep children and pets away. Never spray high-pressure water directly at electrical connections or components. If you’re unsure about the wiring or refrigerant lines, pause and consult a professional. A quick safety check now prevents shocks, short circuits, and costly repairs later. Having a clear workspace and adequate lighting makes the job safer and more effective. Heatpump Smart recommends documenting your safety steps in a maintenance log for future reference.
Cleaning the Outdoor Unit (Condenser)
The outdoor condenser coils are exposed to weather, dust, and seasonal debris. Start by removing large leaves, sticks, and overhanging vegetation within a three-foot clearance around the unit. Use a soft brush or a low-pressure stream from a garden hose to knock loose dirt from the fins—never use a pressure washer, which can bend fins and damage the coil. Work from the top down and avoid spraying water into electrical components. If fins are bent, a plastic fin comb can realign them gently. Allow the unit to dry completely before powering back up. Make sure surrounding air can circulate freely for best airflow and heat exchange.
Cleaning the Indoor Components (Air Handler, Coils)
Access the indoor air handler by removing the service panel. Use a vacuum with a brush attachment to remove surface dust from the evaporator coil and surrounding areas. For stubborn grime, a mild coil cleaner applied according to the product directions can be used on non-metal surfaces; avoid applying cleaners directly to any electrical components. Rinse lightly with a spray bottle or damp cloth if needed. Check the condensate drain pan for standing water and clean it. Clear any clogs in the drain line to prevent water damage and mold growth. Reassemble the panel when dry.
Filter Maintenance and Replacement
Filters are the first line of defense against dust and allergens. Check filters monthly and replace or clean reusable filters as recommended by the manufacturer. If you have disposable filters, replace them with the correct size and type. If you use washable filters, rinse with cool water and let them dry completely before reinstalling. A clean filter improves airflow and system efficiency while reducing strain on the blower motor. Keep a small stock of replacement filters on hand to avoid delays.
Seasonal Maintenance Schedule
Create a simple calendar that aligns with local climate and usage patterns. In temperate climates, perform a major outdoor and indoor clean at the start of spring and fall, then perform lighter checks mid-season. Record dates of cleaning, filter changes, and any observations about performance. If you notice reduced airflow, unusual noises, frost on outdoor coils, or rising energy bills between cleanings, address them promptly. Heatpump Smart emphasizes that consistency beats intensity: regular light maintenance beats infrequent, heavy service.
Common Mistakes to Avoid
Avoid the temptation to spray water at electrical connections or share metal tools across the outdoor fins, which can cause shorts or bent fins. Don’t use harsh chemicals or abrasive cleaners that could corrode surfaces. Rushing cleaning on very hot days can increase the risk of heat-related injury and reduce effectiveness. If you suspect refrigerant leaks, call a licensed technician rather than attempting a DIY fix. Finally, never skip safety steps—power off, disable the thermostat, and disconnect power before any cleaning task.
Tools & Materials
- Safety gear (gloves, safety glasses)(Protect hands and eyes from sharp edges and debris)
- Soft-bristle brush(Gently loosen dirt from fins and surfaces)
- Garden hose with adjustable nozzle(Use low to medium pressure; avoid jet spray)
- Mild cleaner or coil cleaner(Follow product directions; test on a small area first)
- Vacuum with brush attachment(Remove dust from indoor components safely)
- Screwdriver set(Remove service panels safely if needed)
- Replacement air filters(Keep on hand for quick swaps)
Steps
Estimated time: 60-90 minutes
- 1
Power Down & Prep
Turn off the main breaker and, if present, the outdoor disconnect. Wait a few minutes for capacitors to discharge. Gather tools and clear the work area to prevent accidents during cleaning.
Tip: Taking 10 minutes to organize now saves time later and reduces risk. - 2
Check Clearances
Ensure a minimum three-foot clearance around the outdoor unit and remove any nearby debris or overhanging branches. Adequate space ensures safe access and proper airflow after cleaning.
Tip: Clearance also prevents debris from re-entering the coil during cleanup. - 3
Clean Outdoor Coils
Gently brush away loose debris, then rinse with a low-pressure spray from top to bottom. Avoid direct spray at electrical components; do not use a pressure washer as it can bend fins.
Tip: If fins are bent, use a plastic fin comb to restore alignment. - 4
Clean Outdoor Fins
Inspect the condenser fins for damage. Clean between fins and work carefully to prevent bending. Allow coils to dry before reapplying power.
Tip: Drying ensures moisture doesn’t cause short-term corrosion or mold growth. - 5
Access Indoor Coils
Remove the indoor access panel to reach the evaporator coil. Use a vacuum to remove surface dust and debris around the coil and drainage components.
Tip: Hold panels steady to avoid bending mounting clips during removal. - 6
Clean Indoor Coils
Apply a mild cleaner to the evaporator coil if needed, following the product’s directions. Rinse lightly with a damp cloth or spray bottle; avoid saturating electrical components.
Tip: Do not use metal tools on the coil; plastics are gentler and safer. - 7
Check Drain & Pan
Inspect the condensate pan for standing water and clean it. Clear any clogs in the drain line to prevent overflow and mold growth.
Tip: A simple vinegar solution can help sanitize the pan between seasonal cleanings. - 8
Replace Filters & Reassemble
Install a fresh filter or cleaned, dry reusable filter. Reassemble panels and restore power, then run a short test to confirm airflow and noise levels.
Tip: Keep a log of filter changes for future maintenance scheduling.
Your Questions Answered
How often should I clean my heat pump?
Most homeowners clean the outdoor and indoor components at least twice a year, with monthly filter checks. In dusty or humid climates, more frequent cleaning may be beneficial.
Clean your heat pump twice a year, with monthly filter checks; more frequent cleaning may be needed in dusty or humid areas.
Can I use water to clean the evaporator coils?
Light rinsing with water may be appropriate for evaporator coils if the access panel is removed and no electrical components are exposed. Use a damp cloth for sensitive areas and avoid soaking the coil.
Light water rinse is sometimes okay on evaporator coils if you avoid electrical parts; otherwise use a damp cloth.
Do I need a professional to clean the heat pump?
For basic maintenance like cleaning accessible coils and replacing filters, a DIY approach is fine. Complex tasks such as refrigerant checks, major refrigerant leaks, or refrigerant handling require a licensed technician.
DIY cleaning is fine for basic tasks, but call a professional for refrigerant issues or complex repairs.
What safety steps should I take before cleaning?
Turn off power at the breaker and outdoor disconnect, wait for capacitors to discharge, wear protective gear, and keep children away from the work area.
Turn off power, wait for capacitors to discharge, wear protection, and keep kids away.
What are common signs cleaning is needed?
Reduced airflow, higher energy bills, unusual noises, frost on outdoor coils, or ice buildup indicate it’s time for a cleaning and inspection.
If airflow drops or you hear unusual noises, consider cleaning and inspecting the system.
Should I use chemical cleaners on all coils?
Use mild coil cleaners only as directed and avoid harsh chemicals on metal surfaces or near electrical components. Test on a small area first.
Only use mild cleaners per instructions and avoid harsh chemicals near electrical parts.
Is there a difference between cleaning a heat pump in winter vs summer?
Cleaning in mild seasons minimizes thermal stress and improves efficiency during peak use. In winter, focus on preventing ice buildup; in summer, emphasize airflow and filter condition.
Clean during mild seasons; focus on ice prevention in winter and airflow in summer.
Top Takeaways
- Power down before any cleaning task.
- Maintain at least 3 feet of clearance around the outdoor unit.
- Clean outdoor coils first, then indoor components.
- Replace or clean filters to improve airflow and efficiency.
- Record maintenance dates for predictable upkeep.