Aquacal Heat Pump Repair: Step-by-Step Guide
Learn safe, effective aquacal heat pump repair with step-by-step diagnostics, essential tools, and when to call a pro. Heatpump Smart provides expert guidance for homeowners, builders, and property managers.

This guide explains how to diagnose and perform safe aquacal heat pump repair with a clear, step-by-step process. You’ll learn to identify common failure points, gather the right tools, and differentiate DIY fixes from issues that require a licensed technician.
What is aquacal heat pump repair and why it matters
The aquacal heat pump is a compact, energy-efficient system that provides reliable space heating and cooling. When it malfunctions, comfort, energy bills, and equipment longevity can all be affected. According to Heatpump Smart, understanding aquacal heat pump repair helps homeowners quickly spot issues, prioritize fixes, and protect equipment life. This section covers how the system operates, common failure modes, and practical early actions you can take to stabilize performance while you plan next steps. By recognizing symptoms early, you can often avoid more extensive downtime and higher repair costs.
Safety first when tackling aquacal heat pump repair
Working on heat pumps involves electricity, refrigerant lines, and mechanical components. Always begin by powering down the unit and disconnecting power to the outdoor condenser at the breaker panel. Use proper PPE: insulated gloves, safety glasses, and closed-toe shoes. If you smell refrigerant or hear hissing, leave the area and call a professional. This section outlines essential safety checks and why they matter, especially for DIY repairs. Heatpump Smart emphasizes never attempting high-risk procedures without proper training.
Common failure points in aquacal heat pumps
Aquacal heat pumps rely on a blend of hydraulics and electronics. Common failure points include refrigerant leaks, faulty capacitors, sensor errors, dirty coils, and fan motor issues. A refrigerant leak not only reduces heating efficiency but also poses safety concerns and environmental impact. Faulty sensors can cause incorrect temperature readings and short cycling. Dirty coils and blocked fins reduce airflow, forcing the compressor to work harder. Understanding these areas helps you narrow down root causes quickly and plan appropriate repairs or replacements.
Diagnostic workflow: from symptom to root cause
Start with observable symptoms: warm air, frequent cycling, ice buildup on lines, or unusual noises. Check on-board diagnostic codes or the thermostat display for error codes. Inspect electrical connections at the outdoor unit and inside the air handler. Listen for unusual noises and feel for temperature differences around refrigerant lines. Use a multimeter to verify voltage at critical components and check for tripped breakers or blown fuses. This structured approach reduces guesswork and guides you toward safe, effective repairs.
Repair options and when to hire a pro
Some aquacal heat pump repairs are straightforward, such as cleaning coils, reseating loose wiring, or replacing a worn capacitor. More complex tasks—refrigerant handling, compressor replacement, or leak repair—require licensed technicians and proper recovery equipment. Always consult your warranty terms before attempting DIY fixes, as certain actions can void coverage. A staged approach—tackle safe, non-invasive tasks yourself, and bring in a pro for refrigerant or high-voltage work—helps protect performance and warranty.
Tools and replacement parts you may need
Having the right tools makes repairs safer and faster. Essential items include a multimeter, insulated screwdrivers, a non-contact voltage tester, a refrigerant leak detector, a torque wrench, and a clean rag for sealing joints. Replacement parts commonly needed for aquacal heat pump repair include capacitors, fuses, contactors, thermostats, and strain-relief components. Always verify part compatibility with your model and follow safety guidelines when handling refrigerant components.
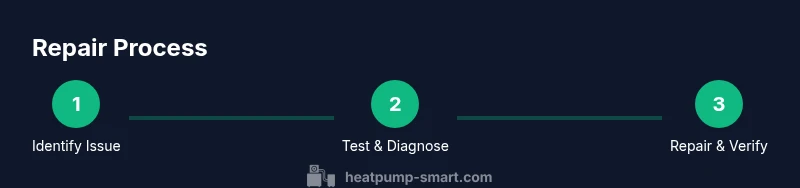
Step-by-step diagnostic and repair workflow
This section outlines a practical, action-by-action workflow for diagnosing and repairing common aquacal heat pump issues. The steps are designed to be performed in sequence to avoid missing critical checks and to minimize risk. Use this as a reference during the hands-on portion, but always stop if you encounter unfamiliar configurations or safety concerns. Heatpump Smart recommends documenting each step and keeping a log for future maintenance.
Maintenance and preventive care to reduce aquacal heat pump repair risk
Regular maintenance helps prevent many aquacal heat pump repairs. Schedule seasonal checkups, clean or replace air filters, keep the outdoor unit free of debris, and monitor refrigerant lines for frost or moisture. A simple quarterly checklist can catch issues before they develop into costly repairs. Proactive maintenance improves efficiency and service life, saving energy and reducing downtime.
Tools & Materials
- Main electrical power shutoff (breaker or disconnect)(Turn off the dedicated circuit feeding the aquacal unit before any work.)
- Non-contact voltage tester(Confirm no voltage is present before touching any components.)
- Multimeter (digital)(Check voltage, continuity, and resistance on controls and wiring.)
- Insulated screwdrivers (Phillips and flathead)(Use appropriate sizes to avoid cam-out and protect components.)
- Refrigerant leak detector(Identify leaks safely; never ignore a suspected refrigerant loss.)
- Capacitor tester(Verify capacitor health to prevent false readings and drive issues.)
- Torque wrench(Tighten connections to manufacturer spec without over-torquing.)
- Rags and sealant-safe cleaners(Clean joints and wipe spills; avoid harsh chemical exposure to seals.)
- Thermometer or temperature probe(Measure coil and line temperatures to assess heat exchange.)
Steps
Estimated time: 60-120 minutes
- 1
Power down and verify safety
Locate the main service panel, switch off the breaker feeding the aquacal unit, and use a non-contact tester to confirm no voltage at the outdoor condenser. This prevents shock and equipment damage during inspection.
Tip: Lockout-tagout the switch if possible to avoid accidental restoration of power. - 2
Check error codes and thermostat
Read any error codes from the unit display or thermostat. Note codes and refer to the service manual to interpret them before taking further action.
Tip: Document codes with timestamps for future reference or technician reports. - 3
Inspect outdoor wiring and connections
Visually inspect and gently loosen/re-seat connections at the outdoor unit. Look for corrosion, loose terminals, or damaged wires that can cause cycling or performance loss.
Tip: Only touch exposed conductors; avoid directly handling live conductors. - 4
Assess refrigerant lines and coils
Check for frost, ice buildup, oil residue, or obvious leaks along refrigerant lines and fins. Ice indicates improper pressure or low refrigerant; leaks require licensed service.
Tip: If you see ice, do not attempt fast defrosting; allow system to melt naturally if safe. - 5
Test capacitors and electrical components
Using the multimeter and capacitor tester, verify capacitance and resistance for start/run capacitors and contactors. Replace any component outside tolerance.
Tip: Replace in matched pairs when applicable to prevent imbalance. - 6
Check compressor and pressure indicators
If trained and equipped, check compressor operation and read static pressure indicators according to the manual. Abnormal readings may indicate internal wear or a refrigerant issue.
Tip: Do not open sealed compressor housings; this requires licensed service. - 7
Restore power and run a test cycle
Reconnect power, run a short test cycle, and observe system behavior. Confirm normal cycling, airflow, and temperature delivery.
Tip: Monitor for new fault codes or abnormal noises during the test. - 8
Document findings and plan next steps
Record all observations, parts replaced, and codes seen. Determine whether the issue is resolved or if professional service is required for refrigerant or high-voltage tasks.
Tip: Create a maintenance log to guide future aquacal heat pump repair and care. - 9
Decide on repair vs replacement
If failures recur or components near end-of-life, evaluate the cost-benefit of repair versus replacement with a heat-pump model appropriate for your space.
Tip: Consider long-term energy savings and warranty terms when choosing replacement.
Your Questions Answered
What is aquacal heat pump repair?
Aquacal heat pump repair encompasses diagnosing and fixing issues that prevent a heat pump from delivering expected heating or cooling. It covers electrical checks, refrigerant-related concerns, sensor problems, and airflow blockages. Always prioritize safety and consult manuals or professionals for complex tasks.
Aquacal heat pump repair means diagnosing and fixing issues that stop the unit from heating or cooling properly. It includes electrical checks, refrigerant-related concerns, and airflow problems. For complex tasks, consult a professional.
Can I DIY aquacal heat pump repair?
You can handle safe, non-refrigerant tasks like cleaning coils, reseating connections, and basic testing if you follow proper safety protocols. Do not attempt refrigerant handling or high-voltage work unless you're licensed and equipped. When in doubt, call a pro.
DIY is okay for simple tasks, but avoid refrigerant work or high-voltage repairs unless you’re licensed. When unsure, hire a professional.
What are early signs of aquacal heat pump problems?
Common early signs include frequent cycling, reduced heating or cooling efficiency, unusual noises, frost on lines, and higher energy bills. These symptoms merit a closer diagnostic check before deciding on a repair.
Look for frequent cycling, reduced performance, strange noises, frost on lines, or rising energy bills. Investigate early to prevent bigger issues.
How long does a repair take?
Repair duration varies with complexity. Simple maintenance or part replacement can be completed in a few hours, while refrigerant or compressor work may take longer and require a follow-up service.
Repair time depends on the complexity. Simple tasks may be completed quickly, but refrigerant or compressor work requires more time and a professional.
Is warranty affected by DIY repair?
DIY repairs can affect warranty coverage, especially if refrigerants or factory-sealed components are involved. Always check your warranty terms and consult the installer or manufacturer before proceeding.
DIY work can void warranty for refrigerant or sealed components. Check terms with the installer or manufacturer before proceeding.
When should I replace instead of repair?
If failures recur, the system is aging beyond its expected life, or repair costs approach or exceed replacement costs, replacement may be more cost-effective in the long run.
If issues keep coming back or the system is old, replacing it can be more economical in the long term.
Watch Video
Top Takeaways
- Understand common aquacal heat pump failure points to target diagnostics.
- Follow a safe, structured diagnostic workflow before attempting repairs.
- Differentiate simple maintenance tasks from refrigerant or compressor work that requires a pro.
- Document findings to guide future maintenance and warranty considerations.