Cracked Heat Pump: Urgent Troubleshooting Guide for Homeowners
Urgent guide to diagnosing and safely handling a cracked heat pump, with actionable steps for homeowners and HVAC pros. Learn signs, when to seek help, and prevention tips.

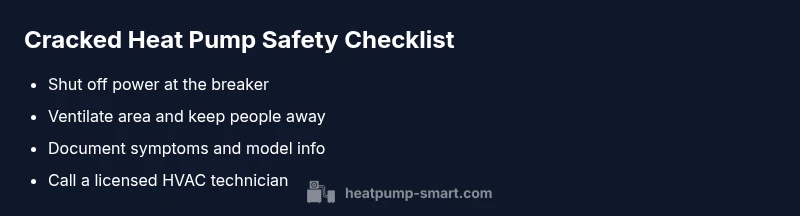
A cracked heat pump is a safety and performance red flag. It usually means a damaged heat exchanger, cabinet crack, or refrigerant line that can leak and reduce efficiency. Do not run the unit, shut it off at the breaker or thermostat, and contact a licensed HVAC technician immediately. Ventilate the area and keep others away.
What cracked heat pump means for safety and performance
A cracked heat pump describes a physical breach in the unit’s structure—most often the heat exchanger, cabinet, or a refrigerant line. The consequences extend beyond reduced heating or cooling; leaks can expose occupants to refrigerant and create flammable or chemical exposure risks in poorly ventilated spaces. According to Heatpump Smart, a cracked heat pump is a red flag for safety and efficiency and should be treated as an urgent concern. Visible cracks on the cabinet, oily residue near joints, or unusual sounds like hissing indicate a problem that likely requires professional evaluation. The crack may result from impacts, material fatigue, improper installation, or extreme thermal stress from rapid temperature swings. Once a crack exists, the refrigerant circuit can be compromised, raising the potential for leaks and system instability. Do not ignore these signs or attempt quick fixes; rushed repairs can worsen damage and void warranties.
Immediate safety steps to take today
Take immediate action to keep your home safe while you arrange service. First, switch off power to the heat pump at the main breaker or thermostat to stop electrical activity and reduce the risk of further damage. Do not attempt to seal the crack with tape or epoxy—these are temporary at best and can trap refrigerant or mask leaks. Evacuate occupants from the area if you notice odors or a strong chemical smell, and ventilate by opening doors and windows if it’s safe to do so. Keep children and pets away from the unit, and mark the location so others don’t re-energize the system. Finally, contact a licensed HVAC technician or the manufacturer's service line and describe what you observed; prepare your unit’s model number, serial, and any warranty information to speed up dispatch.
Common signs of a cracked heat exchanger or housing
Detecting a crack early can prevent serious hazards. Look for visible cracks on the metal cabinet or around joints, and note any hissing or bubbling sounds as refrigerant circulates. A sudden drop in heating or cooling efficiency, unexplained increases in energy use, or frost/ice buildup on the coils can indicate a refrigerant leak or compromised heat exchanger. Smells described as sweet, chemical, or solvent-like near the outdoor unit or indoor air stream may signal a refrigerant release. If you notice oily residues near the connections or on the floor beneath the unit, that can be a sign of a leak. Finally, frequent trips to the breaker or tripping safety switches during operation are a red flag that deserves professional evaluation.
How technicians diagnose a cracked heat pump
On inspection day, the technician will perform a careful visual assessment of the cabinet, coils, and refrigerant lines for signs of cracking or corrosion. They will typically conduct a pressure test or leak-detection scan to locate breaches in the refrigerant circuit, followed by a refrigerant charge check to assess system performance. Thermal imaging or infrared cameras may be used to identify cold spots and heat exchange irregularities. If a crack is confirmed, the repair may involve replacing the affected coil or heat exchanger, resealing joints, and ensuring the refrigerant charge is correct. In many cases, a cracked heat exchanger is treated as a replacement scenario rather than a patch repair, due to long-term safety concerns.
What to do while awaiting service
While waiting for a technician, minimize unit use and keep the space ventilated. Document symptoms with dates and times, and take photos from multiple angles for the service report. Gather your unit’s model, serial, and purchase/warranty details. If you’re able, note how long the issue has persisted and whether it coincides with weather changes. Do not attempt any DIY repairs; refrigerant handling requires licensed professionals. Have a clear plan for where the machine is located and how access will be arranged, so the technician can reach it quickly when they arrive.
Safety and regulatory considerations
Refrigerant handling and safety standards are heavily regulated. Homeowners should not attempt to repair or modify a cracked heat pump coil; such actions can release gases or create unsafe pressures. Licensed HVAC technicians use certified equipment to recover refrigerants and comply with disposal regulations. After replacement or repair, the system must be recharged to correct levels and tested for leaks. If the unit is under warranty, follow the manufacturer’s service procedures to avoid voiding coverage. Local codes may require permits or inspections for significant refrigerant work, so check with your building department if you’re in a rental or agency-managed property.
Repair vs replacement: finding the best path
A cracked heat exchanger is a serious fault. If the unit is older or the cost of coil replacement is high, replacement with a newer model may offer better long-term value and reliability. Consider the system’s overall efficiency, ozone-friendly refrigerants, and availability of parts in your area. Warranty coverage, depreciation, and possible rebates or incentives can influence the decision. A professional assessment will provide a recommended path based on the unit’s age, condition, and your home’s heating and cooling needs.
Maintenance to prevent future cracks
Prevention starts with regular maintenance and careful installation. Schedule annual inspections focusing on cabinet integrity, duct connections, and vibration reduction to minimize stress. Ensure proper clearances around the outdoor unit to prevent debris buildup and corrosion. Keep the area around the unit clean and dry to avoid moisture-related damage. Replace worn vibration isolators and secure loose panels to prevent chafing. Use weatherproof seals and protect against accidental impacts by relocating items away from the unit. By following these steps, homeowners can extend the life of their heat pump and reduce the risk of cracks or leaks.
Steps
Estimated time: 60-90 minutes
- 1
Power down and secure the unit
Turn off power to the heat pump at the main breaker or using the thermostat. This reduces electrical risk and stops any ongoing refrigerant movement. Do not re-energize until a professional has assessed the situation.
Tip: If you hear hissing or see a visible crack, keep clear and call for help right away. - 2
Inspect the exterior for obvious damage
Carefully examine the cabinet for cracks, bent panels, or oil residues near joints. Photograph any damage from multiple angles to aid the technician’s assessment. Do not disassemble components yourself.
Tip: Avoid touching refrigerant lines or attempting to seal cracks with tape. - 3
Document symptoms and gather unit details
Note any signs like odors, frost buildup, or reduced performance. Record the model, serial number, and purchase date. This information helps the technician diagnose and check warranty coverage.
Tip: Have original purchase receipts or warranty documents ready. - 4
Ventilate and restrict access
Open doors/windows only if safe to do so to improve air quality. Keep children and pets away from the area and do not operate the unit during this time.
Tip: Use fans to improve airflow, but avoid pointing them directly at the outdoor coil if leaking. - 5
Schedule professional service
Contact a licensed HVAC technician or the manufacturer’s service line to arrange an inspection. Provide your findings and photos to speed the dispatch.
Tip: Ask about coil replacement versus exchanger repair and any safety precautions. - 6
Follow technician guidance on safety and repair
Do not attempt DIY repairs. Refrigerant handling requires certified equipment and training, and improper repairs can worsen hazards.
Tip: Clarify warranty implications before any replacement parts are installed. - 7
Post-service testing and verification
Ensure the system is recharged to proper specifications and tested for leaks. Confirm that all safety devices function and that performance meets manufacturer specs.
Tip: Request a written report detailing detected issues and the repair performed. - 8
Review maintenance plan to prevent recurrence
Ask for a maintenance schedule that includes annual inspections, vibration checks, and cleanings to reduce future crack risks.
Tip: Set calendar reminders for routine checks to stay ahead of issues.
Diagnosis: Cracked heat pump housing or refrigerant lines detected (visual crack, hissing, or unusual odor).
Possible Causes
- highPhysical impact or improper installation causing stress cracks
- mediumThermal stress from rapid temperature swings
- lowManufacturing defect in heat exchanger
Fixes
- easyShut off power to the unit at the breaker or thermostat
- easyDo not operate or attempt DIY patching; call a licensed HVAC technician
- mediumSchedule professional inspection to confirm crack and perform refrigerant-safe repair or coil replacement
- easyIf refrigerant leak is suspected, evacuate the area and ventilate; avoid ignition sources
Your Questions Answered
Can a cracked heat pump be repaired?
Generally, a cracked heat exchanger or major cabinet crack requires coil or exchanger replacement rather than a patch. A licensed HVAC technician should assess feasibility and safety before any repair is attempted.
Most cracks require coil replacement; a pro must assess feasibility and safety before repair.
Is a cracked heat exchanger dangerous to occupants?
Yes. Refrigerant leaks can pose health and safety risks. If you suspect a leak, evacuate, ventilate, and have a technician inspect the unit promptly.
Yes, leaks are dangerous—evacuate and call a professional.
How long does it take to fix a cracked heat exchanger?
Repair time varies with the unit and parts availability; it can range from a few hours to several days depending on whether a replacement coil is on hand.
Repair times vary; it can take hours to days depending on parts availability.
What are the signs of a refrigerant leak?
Signs include a sweet or chemical odor, frost or ice on coils, oily residues, hissing sounds, and sudden drops in performance.
Look for sweet smells, ice buildup, and unusual noises as leak indicators.
Should I run emergency heat if I suspect a crack?
No. Running emergency heat can stress a damaged system and worsen leaks. Turn off the unit and seek professional help.
Don’t run emergency heat; turn off the unit and call a pro.
Will warranty cover cracked heat exchanger repairs?
Warranty eligibility depends on the terms and the unit’s age. Check with the manufacturer and review your policy for coverage of coils or exchangers.
Check the warranty terms with the manufacturer or insurer for coverage.
Watch Video
Top Takeaways
- Shut off power at the breaker and avoid DIY fixes.
- A cracked heat exchanger usually requires professional coil/ exchanger replacement.
- Only operate after a professional confirms it’s safe and properly serviced.
- Maintenance is the best defense against future cracks.