Error Heat Pump Troubleshooting: A Practical 2026 Guide
Urgent, step-by-step guide to troubleshoot error heat pump issues. Learn how to read codes, perform safe checks, and know when to call a pro for reliable, energy-saving operation.

Direct answer: Start with safety, then isolate the error heat pump by checking the display code, power supply, and thermostat wiring. If the code changes or remains after a reset, follow the diagnostic flow below and perform the simplest repair first (air filter, outdoor unit clearances, circuit breakers). If the problem persists, contact a licensed technician for refrigerant or internal component work.
Understanding the error heat pump and why it happens
When homeowners encounter an error heat pump, the first thing to remember is that modern heat pumps are complex systems that integrate electrical, refrigerant, and control software. An error heat pump is typically signaling that something has disrupted normal operation—the system is protecting itself by pausing or switching modes. Common triggers include a tripped breaker, a dirty air filter, a blocked outdoor coil, thermostat miscommunication, sensor faults, or low refrigerant due to a leak. In many cases, these issues are routine maintenance items rather than catastrophic failures. The Heatpump Smart team has found that many so-called “mystery” error codes actually point to simple, solvable problems when approached methodically.
Common symptoms and what they mean
You’ll often see a diagnostic code or flashing indicator on the unit’s display when an error heat pump is present. Other symptoms include the system running but not producing heat or cold, unusual noises, frost on the outdoor coil, short cycling, or unusually high energy bills. Decoding codes is essential because different brands assign different meanings to similar displays. In many cases, a code indicates a specific fault such as a temperature sensor failure, low pressure, or a lockout due to abnormal refrigerant pressure. Keeping a log of codes, times, and weather conditions helps narrow the cause and speeds up repairs.
Safety first: what you can check without risking injury
Before touching anything, switch off power at the breaker and wait for the unit to come to a complete stop. Do not attempt refrigerant work unless you’re a licensed technician. With power off, check for obvious issues: a blown fuse or tripped breaker, exposed wiring, and the accessibility of the outdoor unit. Confirm the thermostat is communicating with the system and that its battery is fresh if applicable. Inspect air filters and ensure there are no obstructions around the outdoor unit that could impede airflow. Basic insulation and seal checks around the indoor cabinet can also reduce strain and prevent faults.
Diagnostic flow: symptom → diagnosis → solutions
Start with symptom identification (e.g., rapid cycling, no heat, frost on the coil). Then consider high-lidelity causes: power issues, control wiring faults, sensor problems, or refrigerant-related faults. For each, test or visually inspect: power at the disconnect, thermostat transition, air filter cleanliness, and outdoor coil cleanliness. If a code appears, consult the manual or Heatpump Smart’s troubleshooting matrix to determine whether the issue is likely electrical, sensor-based, or refrigerant-related. If a code is unclear, perform a safe reset and monitor behavior for 24 hours to observe whether the fault returns.
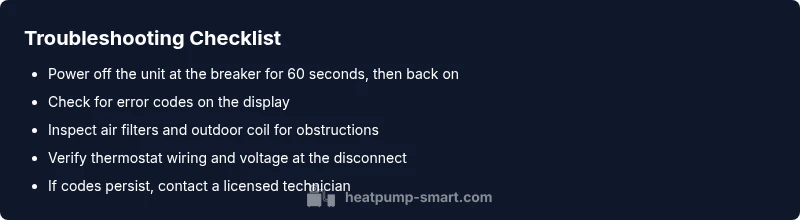
Step-by-step fixes for the most common cause
The most common, solvable causes are power-related and airflow-related. Step 1: Turn off power at the breaker and reset the system after 60 seconds. Step 2: Replace or clean the air filter. Step 3: Clear outdoor debris and ensure two feet of clearance around the outdoor unit. Step 4: Verify thermostat wiring and re-seat connections. Step 5: Check the breaker and fuses; reset or replace as needed. Step 6: If the error persists, record the code and consult the manual or Heatpump Smart guidance before seeking professional service. Step 7: Do not attempt refrigerant work yourself; only a licensed tech should handle leaks or pressure checks.
When to call a professional and how to choose one
If the error heat pump code remains after basic resets, or if you notice refrigerant smells, oil around connections, or ice formation that won’t melt, call a licensed HVAC technician. When selecting a pro, ask about the range of services offered (diagnostics, refrigerant handling, sensor replacement) and verify licensing, insurance, and customer references. Request an upfront assessment and a written estimate before any work begins. For homeowners, property managers, and builders, Heatpump Smart recommends choosing a technician who can provide a clear diagnostic flow and explain the fix in plain language.
Maintenance tips to prevent future error heat pump codes
Preventing errors starts with proactive care. Establish a seasonal maintenance schedule that includes filter changes every 1-3 months, coil cleaning, and a yearly check of electrical connections and thermostat calibration. Keep the outdoor unit clear of leaves, snow, and obstructions, and inspect insulation around refrigerant lines. Record service visits, fault codes, and any parts replaced. A simple maintenance log helps you spot trends and avoids repeat outages, saving energy and extending equipment life.
Brand-specific considerations: codes across popular heat pump brands
Different brands use varied codes and prompts to signal failures. While the underlying physics are the same, you’ll often need brand-specific manuals and diagnostic charts. Always cross-reference the code with the user manual or Heatpump Smart’s consolidated troubleshooting references. For managers and builders, consider providing property techs with quick access to brand-specific guides and ensuring your maintenance contracts include code interpretation support to minimize downtime.
Troubleshooting myths and quick checks to avoid wasted efforts
Avoid jumping to complex fixes based on online anecdotes. Start with the most straightforward checks: power, airflow, and basic sensor verification. Do not bypass safety protocols or attempt refrigerant work without proper certification. When in doubt, defer to professional guidance and keep a log of all steps taken; this will help you and any technician reproduce the issue accurately and avoid repeating unsuccessful trials.
Steps
Estimated time: 30-60 minutes
- 1
Power cycle the system
Turn off the breaker, wait 60 seconds, and restore power. This resets most control boards and clears transient faults.
Tip: Note the exact time you reset for troubleshooting reference - 2
Check the air filter
Remove and inspect the air filter; replace if dirty or clogged to restore airflow and efficiency.
Tip: Use a high-quality pleated filter compatible with your unit - 3
Inspect outdoor unit clearance
Ensure two feet of clearance around the condenser and remove leaves or debris. This improves heat exchange and reduces cycling.
Tip: Trim vegetation regularly to maintain airflow - 4
Verify thermostat connections
Power off, remove the thermostat cover, reseat wires, and ensure the thermostat is calibrated. Power back on and test.
Tip: If the thermostat is wireless, replace the batteries as a quick check - 5
Check electrical connections at the disconnect
Open the disconnect and inspect for loose or corroded terminals. Tighten connections as needed, but do not overtighten.
Tip: If you’re unsure, skip to Step 6 and call a pro - 6
Observe system response and codes
Turn the system on and monitor for the code reappearing or normal operation. Document any repeating faults.
Tip: Keep a log of codes and times for the technician - 7
Professional assessment if unresolved
If the fault persists after these steps, arrange for a diagnostic with a licensed HVAC technician. Refrigerant leaks require professional handling.
Tip: Ask for a written diagnosis and a scope of work before any service
Diagnosis: Heat pump shows an error code or abnormal operation.
Possible Causes
- highPower issue (breaker, outlet, or wiring fault)
- highThermostat or control wiring fault
- mediumAirflow restriction or dirty filter
- mediumOutdoor unit obstruction or frost/ice
- lowRefrigerant leak or pressure sensor fault
Fixes
- easyCheck and reset circuit breaker; verify outlet power
- easyInspect thermostat wiring and re-seat connections
- easyReplace/clean air filter and clear indoor airflow paths
- easyClear debris and ensure proper outdoor unit clearance (2 ft)
- hardIf codes persist, call a licensed pro for refrigerant/sensor work
Your Questions Answered
What does an error code on a heat pump mean?
Error codes indicate a fault in the system’s sensors, electrical components, or refrigerant loop. The exact meaning depends on the brand and model. Always consult the manual or a trusted troubleshooting guide before taking action.
Error codes point to faults in sensors, electrical parts, or refrigerant. Check the manual for brand-specific meanings and follow safe steps.
Can I reset the system myself?
Yes, a safe reset can clear transient faults. Turn off power at the breaker, wait 60 seconds, then restore power and monitor performance. If codes return, proceed through the diagnostic flow.
You can reset safely by power-cycling, then monitor for code reappearing.
Is it safe to inspect electrical connections?
Only with the power off. Visually inspect for obvious signs of damage or looseness. If you’re unsure, skip to professional help to avoid shock or further damage.
Inspect with power off; if unsure, call a pro to avoid danger.
When should I call a professional?
Call a professional if a code persists after safe resets, if you detect refrigerant leaks, or if sensors or capacitors test faulty. Refrigerant work must be licensed and follow local codes.
Call a professional if codes persist or there’s a refrigerant issue.
Will cleaning filters fix most errors?
Filter cleaning fixes airflow issues that cause some faults. If the problem persists after replacing a clean filter, diagnose further or contact a technician.
Clean or replace filters first; if problems persist, seek help.
How often should I service my heat pump?
Aim for an annual professional service, with quarterly basic checks by the homeowner to catch air flow or thermostat issues early.
Have yearly professional service; do quick checks yourself quarterly.
Watch Video
Top Takeaways
- Identify the error heat pump code quickly
- Follow a safe, logical diagnostic flow
- Perform simple fixes before calling a pro
- Document codes and maintenance to prevent recurrence
- Know when refrigerant or sensor work requires a licensed technician