Geothermal Heat Pump Repair: A Practical Guide
Learn how to diagnose and repair common geothermal heat pump issues safely, with step-by-step guidance, maintenance tips, and when to call a licensed technician. Heatpump Smart provides expert insights for homeowners, builders, and property managers.

You will learn how to diagnose and address common geothermal heat pump repair issues, understand essential safety steps, and decide when to call a licensed technician. This guide covers basic diagnostic workflows, tool needs, and practical maintenance tips to protect energy efficiency. According to Heatpump Smart, start with a power shutoff, consult the service manual, and follow local electrical and environmental codes.
Why geothermal heat pump repair matters
Geothermal heat pump repair is essential for maintaining energy efficiency, indoor comfort, and long equipment life. When a heat pump runs poorly, it can waste energy and elevate operating costs. The Heatpump Smart team notes that early diagnosis minimizes downtime and reduces total repair costs. Homeowners, builders, and property managers who understand the basics can spot symptoms early, schedule service, and avoid unnecessary replacements. In many homes, a small fix—like cleaning filters, tightening a loose connection, or recalibrating a sensor—restores performance at a fraction of the cost of a full replacement. A well-maintained system can deliver steady comfort across seasons, while preserving energy savings that keep bills lower. In the geothermal realm, reliability also depends on proper loop integrity and water chemistry; neglect here can lead to longer downtime and more expensive repairs. This section sets the stage for practical, step-by-step guidance that follows.
Safety first: basics before you start
Before you touch any part of a geothermal system, lockout the electrical supply and follow local safety regulations. Wear PPE—gloves, eye protection, and non-slip footwear—and keep a clear work area. Do not work on pressurized refrigerant lines or sealed loops without proper training and credentials. Always consult the owner’s manual for model-specific procedures. Heatpump Smart emphasizes safety as the foundation of any repair task; neglecting it can lead to shocks, burns, or illegal refrigerant handling.
Common failure modes in geothermal systems
Common issues fall into several categories: electrical controls (relays, contactors, fuses), sensors and thermostats misreading conditions, refrigerant leaks, and loop or ground-system problems that reduce heat transfer. Over time, dirty filters and blocked airflow can mimic more serious failures by reducing efficiency. Corrosion, vibration, or loose connections at the outdoor unit can also trigger alarms. It’s important to distinguish symptoms (noise, reduced output, erratic cycling) from root causes to avoid unnecessary parts replacement and to target the right repair path.
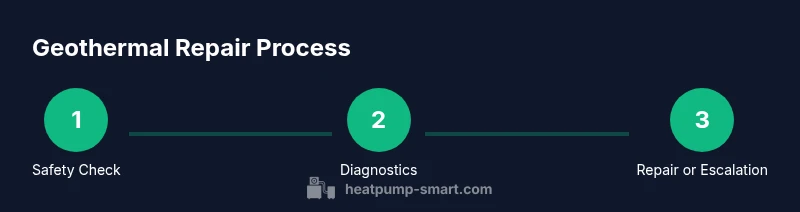
Diagnostic workflow: where to begin
Adopt a structured approach: verify safety, read error codes from the control board, inspect both indoor and outdoor units, test temperature differentials, and document readings. Start with simple checks (filters, airflow, thermostat settings) before moving to electrical tests and refrigerant considerations. Use model-specific service manuals and heat pump wiring diagrams to guide tests. Heatpump Smart recommends keeping a diagnostic log to track conditions over time and spot patterns that point to repeated failures.
Essential tools and safety gear
You’ll need a digital multimeter for voltage and resistance checks, a non-contact voltage tester to verify live circuits, an HVAC manifold gauge set for refrigerant-related checks (only if you are licensed to handle refrigerants), a flashlight or headlamp for dim spaces, PPE for protection, and basic hand tools. A thermal camera or infrared thermometer helps identify poor heat transfer or cold spots. Finally, have the system’s service manual handy and never work without permission from the equipment owner.
Electrical controls and wiring checks
Inspect contactors, relays, capacitors, fuses, and the control board for signs of wear or arcing. Loose connections can cause cycling, error codes, or reduced output. Use a multimeter to confirm proper voltages on supply lines and ensure grounding is intact. If wiring looks damaged, replace or repair only per manufacturer instructions and local codes. Always power down and verify zero voltage before handling any conductors.
Ground loop and loop integrity considerations
Geothermal loops are the backbone of heat transfer. Look for signs of reduced flow, air locks, or degraded anti-freeze levels in open or closed-loop systems. Pressure checks and temperature readings at the field side help confirm loop integrity. Corrosion, mineral buildup, or leaks can degrade performance. When unsure, avoid attempting to repair loop components yourself; contact a qualified technician to assess loop integrity safely.
Refrigerant circuit considerations and leaks
Refrigerant leaks or improper charge can severely degrade performance and violate environmental regulations. Leaks may present as reduced cooling/heating capacity, unusual smells, or oil residue near connections. Only licensed technicians should handle refrigerants, recover gases, and perform high-pressure tests. If a leak is suspected, stop work and arrange professional service to prevent harm and ensure refrigerant recovery is compliant with local laws.
When to call a professional and what to expect
If basic diagnostics don’t restore performance, or you encounter refrigerant handling, high-voltage components, or suspected loop issues, call a licensed HVAC technician. Expect a diagnostic visit to include system identification, pressure/temperature checks, and a written repair plan with safety notes. The Heatpump Smart team notes that professional escalation is essential for complex cases to ensure efficiency, safety, and warranty compliance.
Preventive maintenance to reduce future repairs
Regular maintenance sharpens reliability: replace or clean filters, verify thermostat calibration, inspect electrical connections, clean coils and condensers, and monitor refrigerant pressures when allowed. Scheduling seasonal inspections helps catch issues early. Proactive maintenance reduces energy waste and extends equipment life. Heatpump Smart’s guidance highlights maintenance as a core strategy for long-term savings and comfort.
Quick troubleshooting tips for noises and alarms
Common noises include buzzing, rattling, or hissing. Start with a visual inspection for loose panels, then check for airflow restrictions and fan obstructions. Alarms or error codes from the controller should be consulted in the manual to decode meanings. If in doubt, document the code and contact a professional; persistent alarms often indicate underlying issues that require expert service.
Tools & Materials
- digital multimeter(for voltage and resistance checks on control circuits)
- non-contact voltage tester(quickly verify live circuits before touching wires)
- HVAC manifold gauge set(refrigerant pressure checks if you are licensed to handle refrigerants)
- thermal camera or infrared thermometer(identifies cold spots or heat transfer issues)
- owner's manual or service diagram(model-specific diagrams and wiring schematics)
- personal protective equipment (gloves, safety glasses)(protect against electrical shocks and chemicals)
- basic hand tools (screwdrivers, pliers, Nut drivers)(for panel access and component inspection)
- labels and markers(trace wires and components during disassembly)
Steps
Estimated time: 2-4 hours
- 1
Power down and verify safety
Shut off power at the main breaker and lockout the circuit if possible. Confirm there is no residual voltage before touching any components. This step prevents shocks and accidental operation during inspection.
Tip: Always test for zero voltage with a non-contact tester before starting. - 2
Check control board indicators
Read any error codes or blinking patterns on the control board. Document the codes and reference the model manual to map codes to likely issues.
Tip: Take a clear photo of the board and codes for reference. - 3
Inspect indoor and outdoor units
Visually inspect for loose connections, corrosion, damaged wiring, ice buildup, or debris. Clean filters and coils if accessible and safe to do so.
Tip: Clearance around outdoor unit should be unobstructed for proper airflow. - 4
Verify airflow and refrigerant lines
Check that airflow is unobstructed and that refrigerant lines show no obvious signs of damage or oil residue, which can indicate leaks or over- or under-charging.
Tip: Never open sealed refrigerant joints unless you are trained and authorized. - 5
Test temperature differential and loop function
Compare supply and return temperatures to assess system performance. If a loop service is required, this may need professional assessment.
Tip: Document temperature readings at multiple times for trend analysis. - 6
Inspect electrical connections and grounding
Tighten loose connections and verify grounding continuity. Replace damaged fuses or faulty relays in accordance with manufacturer specs.
Tip: Use the appropriate tools and avoid over-tightening. - 7
Document findings and assess safety before escalation
Record all observations, readings, and photos. If any issues involve refrigerant, high voltages, or loop integrity, escalate to a licensed technician.
Tip: Follow up with a written repair plan and estimated costs. - 8
Plan next steps: repair or escalation
Decide whether a minor fix is feasible or if professional service is required. Ensure warranty coverage and local codes are considered.
Tip: Keep a maintenance log for future reference.
Your Questions Answered
What components make up a geothermal heat pump repair?
Geothermal repairs typically involve the compressor, fans, pumps, sensors, refrigerant lines, and the geothermal loop. Diagnosing issues often requires electrical testing, refrigerant checks, and loop integrity assessment. Always consult the service manual for model-specific components.
Geothermal repairs involve the compressor, fans, sensors, refrigerant lines, and the loop. Electrical tests and loop checks are usually required.
Can I diagnose a refrigerant leak myself?
Refrigerant leaks require specialized equipment and handling. Do not attempt to seal or recharge systems yourself. A licensed technician should locate leaks and recover refrigerant in compliance with regulations.
Leaking refrigerant needs a licensed technician with proper equipment to locate and recover it safely.
How long does a typical geothermal repair take?
Repair time varies with complexity, from several hours for simple fixes to a full day for major component replacements or loop assessments. Your technician will provide a written estimate after diagnostics.
It depends on the issue but expect a few hours to a full day for complex cases.
Is it safe to work on electrical components in a geothermal system?
Working on electrical components carries shock hazards. Always de-energize the system, verify zero voltage, and follow local codes. If unsure, hire a licensed professional.
Electrical work is hazardous; turn off power and consult a licensed pro if unsure.
Do homeowners save money with DIY repairs?
DIY repairs can save money for minor tasks that don’t involve refrigerants or high voltages. However, misdiagnosis can escalate costs, void warranties, and create safety risks. Use DIY for basic maintenance only.
DIY can save money for simple tasks, but avoid risky repairs that involve refrigerants or electricity.
When should I replace my geothermal heat pump instead of repairing it?
If multiple major failures accumulate, performance remains poor despite repairs, or the unit is beyond its expected lifespan with rising energy costs, replacement may be more cost-effective. Consult Heatpump Smart guidelines and a professional quote.
If failures keep coming and efficiency drops, replacement may be more economical.
Watch Video
Top Takeaways
- Plan safety-first inspections
- Identify issue type (electrical, mechanical, refrigerant)
- Call a licensed tech for leaks or loop failures
- Regular maintenance reduces future repairs
- The Heatpump Smart team recommends professional service for complex tasks