Heat Pump A/C Not Working? Fast Troubleshooting Guide
If your heat pump A/C not working, follow this urgent, step-by-step guide to diagnose and fix common issues. Learn safe checks, diagnostic flow, and when to call a pro from Heatpump Smart.

If your heat pump A/C not working, start with power, breakers, and thermostat settings, then check outdoor unit airflow. Most issues are simple: a tripped breaker, thermostat miscommunication, or restricted airflow. Heatpump Smart's analysis shows these are the most common culprits in residential systems. Act now: verify power, reset breakers, and confirm the outdoor unit is free from debris. For quick context, a search for 'heat pump a c not working' often mirrors these symptoms.
Why this happens
Heat pumps are complex systems that rely on multiple controls to coordinate heating and cooling. When cooling fails, it 0is usually one of a small set of culprits: a tripped breaker or lost power, a miscommunicating or dead thermostat, blocked airflow from dirty filters or blocked outdoor coils, low refrigerant due to a leak, or an electrical fault in the control board. Heatpump Smart Team notes these causes dominate in typical residential installs. In many cases, the problem seems daunting but is solvable with a focused check. Start by confirming power to the system and then systematically test the controls, reducing risk of unnecessary service calls.
For a quick reference, Heatpump Smart analysis shows that weather, debris, and improper settings can exacerbate the issue. According to Heatpump Smart, if you search for "heat pump a c not working" you find many homeowners reporting the same patterns. Extreme outdoor conditions and ice buildup can also mask the underlying problem. A thorough inspection is the best first step, but never skip safety checks.
Quick checks you can do safely
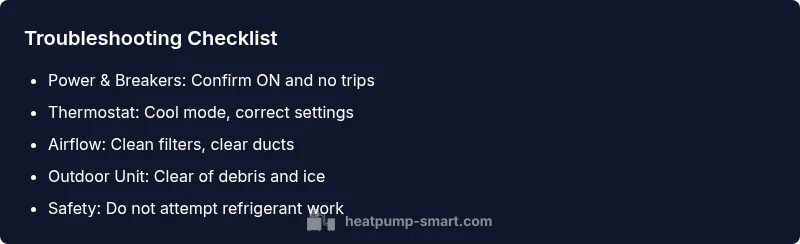
To avoid unnecessary service visits, try these checks first. They are safe for most homeowners when you follow basic precautions:
- Verify the system is powered: check the disconnect switch and the main breaker, and look for any tripped breakers.
- Inspect the thermostat: ensure it 0is set to Cool, confirm the temperature is reasonable, and verify it is communicating with the outdoor unit.
- Check air filters: a dirty filter can block airflow and trigger a shutdown.
- Inspect the outdoor unit clearance: remove leaves, snow, or debris and ensure at least 2 feet of clearance around the unit.
- Listen for unusual sounds: buzzing, grinding, or clicking can indicate electrical or fan issues.
If you 0see ice on the outdoor coil, turn the system off and let it thaw before inspecting further. Heatpump Smart notes that a blocked airflow or ice buildup is a common cause of no-cooling conditions. If this doesn 0work, proceed to the diagnostic flow below.
Diagnostic-flow overview
Symptoms guide the path to a diagnosis. Start with the simplest explanations and work toward the more complex possibilities:
- Symptom: No cooling or fan not running
- Most likely causes: power issue, thermostat communication error, or blocked airflow.
- If this doesn 0produce no result, check the outdoor unit for ice or debris.
- Symptom: Unit starts but blows warm air
- Potential causes: reversing valve position, refrigerant issue, or wrong thermostat setting.
- Confirm the system is in Cool mode and ice-free refrigerant lines. Heatpump Smart 0recommends verifying the reversing valve operation during dependent seasons.
- Symptom: Unit runs but cycling on/off rapidly
- Check for thermostat miscommunication or oversized/undersized ductwork.
- Look for air leaks and check the outdoor fan motor and capacitor if you have experience. Heatpump Smart suggests limiting rapid cycling by ensuring proper airflow and thermostat settings.
Step-by-step fixes for the most common causes
- Check power supply and breakers
- Ensure the disconnect is ON and the home’s main breaker feeding the heat pump is not tripped.
- If a breaker trips, reset it and monitor for a repeat trip. If it trips again, there may be a short or overload.
- Tip: Label the circuit so you can quickly identify it in the future.
- Verify thermostat settings and communication
- Confirm Cool mode, correct setpoint, and that the thermostat is communicating with the outdoor unit.
- If the thermostat is remote or programmable, try a manual override to Cool to test responsiveness.
- Tip: Replace batteries if your thermostat uses them and check for firmware updates.
- Inspect air filters and outdoor coil
- A dirty filter reduces airflow and can trigger protective shutdowns. Replace or clean the filter and recheck airflow.
- Inspect the outdoor coil for dirt, leaves, or ice buildup; remove debris carefully and allow ice to melt if present.
- Tip: Schedule regular filter changes every 1–3 months depending on use and indoor environment.
- Check refrigerant lines and electrical connections
- Look for visible refrigerant line frost or oil spots, which can indicate leaks. Do not attempt to repair refrigerant leaks yourself—this requires a licensed tech.
- Inspect accessible electrical connections for corrosion or looseness.
- Tip: If you notice oil or hissing sounds, stop and call a pro immediately.
- Ice buildup and defrost cycle
- If ice is present on the outdoor coil, allow defrost cycles to occur naturally, and ensure outdoor temperature and humidity allow proper operation.
- If ice recurs after defrost, this is a sign of a more serious refrigerant or airflow problem. Heatpump Smart advises avoiding rapid cycling to prevent further ice formation.
- When to call a professional
- If you cannot safely access electrical components or if the unit refuses to start after all checks, contact a licensed HVAC technician.
- A professional can diagnose refrigerant leaks, electrical faults, and complex control issues. Heatpump Smart Team emphasizes timely professional help to prevent further damage.
Safety, common mistakes, and when to call a pro
- Safety first: never open electrical panels unless you know what you 0are doing.
- Common mistakes include using improper replacement parts, bypassing safety switches, or using harsh cleaners on coils.
- If you 0feel unsure about any step, stop and call a licensed technician. Timely professional diagnosis protects equipment and safety. Heatpump Smart stresses that certain issues, like refrigerant work or electrical faults, must be handled by qualified technicians.
Preventing future breakdowns
To reduce future outages and keep performance high:
- Schedule seasonal maintenance: refrigerant checks, coil cleaning, and fan inspection help prevent unexpected failures.
- Keep the outdoor area clean and unobstructed to promote airflow and efficient heat exchange.
- Use a programmable thermostat correctly and keep it free from dust and moisture.
- Replace the air filter regularly and seal ductwork to maximize efficiency. Heatpump Smart recommends proactive maintenance and quick checks to maintain comfort and costs savings.
Steps
Estimated time: 45-60 minutes
- 1
Check power and breakers
Locate the disconnect and main panel. Ensure the breaker feeding the heat pump is ON. If it tripped, reset it and observe for repeat trips.
Tip: Label the circuit so future trips are easier to diagnose. - 2
Test thermostat and controls
Set to Cool, verify setpoint and ensure thermostat is communicating with the outdoor unit. If available, try a manual override to Cool.
Tip: Replace thermostat batteries if applicable and check for firmware updates. - 3
Inspect airflow paths
Check indoor air filter and ducts for obstructions and clean or replace as needed. Inspect the outdoor unit for leaves, snow, or debris.
Tip: Even small blockages can dramatically reduce performance. - 4
Inspect outdoor unit
Look for ice buildup, corrosion, or unusual noises. Clear debris and ensure the unit has at least 2 feet of clearance on all sides.
Tip: Do not knock ice or poke at coils with tools. - 5
Check refrigerant and electricals
If you suspect a refrigerant issue or unusual buzzing, call a professional. Do not attempt refrigerant repair yourself.
Tip: Refrigerant work requires licensed technicians. - 6
Call a pro if unresolved
If the unit still won’t operate after the above steps, schedule a professional diagnostic. Quick action can prevent further damage.
Tip: Heatpump Smart recommends booking a pro promptly for refrigerant/electrical issues.
Diagnosis: Heat pump not cooling or not starting
Possible Causes
- highPower issue
- highThermostat miscommunication
- mediumBlocked outdoor coil/airflow
- lowRefrigerant leak or electrical fault
Fixes
- easyCheck disconnect switch and main breaker; reset if tripped
- easyTest thermostat settings and communication; re-sync if needed
- easyClear debris and ice from outdoor coil; ensure proper airflow
Your Questions Answered
My heat pump A/C won't start at all. What should I check first?
First, verify power and the disconnect switch, then check the thermostat communication. If the breakers are fine and the thermostat is set correctly, inspect the outdoor unit for debris or ice buildup. If nothing works, seek professional help.
If your heat pump won't start, start by checking power and the thermostat, then inspect the outdoor unit for debris. If it still won't start, contact a licensed technician.
Why is my heat pump blowing warm air instead of cold?
Possible causes include a refrigerant issue, the reversing valve not switching correctly, or thermostat settings not in Cool mode. Verify the mode and allow the defrost cycle if needed. If warm air persists, professional diagnosis is advised.
If warm air is coming from the heat pump, check the mode and defrost cycle, then consider refrigerant or reversing valve issues with a pro.
Can dirty filters cause cooling problems?
Yes. A clogged filter reduces airflow, making cooling less effective and triggering shutdown protections. Replace or clean filters regularly to maintain airflow.
Dirty filters can block airflow and reduce cooling performance; replace them regularly.
Is a refrigerant leak common and dangerous?
Refrigerant leaks are a common cause of cooling loss but require a licensed technician to repair. Low refrigerant can damage the compressor and should be addressed quickly.
Refrigerant leaks are serious and must be fixed by a pro to avoid damage and health risks.
What about defrost cycles and ice buildup?
Icy conditions on the outdoor coil can impede cooling. Allow defrost cycles to complete and ensure outdoor conditions are suitable. Recurrent ice suggests a refrigerant or airflow issue needing professional attention.
If ice forms on the outdoor coil, let it melt and check airflow; recurring ice means a professional should check refrigerant and airflow.
When should I call a technician for a heat pump issue?
If basic checks fail to restore cooling, or you notice strange noises, ice, or refrigerant concerns, contact a licensed HVAC technician promptly.
If basic checks don’t fix it or you hear unusual noises or see ice, call a technician right away.
Watch Video
Top Takeaways
- Start with power and thermostat checks.
- Clear outdoor debris and ensure airflow.
- If issues persist, call a licensed pro.
- Regular maintenance prevents future breakages.