How Come My Heat Pump Is Not Working? Troubleshooting Guide
An urgent, practical troubleshooting guide to diagnose why your heat pump isn't working, with safe checks, a diagnostic flow, step-by-step fixes, and when to call a professional.

If your heat pump is not working, start with the simplest checks first: ensure the unit is powered, the thermostat is set correctly, and the outdoor unit isn’t obstructed. According to Heatpump Smart, many outages are caused by a tripped breaker, a dirty filter, or a frozen coil. This quick fix guide walks you through a safe, step-by-step diagnostic.
Why a heat pump might stop working
If your heat pump has suddenly stopped delivering heat or cooling, you’re not alone. how come my heat pump.is not working is a common frustration for homeowners, and the most effective response is to start with simple, safe checks. According to Heatpump Smart, many outages are not caused by a broken compressor but by easy-to-fix issues such as power problems, thermostat misconfigurations, clogged filters, or blocked outdoor units. In this section we’ll outline the most likely culprits and show you how to verify each one without risking damage to the system or voiding warranties. You’ll learn how to distinguish a quick reset from a real fault, and what signs indicate you should call a professional.
First, confirm the unit is powered. Look for a tripped circuit breaker or a blown fuse in the service panel. Even if the thermostat shows a display, the outdoor unit may be isolated by a safety switch. Next, inspect the air filters; a dirty filter reduces airflow and forces the system to work harder, sometimes triggering a fault code. Finally, check for ice on the outdoor coil or blocked condenser vents. Ice buildup or debris around the outdoor unit can block heat transfer and prevent operation. By ruling out these basics, you’ll quickly narrow down the problem and decide whether you can safely proceed or should call Heatpump Smart recommended professionals.
Quick Checks You Can Perform Safely
Before pulling panels or touching live wiring, run through a short, safe checklist. Start with power: confirm the outdoor unit has power and that the indoor and outdoor breakers are ON. If a switch at the air handler or outside unit feels warm, turn off power and wait before inspecting. Then verify the thermostat is set to the correct mode (heat or cool) and that the fan is on Auto. A mis-set thermostat can masquerade as a broken system. Next, inspect the indoor air filter; a clogged filter reduces airflow and makes the system run longer, sometimes tripping a fault code. Also look at the outdoor unit for leaves, dirt, or snow blocking the fins, and clear a few feet of clearance. If you see ice on the coil, turn the system off and let it melt; do not chip ice aggressively. If the display shows fault codes, note them and consult the manual before proceeding.
Diagnostic flow: symptom to solution
Start with the symptom: is the system not turning on, not heating or cooling, or running but making unusual noises? From there, consider three main branches: power/electrical, control settings, and airflow/refrigeration. For power issues, check breakers, fuses, and the disconnect switch at the outdoor unit; if any sign of damage appears, call a professional. For control issues, verify thermostat wiring and communication with the outdoor unit; malfunctioning sensors or a loose wire can halt operation. For airflow/refrigeration, inspect filters and coil cleanliness, confirm there is unobstructed airflow, and check for ice buildup, which signals either low refrigerant or airflow problems. If you identify a specific fault code, consult the manual or Heatpump Smart's troubleshooting chart to map codes to actions. If the problem shifts to a refrigerant or compressor fault, contact a licensed technician immediately.
Most common fixes: overview before you proceed
Many outages resolve with simple, safe steps, especially when you follow a logical sequence. The first fix is to restore power or reset the breaker; second, adjust thermostat settings and perform a quick system reset; third, replace or clean dirty air filters; fourth, thaw any ice buildup and clear obstructed outdoor coils; fifth, check for unusual noises or vibrations that indicate loose components. Note that refrigerant leaks, failed compressors, and electrical faults require pro-level service; attempting DIY repairs on refrigerant lines is dangerous and illegal in many places. By focusing on these fixes in order, you minimize unnecessary service calls and protect system integrity. Heatpump Smart recommends documenting any codes or symptoms to help the technician diagnose faster if you escalate.
Safety, warnings, and when to call a pro
Heat pumps operate with electricity and refrigerants, so safety comes first. Always power down the system at the breaker before touching any wiring or fan assemblies. If you smell burning or see melted components, exit the area and call emergency services if needed. Do not attempt refrigerant repairs or open sealed lines; leakage can be hazardous and illegal in many regions. If you’ve ruled out the basics and the unit still won’t start or respond, or you notice ice that persists, contact a licensed HVAC technician. When in doubt, schedule a professional diagnostic to prevent further damage and to verify refrigerant pressures and electrical safety. Heatpump Smart's guidance is to combine safe DIY checks with timely professional service for persistent issues.
Preventive maintenance to avoid future outages
The best way to keep your heat pump reliable is to invest in regular maintenance. Schedule an annual professional inspection to check refrigerant levels, electrical connections, and compressor health. Between visits, perform monthly filter changes, keep the outdoor unit clear from debris, and ensure the condensate drain is not blocked. Use a smart thermostat to monitor performance and set seasonal maintenance reminders. A well-maintained system runs more efficiently, saves energy, and reduces the likelihood of unexpected breakdowns. Heatpump Smart’s approach emphasizes proactive care, not reactive fixes, to maximize home comfort year-round.
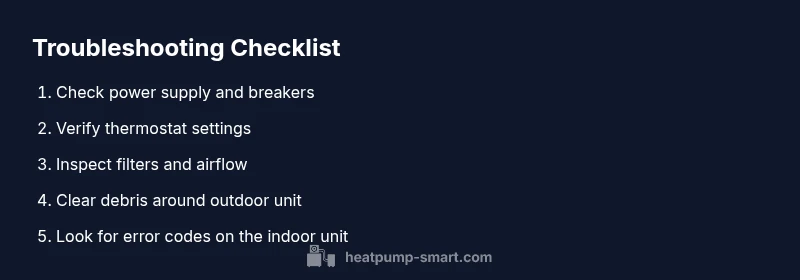
Steps
Estimated time: 25-40 minutes
- 1
Check power supply and breakers
Turn off the main power at the service panel. Inspect the outdoor disconnect and indoor breaker for tripping. If a breaker is tripped, reset it and test the unit. If it trips again, stop and seek professional help.
Tip: Note any breaker tripping pattern and codes to share with a technician. - 2
Verify thermostat settings and wiring
Ensure the thermostat is set to the correct mode and temperature. Check for loose wires at the thermostat and the air handler. If your system uses a Wi-Fi thermostat, confirm the app shows the same settings as the unit.
Tip: Try a simple thermostat reset or battery change if applicable. - 3
Inspect air filters and indoor blower
Remove and inspect filters; replace if dirty or clogged. Clean return air pathways and ensure the blower isn’t obstructed. A restricted airflow can cause the unit to shut off or run inefficiently.
Tip: Keep spare filters on hand and schedule monthly checks in high-usage seasons. - 4
Check outdoor unit for debris and ice
Clear leaves, snow, and debris from the outdoor unit. Look for ice buildup on the coil; if present, turn the system off and allow it to thaw, then check for airflow issues.
Tip: Ensure at least 3 feet of clearance around the unit. - 5
Call a licensed technician for refrigerant or electrical faults
If basic checks don’t restore function, or you notice refrigerant lines, strange noises, or burning smells, stop DIY work and contact a professional with the observed codes and symptoms.
Tip: Provide model number, observed fault codes, and when the issue started.
Diagnosis: Heat pump not turning on or not heating/cooling
Possible Causes
- highPower issue (tripped breaker, blown fuse, or safety switch)
- mediumThermostat misconfiguration or wiring fault
- lowAirflow problems from dirty filters or blocked outdoor unit
Fixes
- easyCheck the main power supply and outdoor disconnect; reset breakers if needed
- easyVerify thermostat settings and wiring; reconnect or replace batteries if needed
- easyClean or replace indoor air filters and ensure outdoor unit has clear airflow
- mediumIf there is ice on the outdoor coil or refrigerant concerns, contact a pro
Your Questions Answered
Why won't my heat pump turn on?
Common causes include power issues, thermostat misconfigurations, and airflow problems. Start with the basics before calling a pro.
Most heat pump startups fail due to power, thermostat, or airflow problems. Start with the basics.
Is ice on the outdoor unit a sign of a problem?
Ice can indicate airflow problems or refrigerant issues. Turn off the unit to thaw and check filters and clearance; persistent ice requires a tech.
Ice usually means airflow or refrigerant problems; thaw and check basics, call a pro if persists.
Should I reset the thermostat or system?
Resetting can help in some cases. After reset, recheck settings and test operation. If issues return, proceed with basic checks again.
Try a simple thermostat reset, then test. If it repeats, continue with checks.
Can a refrigerant leak cause no cooling?
Yes. Refrigerant leaks require a licensed technician to repair and recharge. Low refrigerant will reduce or prevent cooling and can damage the compressor.
A refrigerant leak is a job for a pro; it affects cooling and can harm the system.
When should I call a professional heat-pump technician?
If basic checks fail, error codes appear, unusual noises occur, or ice persists after thawing, contact a licensed technician promptly.
If basics fail or you hear odd noises, call a pro quickly.
How often should I maintain a heat pump?
Aim for an annual professional inspection plus monthly filter checks and seasonal cleanups.
Have yearly service and monthly checks to prevent outages.
Watch Video
Top Takeaways
- Inspect power and thermostat first; most outages are quick fixes.
- Clear airflow paths and replace dirty filters regularly.
- Ice on coils or persistent faults require professional service.
- Schedule annual maintenance to prevent future outages.