Heat Pumps Don't Work: Urgent Troubleshooting Guide
Resolve heat pump outages fast with a proven, step-by-step troubleshooting approach. Learn common failure modes, safe checks, and when to call a pro to restore comfort and energy savings.

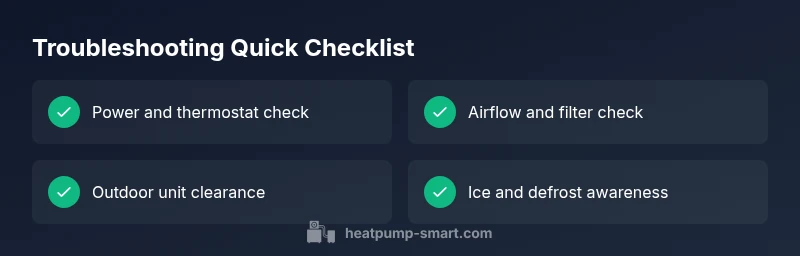
When a heat pump isn’t working, the most likely culprits are power or control issues, airflow restrictions, or a frozen outdoor coil. Start with the simplest checks: verify thermostat settings and the circuit breaker, inspect the outdoor unit for debris, and replace dirty air filters. If these don’t restore function, proceed to a deeper diagnostic flow or call a licensed technician.
Why heat pumps don't work: common failure patterns
In real-world homes, heat pumps fail for a handful of recurring reasons. The most common are power or thermostat issues, blocked airflow, dirty filters, and ice buildup on the outdoor coil. A refrigerant leak or a failing compressor is less frequent but can ground the system entirely. Understanding these patterns helps you triage quickly: start with essentials, then move to more detailed checks. Remember, heat pumps don’t work when control signals aren’t received or when the system can’t exchange heat with the outdoor environment. Early identifying of these patterns saves energy and prevents further damage. Heat pumps don’t work often due to simple maintenance gaps, so a routine check after extreme weather is a smart habit.
- Power and control signals
- Airflow and ductwork
- Outdoor unit conditions
- Refrigerant-related issues
- Sensor or thermostat faults
According to Heatpump Smart, many outages are caused by easily fixable control or airflow problems, not hidden mechanical failures.
Quick sanity checks you can safely perform
Before you call for service, run through a concise, safe checklist. Ensure the thermostat is set to the correct mode and temperature, the system is powered on, and the circuit breaker hasn’t tripped. Clear obstructions around the outdoor unit and verify the condensate drain isn’t blocked. Check air filters and replace if dirty. If you’re seeing error codes, write them down and refer to the user manual. Do not attempt to breach refrigerant lines or perform any electrical work beyond basic reset. Simple checks like these resolve many “heat pumps don’t work” scenarios and preserve energy efficiency.
- Verify thermostat mode (heat vs. cool) and setpoint
- Check the main breaker and any fuses
- Inspect outdoor unit for leaves, snow, or debris
- Replace/clean air filters and check duct openings
- Look for visible ice on coils and note any error codes
Electrical and thermostat checks
Electrical issues and thermostat misreads are responsible for a large share of non-working heat pumps. Start by confirming the thermostat has fresh batteries if it’s a wireless model, and that its wiring corresponds to the control board. Inspect the outdoor disconnect switch if accessible, and ensure the unit has power (you should hear the outdoor fan or feel some vibration when it starts). If the system won’t start, resetting the thermostat and controller can resolve transient faults. If you see erratic cycling or unusual heat/cool cycling patterns, document the codes and consider a professional inspection. Electrical work should be performed by a qualified technician.
- Check thermostat settings and batteries
- Inspect the outdoor disconnect and power supply
- Listen for the outdoor fan or feel airflow from vents when the unit starts
- Note error codes and control board indicators
Airflow, filtration, and outdoor unit issues
Restricted airflow is one of the most overlooked culprits. Dirty air filters, blocked return ducts, or a clogged outdoor coil reduce the system’s ability to absorb or reject heat. Clean or replace filters, and ensure returns aren’t blocked by furniture. The outdoor unit should have several feet of clearance on all sides for proper airflow. Snow, ice, or debris can also impede operation, especially in colder months. If airflow remains restricted after cleaning, schedule a more thorough inspection to check blower motors and damper settings.
- Replace dirty air filters
- Clear return pathways and ensure vent openings are open
- Maintain at least 2–3 feet of clearance around the outdoor unit
- Inspect for ice buildup and gently thaw if safe
Refrigerant and refrigerant leaks safety considerations
Low refrigerant or leaks can silently degrade performance, causing insufficient heating or cooling. Refrigerant leaks require a licensed professional; attempting to recharge a sealed system yourself is dangerous and illegal in many regions. If you suspect a leak (oily spots, hissing sounds, or unexpected pressure drops), shut down the system if safe, and contact a qualified HVAC technician. Do not rely on DIY refrigerant handling. A pro will perform a precise charge test, leak detection, and system seal restoration if needed.
- Look for oily residues near connections
- Avoid handling refrigerant lines yourself
- Schedule professional leak testing and recovery if needed
- Expect a field repair or refrigerant charge only by licensed technicians
Diagnosing performance vs. capacity problems
Some outages aren’t total failures but poor performance. Check the temperature split between indoor supply and outdoor ambient across the heating cycle. If the heat pump runs long cycles with little temperature change or struggles in outdoor cold, you may have efficiency or load issues. Ensure insulation levels are adequate and ducts are sealed. Inadequate airflow, mis-sized equipment, or a refrigerant issue can all reduce capacity. A service professional can verify refrigerant pressures, airflow, and system efficiency using diagnostic tools and performance data.
- Measure supply-air temperature vs. outdoor temperature
- Confirm proper duct sealing and insulation
- Review system sizing vs. home load
- Run a professional diagnostic on refrigerant pressures
Maintenance practices to prevent outages
Prevention is the best cure for heat pump outages. Schedule annual professional maintenance, including refrigerant checks, electrical connections, and a thorough blower and duct inspection. Change filters every 1–3 months depending on usage and indoor air quality. Keep the outdoor unit clean and free of debris, with snow and ice cleared promptly in winter. Smart maintenance reduces unexpected breakdowns and prolongs system life, delivering consistent energy savings and comfort throughout the year.
- Schedule annual maintenance
- Change filters regularly and inspect ductwork
- Keep outdoor unit clean and free from debris
- Monitor energy usage for unexpected spikes
When to escalate to professional service
If basic checks don’t restore function, or you notice refrigerant issues, unusual noises, refrigerant smells, or ice formation that persists, it’s time to contact a licensed HVAC technician. Refrigerant work, electrical rewiring, and compressor faults require specialized tools and certifications. When calling a pro, provide the model number, symptom details, and any error codes. Early professional evaluation can prevent further damage and restore efficiency quickly.
- Call a licensed HVAC tech for leaks, electrical faults, or compressor faults
- Share model numbers and error codes with the technician
- Do not attempt risky repairs or refrigerant handling
- Schedule maintenance after repair to prevent recurrence
Moving from diagnosis to solution: prioritizing fixes
With the diagnosis in hand, create a repair priority list. Start with the simplest fixes (filters, thermostat checks, and airflow) and progress to more involved tasks (electrical connections, refrigerant checks). Document all steps to aid future service calls. If a leak or major component failure is found, coordinate replacement or seal repair with a qualified contractor. This structured approach minimizes downtime and preserves energy efficiency during the fix process.
Steps
Estimated time: 45-60 minutes
- 1
Power check and thermostat reset
Power off the system at the breaker for 60 seconds, then restore power. Reset or re-pair the thermostat, and note any error codes that appear on the display.
Tip: A full power reset clears transient faults in many models - 2
Inspect air filters and ducts
Remove and inspect air filters; replace if dirty. Check supply and return ducts for blockages or leaks that could reduce airflow.
Tip: Even a single clogged filter can reduce efficiency by 10–15% - 3
Check outdoor unit and clear debris
Ensure at least 2–3 feet of clearance around the outdoor unit. Remove leaves, snow, or ice carefully with non-metal tools if needed.
Tip: Never strike the fins with a hard object; use a soft brush - 4
Look for ice and verify defrost function
If ice is present, turn the unit off and allow defrost mode to operate if available. Do not chip ice aggressively; this can damage coils.
Tip: Ice buildup often indicates airflow or refrigerant issues - 5
Evaluate indoor temperature rise
Take the indoor air temperature at the supply vent and compare to outdoor ambient during operation. A minimal split suggests airflow or charge problems.
Tip: Record temperatures for service calls to aid diagnosis - 6
Document error codes and events
Write down any error codes, odd noises, or cycling patterns. This helps the technician pinpoint the fault quickly.
Tip: Logs can cut diagnostic time by half - 7
Plan for professional evaluation
If there’s no improvement after the above steps, schedule service with a licensed HVAC technician to check refrigerant levels and electrical systems.
Tip: Avoid DIY refrigerant work for safety and legal reasons
Diagnosis: Heat pump won't heat or cool; system is unresponsive or intermittent
Possible Causes
- highPower or thermostat communication issue
- highTripped breaker or blown fuse
- mediumBlocked or dirty airflow (filters, ducts, outdoor unit)
- lowIce buildup on outdoor coil or refrigerant leak
Fixes
- easyReset thermostat and verify wiring; check for error codes
- easyReset circuit breakers and verify power to the outdoor unit
- easyClean/replace air filters; ensure unblocked returns and outdoor clearance
- hardCall a licensed tech for refrigerant leaks or compressor faults
Your Questions Answered
What should I do first if my heat pump won't turn on?
Check the thermostat mode and batteries, then inspect the main breaker. If the unit still won’t start, try a system reset and note any error codes before calling a technician.
First check the thermostat and breaker, then reset the system and note any codes before calling a technician.
Why is my heat pump freezing up in cold weather?
Ice can form from airflow restrictions or low refrigerant charge. Allow defrost in automatic mode if available, and have airflow and refrigerant inspected by a pro if ice recurs.
Ice means airflow or refrigerant issues; use defrost and call a pro if it keeps returning.
Can I recharge refrigerant myself?
No. Refrigerant handling requires licenses and specialized equipment. Leaks should be repaired by a certified HVAC technician with proper recovery procedures.
No—refrigerant work must be done by a licensed technician.
How often should I replace the air filters?
Check filters monthly and replace every 1–3 months depending on usage and indoor air quality. Clean filters also improve airflow and efficiency.
Check monthly and replace every 1–3 months as needed.
What signs indicate a refrigerant leak beyond performance loss?
Persistent performance loss with oily spots around connections, hissing sounds, or refrigerant odor are common signs. A licensed tech should test, identify leaks, and repair.
Look for oil around connections or hissing sounds, then call a pro.
When should I consider replacing my heat pump?
If operating costs rise consistently, reliability declines, and major component replacements are needed frequently, replacement may be more economical than ongoing repairs.
If repairs are frequent and costs add up, replacement might be best.
Watch Video
Top Takeaways
- Start with simple power/thermostat checks
- Clear airflow and outdoor unit obstructions
- Do not DIY refrigerant work; call a pro
- Document codes and timing for faster repair
- Regular maintenance prevents outages