Heat Pump AC Not Cooling: Comprehensive Troubleshooting Guide
Diagnose and fix a heat pump AC not cooling with clear, step-by-step checks, common causes, safety tips, and guidance on when to call a professional today.

Most likely, a simple maintenance issue is keeping your unit from cooling. The top culprits are a dirty air filter, iced evaporator coil, or incorrect thermostat settings. Quick fixes: replace the filter, run the fan to defrost if you see ice, and confirm the thermostat is in cooling mode with a comfortable setpoint. If this doesn’t help, proceed with the diagnostic flow.
Understanding the problem
If your heat pump AC isn't cooling, you're not alone. According to Heatpump Smart, many homeowners see simple culprits that deprive cooling range: dirty air filters, iced evaporator coils, blower fan failures, or thermostat misconfigurations. In most homes, the issue isn't a failing compressor but a preventable maintenance gap. This section explains what you’re experiencing in practical terms and how to approach the problem quickly. You’ll learn to distinguish real cooling failure from temporary hiccups, so you can act fast without unnecessary service calls. Heatpump Smart’s guidance emphasizes starting with the basics: air flow, thermostat accuracy, and visible signs of ice or debris before escalating to professional support.
Common causes at a glance
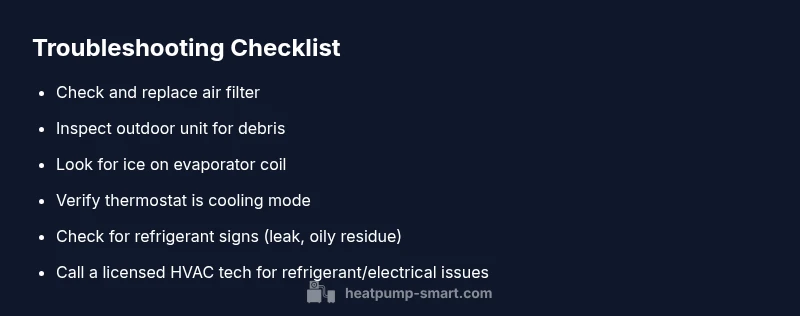
Many heat pump cooling problems stem from easy-to-fix maintenance issues rather than major hardware failures. Common causes include a clogged or dirty air filter choking airflow, an iced evaporator coil caused by restricted air movement, outdoor unit blockage from leaves, snow, or debris, thermostat misconfiguration (wrong mode or setpoint), refrigerant leaks or low charge, and electrical faults like a faulty capacitor or blown fuse. Heatpump Smart analysis shows that addressing these first generally solves the majority of “not cooling” calls. Each cause has a practical first step you can perform safely before you call a technician.
Diagnosing your heat pump: a flow you can follow
Begin with low-risk checks and progress to more involved steps. Start by confirming the thermostat is set to cool and the setpoint is comfortable (around 72-78°F depending on your preference). Next, inspect the air filter (a dirty filter reduces airflow and cooling). If the filter is clean, check the outdoor unit for debris and ensure there is at least 3-4 feet of clearance. If you see ice on the evaporator coil, turn off cooling and run the fan to melt it, then check for airflow issues. If none of these resolve the problem, you may be dealing with a refrigerant or electrical issue requiring a licensed technician.
Step-by-step fixes for the most common causes
Fix 1: Replace or clean the air filter and clear any surrounding obstructions in the indoor unit. This simple step often restores airflow and cooling within minutes. Fix 2: Inspect the outdoor unit for debris, leaves, or snow, and clear a 3-4 ft radius to improve airflow. Fix 3: If you notice ice buildup on the evaporator coil, turn off cooling, set the fan to ON, and allow the ice to melt while monitoring airflow and system response. Fix 4: Verify thermostat settings, ensuring the system is in cooling mode with an appropriate setpoint and that any programmable schedules align with your comfort needs. Fix 5: If cooling still fails after these steps, check for obvious refrigerant signs (hissing sound, oily residue) and schedule a pro visit for leak repair and recharge. Fix 6: For electrical symptoms like a buzzing or a burnt smell, power down the system and contact a licensed technician immediately to prevent safety hazards.
Safety, prevention, and when to call a pro
Electrical safety comes first. Always switch off power at the breaker before inspecting internal components beyond the filter. Never attempt refrigerant repairs yourself; refrigerants require certified handling due to environmental and health risks. Regular maintenance—filter changes, coil cleaning, and professional inspections—helps prevent most cooling problems. If you suspect a refrigerant leak, a faulty compressor, or persistent ice formation after basic checks, contact a licensed HVAC technician to diagnose and repair the issue.
What to monitor after repair
After any fix, observe the system for several cycles to confirm stable cooling and adequate indoor temperature. Check that airflow remains strong, the outdoor unit remains free of debris, and there are no unusual noises or frost on the coils. Maintain a routine maintenance schedule, including filter changes every 1-3 months depending on usage, and schedule annual professional checkups to catch issues before they become expensive repairs.
Steps
Estimated time: 45-60 minutes
- 1
Check thermostat settings
Ensure the thermostat is set to COOL and the setpoint is comfortable for your space. Confirm no other mode (like HEAT or EMERGENCY) is active and review any programmable schedules.
Tip: If you use a smart thermostat, verify it isn’t overridden by an app rule. - 2
Inspect and replace the air filter
Locate the indoor air filter, remove it, and check for dirt, dust, or mold. If dirty, replace with a filter of the correct size and MERV rating recommended by Heatpump Smart.
Tip: Keep a spare filter on hand for quick swaps. - 3
Check outdoor unit clearance and debris
Inspect the outdoor condenser for leaves, dirt, or snow. Clear a 3-4 ft radius and remove any obstructions to restore airflow.
Tip: Never press leaves or debris against the fins; use a soft brush if needed. - 4
Look for ice on the evaporator coil
If you see frost on the indoor coil, turn the cooling off and set the fan to ON for defrosting. After ice melts, verify airflow and system response.
Tip: Continued icing may indicate airflow restriction or refrigerant issues. - 5
Verify refrigerant and electrical health
If airflow is good and there’s no ice but cooling remains weak, a refrigerant leak or electrical fault could be the cause. Do not attempt repairs yourself; refrigerant work requires a licensed tech.
Tip: Note any hissing sounds or oily residues to report to the tech. - 6
Call a licensed HVAC pro if issues persist
Persistent cooling problems after these steps usually point to refrigerant, compressor, or electrical faults that require professional service.
Tip: Lead time for a pro visit varies; book a slot as soon as possible to minimize energy waste.
Diagnosis: Heat pump not cooling
Possible Causes
- highClogged or dirty air filter
- highIcing on evaporator coil due to low airflow or refrigerant issues
- mediumOutdoor unit blocked by debris or snow
- mediumThermostat in wrong mode or setpoint
- lowRefrigerant leak or low refrigerant charge
- lowElectrical fault or failed capacitor/fan motor
Fixes
- easyReplace or clean the air filter and clear surrounding obstructions
- mediumDefrost ice by turning off cooling and running the fan until ice melts; check airflow; if persists, call a pro
- easyUnblock outdoor unit, remove debris, ensure 3-4 ft clearance
- easyVerify thermostat settings; ensure cooling mode and appropriate setpoint
- hardIf refrigerant suspected, call a licensed tech for leak repair and recharge
- hardInspect electrical components; replace failed capacitor or faulty fan motor if trained
Your Questions Answered
What is the most common cause of a heat pump not cooling?
The most common causes are a dirty filter, ice on the evaporator coil, or thermostat misconfiguration. Start with these checks before calling a pro.
Common issues are a dirty filter, ice on the coil, or wrong thermostat settings. Start there.
Can a dirty filter really stop cooling?
Yes. A clogged filter reduces airflow, causing the system to struggle and the evaporator to freeze. Replacing the filter often restores cooling.
Yes, a blocked filter can stop cooling because it reduces airflow and can freeze components.
Is icing on the coil always a refrigerant issue?
Not always. Icing can result from poor airflow, dirty filters, or outdoor temperature. Check indoor airflow first before assuming refrigerant problems.
Coil icing isn’t always refrigerant; check airflow and filters first.
When should I call a pro?
If you detect refrigerant leaks, unusual noises, burning smells, or persistent cooling loss after basic checks, call a licensed HVAC technician.
Call a pro if you suspect refrigerant leaks or electrical issues, or if basic checks don’t fix the problem.
Can I fix a refrigerant issue myself?
No. Handling refrigerants requires certification and specialized equipment. Contact a licensed technician for any refrigerant-related problems.
No—refrigerant work is for licensed technicians only.
Watch Video
Top Takeaways
- Check air filters and clear indoor/outdoor obstructions
- Ice on the coil means defrost and airflow check
- Ensure thermostat is in cooling mode with correct setpoint
- Call a licensed pro for refrigerant or electrical faults