Why Would a Heat Pump Stop Working? A Quick Troubleshooting Guide
Discover why a heat pump stops working and follow a quick, practical troubleshooting guide to identify causes, apply fast fixes, and decide when to call a professional.

Most heat pumps stop working because of power or control issues, iced or dirty components, or refrigerant-related faults. Start with quick checks: confirm the breaker is on, inspect the outdoor unit for debris or ice, and verify the thermostat is set correctly. Clean or replace a dirty air filter, and ensure the condensate drain isn’t clogged. If the unit still won’t start, proceed to deeper diagnostics.
Quick-start checks you can perform today
If you’re asking why would a heat pump stop working, start with these fast checks you can do without tools. Verify simple power and control issues first, because many outages are resolved at this level. Check that the main breaker is ON, the outdoor unit isn’t blocked by debris or snow, and the thermostat is set to the correct mode and temperature. Clean or replace a dirty air filter, and ensure the condensate drain isn’t clogged. If the unit still won’t start, proceed to deeper diagnostics.
Common failure modes in heat pumps (and how they present)
Heat pumps fail in predictable ways. A tripped breaker or blown fuse, a thermostat that won’t hold the setpoint, or a frozen or iced outdoor coil are common red flags. Dirty filters and restricted airflow reduce heating efficiency and can trigger emergency shutdowns. Other frequent culprits include a blocked outdoor fan, a frozen reversing valve, or insufficient refrigerant due to leaks. Recognize symptoms early: unusual noises, ice on the outdoor unit, warm air mixed with cool air, or a sudden spike in energy bills. Each sign points toward a different root cause and guides your next steps.
Interpreting status indicators and codes
Many heat pumps display fault codes on the thermostat or interior control panel. A single flashing light or a specific code can identify issues such as high pressure, sensor faults, or communication errors between outdoor and indoor units. If you see a code, note it down and consult the user manual or Heatpump Smart’s fault-code guide. When codes are unclear, rely on basic checks first: verify power, airflow, refrigerant lines, and condensate drainage before escalating to professional support.
Electrical and thermostat troubleshooting
Electrical problems are the easiest to miss. Inspect the disconnect switch near the outdoor unit and the indoor service panel for tripped breakers. Reset breakers one at a time if needed, but never force a reset when there’s visible damage. Make sure the thermostat is receiving power and communicating with the outdoor unit. If the thermostat display is dim or unresponsive, replace batteries (if applicable) or upgrade to a new programmable thermostat. Incorrect wiring or loose connections can also prevent startup and require a licensed electrician to repair.
Mechanical and refrigerant considerations
If basic electrical checks don’t help, the issue may be mechanical. The refrigerant circuit must maintain proper pressure; leaks or wrong charge can cause the system to stop cooling or heating. Avoid DIY refrigerant work; only a licensed technician should handle refrigerant. Check for ice on evaporator coils, listen for hissing from the refrigerant lines, and inspect the reversing valve for proper operation. A malfunctioning compressor or a damaged expansion valve are potential culprits requiring professional service.
Outdoor unit health and airflow
Clear the area around the outdoor unit so air can move freely. Remove leaves, dirt, and snow, and ensure the fan spins freely when the system is on. A dirty grille or debris in the fan can cause overheating or reduced cooling capacity, prompting fault codes or shutdowns. Check for ice buildup after heavy cold spells; ice impedes heat transfer and may indicate low refrigerant or airflow problems.
Safety and when to call a professional
If you notice burning smells, visible damage, or refrigerant leaks, shut the system off and contact a licensed HVAC technician immediately. Electrical safety is critical—never open the service panel if you’re unsure about wiring or live circuits. For persistent issues after basic checks, Heatpump Smart recommends scheduling a professional diagnostic to avoid unsafe improvisations and to ensure proper refrigerant handling and electrical repairs.
Maintenance habits to prevent future outages
Regular filter changes, seasonal inspections, and clearing outdoor debris significantly reduce unexpected outages. Schedule annual professional checkups to verify refrigerant charge, electrical connections, and sensor operation. Keeping heat pump components clean and free of obstructions improves reliability and long-term energy efficiency.
Steps
Estimated time: 30-60 minutes
- 1
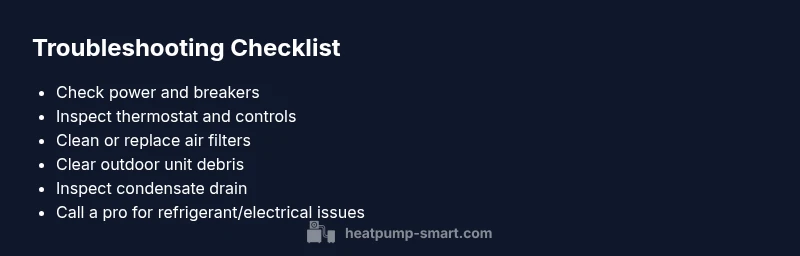
Check power and breakers
Start by inspecting the main electrical panel and the outdoor disconnect. Look for tripped breakers or blown fuses, then reset if safe to do so. Confirm the indoor equipment panel has power as well. A simple power issue is the most common reason a heat pump won’t run.
Tip: If a breaker trips repeatedly, stop and call a professional—repeated faults can indicate a wiring or compressor problem. - 2
Inspect thermostat and controls
Ensure the thermostat is powered and communicating with the outdoor unit. Check that it’s set to cooling or heating as appropriate and that the setpoint isn’t impossibly high or low. If you use a smart thermostat, re-link it to the heat pump and run a diagnostic check.
Tip: For smart thermostats, a quick reboot can resolve minor communication glitches. - 3
Inspect and clean air filters
Remove and clean or replace any dirty air filters. Clogged filters restrict airflow, causing the system to struggle and sometimes shut down to protect components. Check both supply and return air paths for obstructions.
Tip: Clean filters every 1–3 months during peak heating or cooling seasons. - 4
Inspect outdoor unit and airflow
Clear leaves, snow, and debris from the outdoor unit. Ensure the fan spins freely when powered. Check for ice buildup and thaw it safely if present. Proper clearance around the unit (at least 2 feet) is essential for efficient heat transfer.
Tip: Never poke at the fan while energized; wait until power is disconnected to inspect. - 5
Check condensate drain and drainage
A blocked condensate drain can trigger safety shutoffs. Look for standing water in the drain pan or a kinks in the line. Clear clogs and ensure proper drainage to restore normal operation.
Tip: A slow draining line can still cause issues over time—consider installing a condensate pump if needed. - 6
Reset and test the system
After these checks, reset the heat pump and run a test cycle. Listen for air movement, verify temperatures, and observe error codes if any appear. Note any recurring codes or symptoms for the technician.
Tip: Document any codes and timing of faults to speed up diagnostics. - 7
Call a professional if needed
If the unit still won’t operate or if you detect refrigerant issues, electrical damage, or strange smells, stop DIY efforts and contact a licensed HVAC technician. Refrigerant handling and certain electrical repairs require professional certification.
Tip: Provide fault codes, photos of the outdoor unit, and a log of checks to the technician.
Diagnosis: Heat pump won't start or run
Possible Causes
- highPower or breaker issue
- highThermostat or control wiring fault
- mediumOutdoor unit blocked or iced
- mediumAirflow restriction (dirty filter, blocked return ducts)
- lowRefrigerant leak or charge issue
Fixes
- easyReset breakers and verify power to the outdoor and indoor units
- easyCheck thermostat settings and replace batteries or upgrade thermostat
- easyClear debris from the outdoor unit and thaw ice; ensure adequate clearance
- easyReplace dirty air filters and check return-air paths for obstructions
- hardIf refrigerant issues suspected, do not DIY; call a licensed technician for pressure check and recharge
Your Questions Answered
Why won’t my heat pump start even though the thermostat is on?
Common causes include power issues, tripped breakers, or wiring problems between the thermostat and outdoor unit. Verify power first, then check the communication signal and wiring connections.
If your thermostat says the unit should run but it won’t start, check the breakers and wiring, then recheck the thermostat settings.
Can a dirty air filter stop a heat pump from working?
Yes. A clogged filter restricts airflow, reducing heat transfer and potentially triggering shutdowns for safety. Replacing or cleaning filters often resolves the issue.
A dirty filter can block airflow and prevent proper operation—replace it to restore performance.
Is ice on the outdoor coils normal in winter?
Some icing can occur during extreme cold, but persistent ice suggests airflow problems or refrigerant issues. Don’t remove ice aggressively; let a professional assess.
A little ice can happen, but persistent ice usually means a problem an HVAC tech should check.
When should I replace my thermostat?
If the thermostat is unresponsive, inaccurate, or failing to communicate with the heat pump, upgrading to a modern device can improve reliability and control.
If your thermostat is flaky or old, consider an upgrade for better control and reliability.
Do refrigerant leaks require DIY repair?
No. Refrigerant work is hazardous and legally restricted. A licensed technician must diagnose leaks and recharge safely.
Don’t try to fix refrigerant leaks yourself; call a pro right away.
How long should a heat pump last with proper maintenance?
Most heat pumps last 10–15 years with regular maintenance, depending on usage, climate, and installation quality.
With good care, a heat pump can last a decade or more.
Watch Video
Top Takeaways
- Verify power and thermostat first to rule out easy fixes
- Keep outdoor unit clear to maintain airflow
- Do not DIY refrigerant work; call a pro for leaks or pressures
- Regular maintenance reduces unexpected outages
- Document fault codes for faster service