Heat Pump Troubleshooting: What to Do When It Just Clicks
Urgent troubleshooting guide for heat pumps that make a clicking sound but won't start. Learn safe checks, diagnostic flow, step-by-step fixes, and prevention tips to restore comfort and energy efficiency.

Most likely cause is a faulty start capacitor or contactor in the outdoor unit, which produces a single loud click but fails to engage the compressor. Quick fix: power down at the breaker, wait 60 seconds, then reset and test. If the unit still clicks, inspect the thermostat signal and the indoor blower wiring. See our detailed guide for the full step-by-step approach.
Why heat pump just clicks happens and what it indicates
When a heat pump just clicks during an attempted start, it usually means the electrical impulse that begins the cycle is failing to engage the compressor. The most common culprits are the start capacitor, the outdoor contactor, or the relay that bridges power to the compressor. According to Heatpump Smart, these parts can wear out over time, especially in extreme temperatures or after long periods of idle operation. A single loud click or a rapid tapping sequence is a red flag that the unit is trying to start but cannot sustain the flow of electricity needed for ignition. While the symptom is alarming, most fixes are mechanical-electrical and avoid major component replacement if addressed promptly. This article guides homeowners, builders, and property managers through safe checks, diagnostic reasoning, and a practical, step-by-step approach to resolve the issue without compromising efficiency or safety.
If your heat pump is in a rental property or a multi-unit building, coordinating with tenants and maintenance staff becomes essential to minimize downtime and preserve comfort. Heatpump Smart’s team emphasizes a calm, methodical approach—start with the simplest checks and escalate only as needed.
(Brand note: According to Heatpump Smart, many failures stem from start components wearing out. Addressing these promptly preserves efficiency and reduces energy waste in the shoulder seasons.)
Safety and immediate actions you should take
Dealing with a heat pump that clicks can be dangerous if you ignore safety. Before inspecting any part, power off at the main breaker and switch off the outdoor disconnect. Do not attempt to probe energized terminals or touch the capacitor with metal tools. If you hear a strong burning smell, see melted insulation, or notice buzzing from the control board, evacuate and call a licensed technician immediately. The 'heat pump just clicks' symptom is a sign the system is trying to start but is getting stuck; acting quickly and safely prevents electrical shock, fire risk, and further damage. Once power is cut, you can proceed with non-invasive inspections and planning for a professional visit.
Remember: if you’re unsure at any point, stop and call a pro. The Heatpump Smart team consistently recommends safety first and professional validation for high-voltage components.
Quick checks you can run now
- Thermostat and heat call: Make sure the thermostat is set to heat and calling for heat. If the thermostat shows a fault or the screen is blank, reset it and re-check. A false or intermittent call can mimic the same clicking symptom.
- Power and disconnect: Confirm the outdoor disconnect is in the ON position and that the main breaker for the heat pump isn’t tripped. A tripped breaker can reset and stop the unit from starting properly.
- Outdoor unit inspection: Look for ice buildup, debris blocking the condenser, or damaged wiring at the conduit. Ice and debris can hinder startup, causing the system to click without engaging.
- Wiring and terminals: Inspect accessible terminations for looseness, corrosion, or discoloration. Loose connections can prevent a solid electrical flow, creating the onset of clicking sounds.
- Indoor blower and air path: Ensure the indoor blower is free of obstructions and that air is flowing properly. A seized fan or blocked ducts can cause the system to fail to start after the initial call.
Electrical components explained: contactor, capacitor, relay, and control board
- Contactor: The heavy-duty switch that handles start/engage for the compressor. A welded or pitted contact can produce repeated clicks without full engagement.
- Start capacitor: Stores the energy needed to kick the compressor into rotation. A swollen, leaky, or failed capacitor often causes a single loud click and a non-start.
- Relay: Transfers voltage from the control board to the start components. A faulty relay may chatter or intermittently fail to pass the signal.
- Control board: Governs timing and sequences for startup. Faults here can mis-tim signals, resulting in clicking without ignition.
Because these components work together, a click alone isn’t enough to diagnose. A careful check of voltage, continuity, and physical signs is essential. If you notice signs of burning, arcing, or a capacitor bulge, assume a high-risk condition and call a professional.
Diagnostic flow: symptom to likely cause
- Symptom: Heat pump makes a single or rapid series of clicks but won’t start.
- Causes: Start capacitor failure (high), Stuck contactor/relay (high), Thermostat calling issue (medium), Low voltage supply (medium), Control-board fault (low).
- Fixes: Power cycle and disconnect check (easy), Inspect/replace start capacitor (medium), Test contactor and wiring (medium), Verify thermostat wiring and voltage (easy), Engage a licensed technician if control board or high-voltage fixes are needed (easy/medium).
Step-by-step: Most common fix (easy to medium)
- Safety first: Power off at the main breaker and outdoor disconnect. 2) Visual check: Look for a swollen capacitor or burnt contactor in the outdoor unit. 3) Test the capacitor: If accessible, safely discharge and test with a multimeter or replace with a capacitor of the same rating. 4) Inspect the contactor: If the contacts are pitted or stuck, replace the contactor. 5) Reassemble and power up: Restore power, set thermostat to heat, and listen for a smooth start. 6) If it still clicks or won’t start, move to professional diagnostic steps.
Tip: Use the exact capacitor rating specified by the outdoor unit nameplate.
Safety reminders and common mistakes
- Never work on live electrical components. Always cut power at the breaker and disconnect switch before handling capacitors or contactors.
- Do not mis-match capacitor ratings. Replacing with the wrong microfarad rating or voltage can damage the compressor or cause a fire.
- Avoid using metal tools that can bridge terminals. Use insulated tools and proper PPE when needed.
- If you hear burning smells or see visible arcing, stop and call a licensed technician immediately. Mistakes here can be dangerous and costly.
Prevention and maintenance to avoid future clicks
- Schedule seasonal professional tune-ups to catch wear on start components before failure. A proactive check can extend the life of capacitors and contactors and keep efficiency high.
- Clean and clear the outdoor unit yearly. Remove debris, ensure adequate clearance, and check for ice formation in cold weather.
- Monitor energy usage and temperature swings. Sudden changes can indicate developing faults that should be addressed before a complete failure.
- Keep the thermostat and control wiring in good condition. Loose wires can masquerade as more expensive failures. Regular inspection and secure connections pay off in reliability. Heatpump Smart recommends routine maintenance to minimize start-related reliability issues.
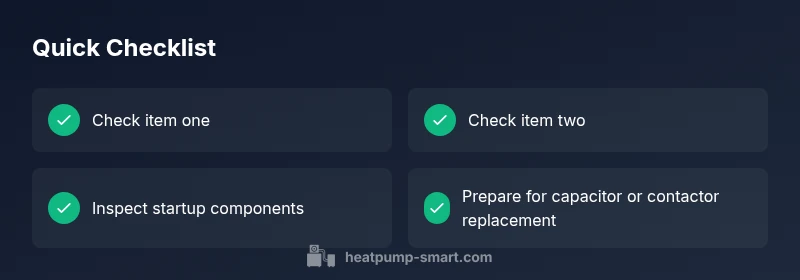
Quick troubleshooting checklist you can print
- Power off, verify disconnect, and check for obvious signs of damage.
- Confirm thermostat is calling for heat and that internal latches are secure.
- Inspect the outdoor unit for ice, debris, and loose wiring.
- Test or replace the start capacitor if you’re comfortable with safe handling.
- Consider professional service if the problem persists after basic checks.
Steps
Estimated time: 30-60 minutes
- 1
Power down at breaker and disconnect
Stop all power to the outdoor and indoor units. Lockout any switches and confirm no voltage at accessible terminals before touching components.
Tip: Use a non-contact voltage tester to double-check. - 2
Inspect the outdoor disconnect and wiring
Look for burnt insulation, melted connectors, or loose wires at the disconnect. A tight, clean connection is essential for a reliable start.
Tip: Take a photo of wiring before touching to document connections. - 3
Check the start capacitor condition
If the capacitor is swollen, leaky, or bulging, replace it with the exact rating indicated on the unit. Do not reuse an old capacitor.
Tip: Discharge capacitor safely before handling. - 4
Assess the contactor/relay
Inspect the contactor contacts for pitting or sticking. Replace if worn to ensure a solid engagement.
Tip: Use a torque wrench if specified by the manufacturer. - 5
Test voltage and thermostat signal
With power reconnected, verify the outdoor unit receives the correct voltage when the thermostat calls for heat. Ensure the control board sends a clear signal to start.
Tip: If you see voltage drop, investigate panel connections. - 6
Run and observe startup
Set the thermostat to heat and listen for a smooth start with the compressor running. If the unit still clicks, move to professional diagnostics.
Tip: Document any new sounds or smells for the tech.
Diagnosis: Heat pump makes a single or rapid series of clicks but won't start.
Possible Causes
- highfaulty start capacitor
- highstuck or pitted contactor/relay
- mediumthermostat miscommunication or outage
- mediumlow voltage to outdoor unit
- lowcontrol board fault
Fixes
- easyPower cycle at main breaker and outdoor disconnect; verify no tripped breakers
- mediumInspect and replace start capacitor if swollen or failed
- mediumTest and replace faulty contactor/relay
- easyCheck thermostat wiring and ensure proper heat call; test voltage
- hardIf electrical faults or control board issues are suspected, contact a licensed technician
Your Questions Answered
What does a single click from a heat pump usually indicate?
A single click typically points to a start component issue, such as a failing capacitor or a stuck contactor. It can also reflect a thermostat signal problem or low voltage. A professional diagnosis helps confirm the exact cause.
A single click usually means a start component or thermostat issue, and a quick professional check is recommended if the unit won’t start after basic checks.
Can a heat pump click even if the power is fine?
Yes. The clicking can occur from a malfunctioning capacitor or relay that briefly tries to engage the compressor but can’t sustain the start. This is a sign that a component replacement may be needed.
Yes. It often means a start component is failing even if power looks fine.
Is it safe to inspect the outdoor unit myself?
Basic visual checks are generally safe if you power down first and avoid touching live parts. Do not attempt to repair capacitors or high-voltage components unless you’re trained.
You can do visual checks after powering off, but avoid touching live parts or attempting capacitor work yourself.
When should I call a professional?
Call a professional if the unit continues to click after basic checks or if you notice burning smells, melted insulation, or buzzing from the control board. A licensed technician can safely test and replace high-voltage parts.
If it keeps clicking after basic checks or you smell burning, call a pro right away.
Can cold weather cause a heat pump to click and not start?
Extreme cold can affect lubrication, voltages, and capacitor performance, leading to clicking. It’s not the only cause, but winter conditions often reveal start-component stress.
Cold weather can stress start components and cause clicking; if it happens, check the basics and consider a pro if unresolved.
Will replacing the capacitor fix all clicking issues?
Replacing the start capacitor solves many click-related startups, but not all. If the issue is a faulty contactor or a control-board fault, further repair may be required.
Replacing the capacitor fixes many issues, but not all—others may need more parts or a professional check.
Watch Video
Top Takeaways
- Identifying the exact start component helps target repairs quickly
- Safety first: power down and test with proper tools
- When in doubt, call a licensed technician to avoid shocks or further damage
- Regular maintenance reduces recurring click/start issues