Heat Pump Not Working at All: A Complete Troubleshooting Guide
When your heat pump won’t start, quick power checks, thermostat verification, and airflow inspections can save time. This Heatpump Smart guide shows you the fastest path to a safe, lasting fix and when to call a professional.

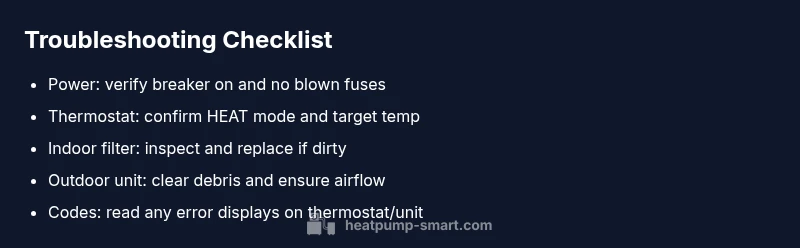
Most often, a heat pump not working at all is a simple power or thermostat issue. Quick start: 1) check that the breaker is on and the outdoor unit isn’t tripped; 2) verify the thermostat is set to heat and the target temp is attainable; 3) inspect the air filter and ensure the outdoor unit has clear airflow.
Quick checks you can perform before calling a technician
If your heat pump is not starting, the fastest path to a resolution is to rule out common, easy issues. According to Heatpump Smart, many outages are caused by simple electrical or thermostat problems rather than major mechanical failures. Start with the basics: confirm the main power source is supplying electricity, check that the circuit breaker for the outdoor unit is in the ON position, and inspect the thermostat for proper settings. If you use a smart thermostat, verify its connectivity and confirm it is communicating with the heat pump. Finally, inspect the air filter; a clogged filter can prevent the system from starting or cause it to run inefficiently, triggering safety protections. Keep notes of any codes or blinking lights on the thermostat display.
Understanding the most common causes: power and thermostat
When a heat pump won’t start, two culprits tend to dominate: power and controls. A tripped breaker or blown fuse interrupts the entire system. The thermostat, whether traditional or smart, is the system’s commander; if it misreads the room or loses connection, the heat pump may stay idle. Check both the indoor and outdoor power sources, then test the thermostat by lowering or raising setpoints and observing any responses from the outdoor unit. In many cases, correcting a misconfigured thermostat or resetting a tripped circuit resolves the issue without professional help.
How to test the thermostat and control signals
A faulty thermostat can mimic a complete outage. Start by turning off the power to the unit before removing the thermostat cover. Check for loose wires, damaged insulation, or disconnected sensors. If you have a programmable or smart thermostat, verify that it has the correct mode (HEAT or Em Heat as appropriate) and that it is communicating with the heat pump. If the thermostat uses batteries, replace them and test the display. After reattaching the cover, restore power and observe whether the system responds to a heat call. If there is no response, move to the next checks for signaling.
Safety-first electrical checks you can perform
Electrical safety is non-negotiable. Always shut off power at the breaker before touching any wiring. Look for signs of arcing, scorch marks, or melted insulation around the outdoor unit disconnect or contactor. Do not attempt refrigerant work or fan motor servicing unless you are licensed. If you smell burning, hear buzzing, or notice a tripped safety switch, contact a professional immediately. When in doubt, schedule a safety assessment to prevent shocks or fire hazards.
Airflow, debris, and outdoor unit inspection
Outside factors often block or slow down heat pumps. Inspect the condenser coils for dirt, leaves, or snow. Clear any obstructions around the outdoor unit and ensure the fan can turn freely. Inside the house, check that supply and return vents are open and not obstructed by furniture. A blocked airflow path can trigger protective shutoffs, making the system appear completely dead. For harder-to-access units, use a flashlight to check for ice buildup on the coils and remove any light frost with a hairdryer on low heat if safe to do so. If ice persists, the system may be in defrost mode or experiencing a refrigerant issue that requires a pro.
Ice build-up and sensor issues that shut down the system
Ice on the outdoor coil or frozen sensors can prevent the heat pump from starting. A common culprit is low outdoor temperatures combined with humidity that causes frost. If you notice ice buildup, turn the system off and allow the unit to thaw before restarting. Do not chisel ice off the coils, as that can damage fins. Inspect temperature and pressure sensors for accuracy, and consider a professional inspection if frost returns frequently. Sensor faults can mimic a full outage and require calibration or part replacement.
When to replace or repair: evaluating costs and warranties
If the heat pump is older or exhibits frequent outages despite multiple fixes, replacement can be more economical than continuous repairs. Review the warranty terms and whether refrigerant or compressor issues are covered. Factor in energy efficiency gains from newer models, which can reduce operating costs over time. If you rely on emergency heat during cold snaps, new heat pumps with better defrost cycles and inverter technology can offer improved reliability and comfort.
Prevention and routine maintenance to avoid future outages
Proactive maintenance is cheaper than emergency repairs. Establish a seasonal checklist: replace air filters every 1-3 months, clean indoor coils, inspect electrical components for corrosion, and ensure the outdoor unit is clear of debris. Schedule annual professional inspections to verify refrigerant charge, duct integrity, and thermostat calibration. A well-maintained heat pump not only reduces the risk of sudden outages but also improves efficiency and comfort. Keep a service log and note any recurring warning codes so you can address them quickly.
How to prepare for a professional visit: what to gather
If a problem persists, a structured approach helps the technician diagnose faster. Gather the model and serial number, recent maintenance history, and any error codes displayed on the thermostat. Note when the issue started, what settings were used, and whether outdoor conditions (wind, snow, humidity) coincide with outages. Take photos of wiring and the outdoor unit from multiple angles if you can do so safely. Having a clear problem statement helps the technician arrive prepared with the right parts and tools.
Steps
Estimated time: 1-2 hours
- 1
Power down and verify safety
Shut off the system at the main breaker and disconnect switch. Visually inspect for scorch marks or melted wiring. Reconnect power only after you are sure there is no hazard.
Tip: Always keep a flashlight handy and wear non-conductive gloves when inspecting electrical components. - 2
Check the breaker and fuses
Flip the breaker fully to OFF and back ON. If the fuse blew, replace it with one of the same rating and inspect for root causes before turning the power back on.
Tip: If the breaker trips again, discontinue DIY checks and call a professional to avoid fire risk. - 3
Inspect thermostat settings
Verify mode is set to HEAT, the target temperature is reasonable, and if a smart thermostat, confirm it’s online and communicating with the equipment.
Tip: Replace thermostat batteries if applicable and perform a manual temperature test switch. - 4
Evaluate indoor air path
Check all supply and return vents for obstructions. Replace dirty filters and ensure the air handler is operating without unusual sounds or vibrations.
Tip: A clogged filter can make the system appear non-responsive even when electrical power is fine. - 5
Inspect outdoor unit and airflow
Clear leaves, debris, and snow from the condenser. Check the fan for smooth rotation and look for ice buildup on coils. Ensure there is at least 2 feet clearance.
Tip: Never poke at the condenser fins; use a soft brush or gentle spray of water when the unit is cool. - 6
Read error codes and status lights
Note any flashing LEDs or fault codes on the thermostat and the outdoor unit. Look up the codes in the user manual or Heatpump Smart guide to map to likely causes.
Tip: Keep a log of codes and times; this helps a tech diagnose faster. - 7
Reset and test
After addressing the above, reset the system and allow it to run through a short cycle. Observe whether the heat pump responds to a heat call and returns to normal operation.
Tip: If the unit immediately shuts off again, it indicates a fault that requires professional service. - 8
Plan for professional evaluation
If there is no improvement after the above steps, schedule a professional service visit. Prepare your notes, codes, and the model information to speed diagnostics.
Tip: Ask about warranty coverage and estimated repair costs before any service work.
Diagnosis: Heat pump won't start or respond at all
Possible Causes
- highPower issue (tripped breaker, blown fuse)
- highThermostat or control board fault
- mediumOutdoor unit blocked by debris or ice buildup
- lowLow refrigerant or compressor fault
Fixes
- easyReset tripped breaker or replace blown fuse
- easyTest thermostat operation, replace batteries, reconnect Wi‑Fi if needed
- mediumClear debris from outdoor unit and thaw ice, ensure proper airflow
- hardSchedule professional service for refrigerant or compressor concerns
Your Questions Answered
What is the first thing I should check if my heat pump won't start?
Start with the basics: confirm power at the main breaker, verify the outdoor unit isn’t tripped, and check the thermostat settings. If these don’t resolve the issue, proceed with the other steps in this guide.
First, check the power at the breaker, then see if the outdoor unit tripped, and verify the thermostat is set correctly. If it still won’t start, continue with the troubleshooting steps.
My thermostat shows no display. What does that mean?
A blank display usually indicates a power issue or a dead thermostat battery. Check the thermostat’s power supply, replace batteries if needed, and ensure it is connected to the heat pump system.
A blank thermostat often means power or battery problems. Check the power, replace batteries if applicable, and reconnect to the system.
Can a dirty air filter cause a heat pump to stop entirely?
Yes, a clogged air filter can trigger safety protections and prevent the unit from starting or running efficiently. Replace the filter and recheck operation after cleaning the indoor coil. Regular filter changes help prevent outages.
A dirty filter can trigger safety protections, making the unit stop. Replace the filter and see if it runs again.
Is it safe to reset the circuit breaker while the system is powered?
No. Turn off power at the panel before interacting with electrical components, then reset the breaker. If the breaker trips again, do not reset it repeatedly; this can indicate a deeper electrical fault requiring a professional.
No, turn the power off first, then reset the breaker. If it trips again, call a professional.
When should I call a professional for a non-starting heat pump?
Call a professional if basic checks don’t restore function, if you hear unusual noises, smell burning, or see signs of refrigerant issues. A licensed technician can diagnose refrigerant leaks, electrical problems, and control faults safely.
Call a professional if the unit still won’t start after basic checks or if you hear unusual sounds or smell burning.
Could refrigerant leaks cause a total shutdown?
Yes. A refrigerant leak can trigger safety protections and prevent the heat pump from starting. A professional should check charge levels and locate leaks, as handling refrigerant requires certification and proper equipment.
A refrigerant leak can cause a total shutdown. A pro should handle the inspection and repair.
Can a smart thermostat cause outages?
A misconfigured or offline smart thermostat can stop the heat pump from starting. Ensure the device is online, paired with the system, and set to the correct mode. Rebooting the thermostat often resolves temporary glitches.
Yes, a faulty or disconnected smart thermostat can prevent startup. Check its connection and settings, then restart it.
Top Takeaways
- Verify power and thermostat first
- Inspect airflow and outdoor unit for obstructions
- Read error codes carefully and log details
- Do not attempt refrigerant work; call a pro when needed
- Maintain routine preventive maintenance to prevent outages