Heat Pump Troubleshooting: What to Do When It Stops Working
Heat pump just stopped working? Follow this urgent guide for quick, safe DIY checks, a diagnostic flow, and professional thresholds to restore comfort fast.

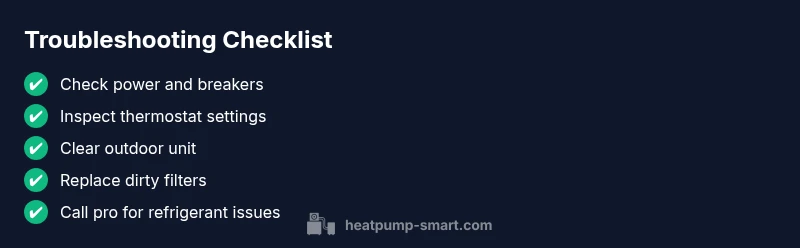
If your heat pump just stopped working, start with quick checks: confirm the unit is powered (outlet and breaker), verify the outdoor unit isn’t blocked by debris, and ensure the thermostat is calling for heat. Most failures stem from power, thermostat settings, or a frozen/blocked coil. If these don’t fix it, follow the diagnostic flow below for deeper troubleshooting.
Why a heat pump stops working
When a heat pump just stopped working, the situation can feel urgent, especially during cold snaps. Fortunately, many outages are simple to diagnose with a structured approach. The most frequent causes are power supply issues, thermostat misreadings, or airflow restrictions on the outdoor unit. Heat pumps rely on a compact control circuit and precise refrigerant flow; a single blown fuse or a misread thermostat can prevent the compressor from starting. According to Heatpump Smart, starting with basic checks saves time and money and reduces the need for costly service calls. This section outlines the common failure modes and how to verify them, so you can determine whether you’re looking at a DIY fix or a professional recommendation.
Key takeaways: power, thermostat, airflow, and defrost problems account for the majority of startup failures. If you notice unusual noises or ice buildup, you’re in a different troubleshooting lane and should proceed with caution.
Quick checks you can safely perform
Use these checks to diagnose quickly and safely. They require no special tools and prevent unnecessary service calls.
- Check the main electrical panel for a tripped breaker or blown fuse feeding the heat pump. If you reset a breaker, observe to see if it trips again. A persistent trip indicates a deeper electrical fault.
- Confirm the outdoor unit has power. Look for illuminated indicator lights on the unit (if present) and listen for the fan. If there’s no sound or lights, power delivery may be interrupted.
- Verify the thermostat is set to the correct mode (heat or auto) and that the temperature setting calls for heat. If the thermostat is old or has weak batteries, replace them.
- Inspect air filters and indoor vents. A clogged filter or blocked supply registers can cause the system to shut down due to low airflow or protective safety limits.
- Check the outdoor unit for debris, leaves, snow, or ice buildup. Clear obstructions from at least 2 feet around the unit to maintain proper airflow.
- Look for ice on the outdoor coil. A frosted coil often means low refrigerant pressure, dirty coils, or a malfunction in the defrost cycle.
- Listen for unusual noises from the outdoor unit or indoor blower. A failing fan motor or loose components can mimic a shutdown.
If these checks don’t restore operation, proceed to the diagnostic flow to identify the underlying cause and the appropriate fix.
Understanding diagnostic signals and likely causes
Different symptoms point to different root causes. The following guide helps you map observed behavior to likely problems, so you can decide whether a DIY fix is feasible or a professional should be involved. If the outdoor unit is silent but the indoor fan runs, the issue is often electrical or control-related. If you hear a humming sound but no cooling or heating, a capacitor or contactor could be failing. Ice on the coils after a defrost cycle may indicate airflow restrictions or refrigerant issues. Always prioritize safety; if you smell burnt insulation, hear buzzing sounds, or suspect a refrigerant leak, shut down the system and call a pro immediately.
Heat pumps are complex systems with several potential failure points. By systematically observing symptoms and applying the right fixes, you can resolve many common outages without professional help. Heatpump Smart emphasizes using a diagnostic flow to distinguish between routine maintenance needs and genuine service calls.
Diagnostic flow overview
This section aligns symptoms with probable causes and practical remedies, forming the backbone of the troubleshooting process. Start with the simplest checks (power, thermostat, airflow) and move toward more involved steps (refrigerant, electrical components) only if the basic steps don’t resolve the issue.
- Symptom: No start, indoor fan runs or outdoor unit is silent → Likely power/electrical or control issue.
- Symptom: Cold air without heating → Possible thermostat misread, Airflow restriction, or defrost cycle issue.
- Symptom: Outdoor unit runs but indoor air is not warm → Check refrigerant pressure or indoor blower performance.
At every stage, move to safe, easier fixes before attempting more complex tasks. If you’re unsure or the unit is under warranty, contact a licensed technician to avoid voiding coverage.
Step-by-step fixes for the most common cause
Below is a robust, practical sequence to address the most frequent outage scenario (power/thermostat-related). Follow these steps in order and only advance when the previous step is complete and safe.
- Check power supply and breakers: Inspect the main panel and the outdoor disconnect. Reset any tripped breakers after waiting 60 seconds. A persistent trip requires professional diagnosis.
- Verify thermostat operation: Confirm the thermostat is calling for heat, has fresh batteries if wireless, and is not in a temporary shutdown mode.
- Inspect airflow and filters: Replace dirty air filters and ensure supply vents aren’t blocked. Poor airflow can cause system protection shutoffs.
- Clear the outdoor unit: Remove debris and ensure at least 2 feet of clearance around the unit. Trim nearby vegetation that could impede airflow.
- Check for icing or frost: If you see ice, turn the system off and let the outdoor coil defrost. A frost buildup can indicate airflow or refrigerant issues that require professional service.
- If nothing works, power down and restart: Turn off the system at the thermostat and disconnect power for 5 minutes before turning it back on.
- Call a professional if needed: If you suspect refrigerant leaks, electrical faults beyond basic resets, or unusual noises, contact a licensed HVAC technician promptly.
Estimated time for this workflow: 30–60 minutes, depending on complexity and safety checks.
Safety notes and warnings
- Always power off the system before inspecting electrical components. Avoid touching wiring, capacitors, or live circuits. If you’re unsure, skip to the next checklist item and call a pro.
- Refrigerant work is hazardous and legally restricted. Do not attempt to repair leaks or alter refrigerant charge yourself.
- If you smell burning plastic, hear buzzing sounds, or see scorching marks, shut everything down and seek emergency help.
- Regular maintenance reduces the chance of sudden outages. Schedule annual checks for coils, filters, and refrigerant levels.
Prevention tips to avoid future outages
- Schedule routine maintenance, including coil cleaning and filter replacement every 3–6 months depending on usage.
- Keep the outdoor unit clear of leaves, snow, and plant growth to maintain airflow and efficiency.
- Consider upgrading the thermostat to a smart model with remote diagnostics to catch issues early.
- Document signs of trouble (strange noises, pressure changes, or fluctuating temperatures) and address them promptly to prevent escalation.
Steps
Estimated time: 30-60 minutes
- 1
Check power and breakers
Inspect the main panel and outdoor disconnect. Reset any tripped breakers after waiting 60 seconds. If the breaker trips again, stop and call a professional.
Tip: Use a flashlight to verify power at the outdoor disconnect if you don’t hear a fan or see indicator lights. - 2
Verify thermostat settings
Confirm the thermostat is in heat mode (or auto) and calling for heat. Replace batteries if it’s wireless, and ensure the screen isn’t dim or cracked.
Tip: If the thermostat is old, consider upgrading to a smart thermostat with remote diagnostics. - 3
Inspect outdoor unit airflow
Clear any leaves, snow, or debris from the outdoor unit and ensure a minimum of 2 feet of clearance around all sides. Check the condenser fan for smooth operation.
Tip: Never insert objects into the fins; use a brush to remove debris. - 4
Check indoor airflow and filters
Replace dirty air filters and verify supply vents are open. A clogged filter reduces airflow and may trigger shutdown protections.
Tip: Mark a monthly reminder to check filters during seasonal transitions. - 5
Inspect for ice and defrost cues
If you see ice on the outdoor coil, power down and allow defrost to occur naturally if safe. Check that the defrost timer or controls are functioning.
Tip: A brief defrost cycle is normal; persistent icing indicates a refrigerant or airflow issue. - 6
Restart and monitor performance
Power the system back on and observe for normal cycling. If it fails to start or rapidly shuts down again, document symptoms and seek professional help.
Tip: Record model and error codes if your unit displays them to speed up troubleshooting.
Diagnosis: Heat pump won't start
Possible Causes
- highPower issue (tripped breaker, blown fuse, or unplugged unit)
- mediumThermostat misreading or incorrect settings
- lowOutdoor unit blocked by debris, snow, or ice
- lowFrozen coils or refrigerant issues
- lowClogged air filters causing protection shutdown
Fixes
- easyCheck the main electrical panel for tripped breakers and reset; verify the outdoor disconnect is ON
- easyEnsure thermostat is calling for heat and set to the correct mode; replace batteries if needed
- easyClear leaves, snow, or debris from around the outdoor unit and maintain at least 2 ft clearance
- easyInspect and replace dirty air filters; confirm indoor vents are open and unobstructed
- mediumIf refrigerant issues are suspected, call a licensed HVAC technician for pressure test and leak repair
- easyIf none of the above work, power down for 5 minutes and restart the system
Your Questions Answered
What should I check first when my heat pump stops?
Start by checking power at the main panel, the outdoor disconnect, and the thermostat settings. If the unit is unpowered or the thermostat isn’t calling for heat, you can often fix the issue without a service visit. If power and settings are correct but the unit still won’t run, continue with the diagnostic flow.
First check power and thermostat settings; if those look fine, follow the diagnostic flow for deeper troubleshooting.
Can a faulty thermostat cause a heat pump to stop working?
Yes. A misreading thermostat can prevent the system from calling for heat or cooling. Replacing batteries, calibrating the sensor, or upgrading to a smart thermostat often resolves this quickly.
Thermostat issues are common; check batteries and mode, then consider an upgrade if problems persist.
Is it safe to restart the heat pump myself after an outage?
Yes, after ensuring there are no exposed hazards. Power down for 5 minutes and then power back on. If it starts but shuts down again, note any error codes and seek professional help.
A safe restart can solve glitches, but if the problem recurs, call a pro.
What if ice forms on the outdoor coil even when it’s not cooling?
Ice on the outdoor coil usually means restricted airflow, a dirty coil, or low refrigerant pressure. Turn the unit off to let it thaw and call a technician to inspect refrigerant levels and coil cleanliness.
Ice on the coil is a red flag; turn off and call a pro to check refrigerant and airflow.
When should I call a professional for a heat pump issue?
If basic checks don’t restore operation, if you smell burning, hear buzzing, or suspect a refrigerant leak, or if the breaker continues to trip, schedule service promptly. Professional diagnostics protect your system and safety.
Call a professional if basic fixes fail or if you suspect electrical or refrigerant problems.
Can dirty filters really stop a heat pump from working?
Yes. A clogged filter reduces airflow, triggering safety protections and inefficient operation. Replacing or cleaning filters is a quick, cost-effective fix.
Yes, dirty filters can stop or slow the unit; replace filters regularly.
Watch Video
Top Takeaways
- Start with power and thermostat checks to rule out quick fixes.
- Maintain clear outdoor airflow and replace dirty filters promptly.
- Use the diagnostic flow to distinguish between DIY fixes and pro service needs.
- Call a professional for refrigerant or electrical faults beyond basic resets.