Heat Pump Quit Working: Quick Troubleshooting Guide
When a heat pump quits working, homeowners need fast, safe steps. This guide from Heatpump Smart provides practical checks, a diagnostic flow, and when to call a pro for reliable home comfort.

Most often, a heat pump quits working due to a simple power or control issue. Common culprits include a tripped breaker, blown fuse, thermostat set incorrectly, dirty air filters, or ice buildup on the outdoor coil. Quick fix: reset the breaker, verify thermostat mode, replace dirty filters, and thaw the outdoor unit if frost is present. If unresolved, contact a professional for a thorough check.
Why Heat Pumps Quit: Common Causes
If you’ve noticed a heat pump quit working, you’re not alone. According to Heatpump Smart, the most frequent outages are simple, addressable issues rather than dramatic failures. The typical culprits include a tripped breaker or blown fuse, an off or incorrect thermostat setting, a dirty air filter that restricts airflow, and ice buildup on the outdoor coil that blocks refrigerant flow. Less frequent but important causes include refrigerant leaks, faulty contactors or capacitors, and sensor malfunctions. Understanding these categories helps you triage safely and quickly.
In most homes, starting with the power and control system is enough to restore operation. If the unit is not getting power, nothing else will work. If the thermostat is misconfigured or misreading room temperatures, the system may stay in standby or run in the wrong mode. If you notice frost or ice on the outdoor unit, do not despair—defrost cycles can manage temporary icing, but persistent ice can signal a refrigerant problem or airflow restriction that requires attention. By mapping symptoms to likely causes, you can determine whether a quick DIY fix is appropriate or if professional service is warranted.
This section lays the groundwork for the diagnostic flow and the practical fixes described later in this guide. Remember: heat pump quit working is rarely a single catastrophic failure; more often it’s a simple, fixable condition.
Quick Self-Checks You Can Safely Do
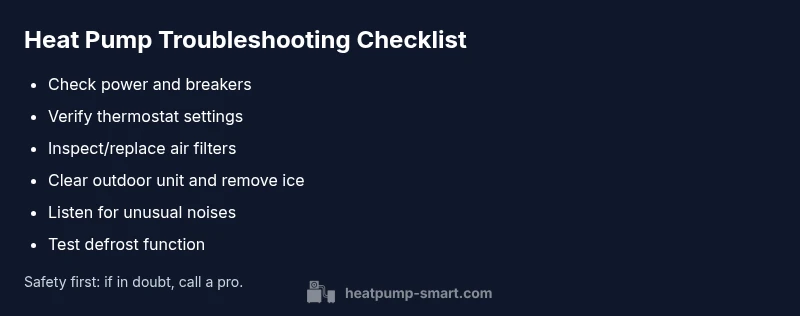
Safety first: power off before touching electrical components. Start with the basics and work your way to less obvious issues.
- Power and breakers: Go to the main electrical panel, locate the circuit labeled for the heat pump, and flip the breaker off and on. If the breaker trips again, there is a wiring or electrical component fault that requires professional inspection.
- Thermostat settings: Confirm the thermostat is set to the correct mode (heat or cool) and that the setpoint is reasonable for the season. If the display is blank or unresponsive, replace the thermostat battery or consider a replacement if it’s old.
- Air filters: Inspect and replace dirty filters. Clogged filters reduce airflow, reduce efficiency, and can cause the system to shut down to protect itself.
- Outdoor unit check: Clear debris, leaves, and vegetation within a 2–3 foot radius. Look for ice buildup on the coil; light frost is normal during defrost cycles, but persistent ice can indicate airflow restrictions or refrigerant issues.
- Audible clues: Listen for humming, clacking, or buzzing noises. A stuck contactor or failing capacitor often makes distinctive sounds and needs a professional diagnosis.
- Condensate and drains: Ensure the drain line isn’t blocked, especially in humid months. A clogged drain can trigger safety switches and shut down the system.
Diagnosing the Problem: Diagnostic-Flow Overview
The diagnostic flow starts with symptom identification and flows toward a probable diagnosis and targeted fixes. This approach helps you avoid unnecessary steps and focuses on the most common failure modes. In practice, you’ll map what you observe (short cycling, no cooling, icy coils, unusual noises) to likely causes, then apply the simplest fixes first. Heatpump Smart’s analysis shows that most issues fall into categories you can verify without specialized tools.
Key idea: always start with power and thermostat checks, then verify airflow and outdoor coil condition. If the system remains unresponsive after these checks, you’ll move to more advanced diagnostics such as refrigerant status, sensor readings, or electrical component testing. The goal is to determine whether you can complete a safe DIY fix or if professional service is required for longer-term reliability.
How to Fix: Step-by-Step Guide
This section provides a practical, safety-forward approach. The steps below cover the most common cause: power/control issues combined with airflow problems. If you identify a fault beyond these steps, stop and call a licensed technician. Remember, professional help is essential for refrigerant work or electrical faults that involve live wiring.
- Power reset and breaker test: Turn off the heat pump breaker at the service panel, wait 60 seconds, and turn it back on. If the breaker trips again, discontinue and dial a pro. 2) Thermostat verification: Confirm mode and setpoint; if the thermostat is unresponsive, replace batteries or upgrade to a smart thermostat to improve reliability. 3) Filter replacement: Replace any clogged filters and inspect ducts for blockages. 4) Outdoor unit inspection: Remove snow/ice and ensure unobstructed airflow; if you see significant ice, allow defrost cycles to operate and monitor for repeated icing. 5) Defrost and heat flood checks: If frost persists for more than a few hours, this may indicate a defrost sensor or refrigerant issue; do not run forced defrost repeatedly. 6) Post-fix testing: Restore power and run a short cycle to observe for normal operation. If the unit still won’t start, schedule a service visit.
EstimatedTime: 25-45 minutes overall for basic checks and fixes.
Electrical Safety and Safe Handling
Electrical safety cannot be overstated when dealing with heat pumps. Always de-energize at the breaker before touching electrical components. Wear insulated gloves if you access wiring, and never work alone if you’re unsure about electrical hazards. Do not bypass safety switches or attempt refrigerant handling unless you are a licensed professional. If you smell burning insulation or hear arcing, turn off power immediately and call emergency electrical help.
Common Scenarios and Solutions
- Scenario A: No power to outdoor unit. Solution: Check main panel, confirm the disconnect fuse or breaker is functioning, and verify wiring connections. If you can’t restore power, call a pro to diagnose internal faults.
- Scenario B: Thermostat reading normal, but no heat. Solution: Recalibrate or replace thermostat, then retest. If the issue recurs, test for air leaks around the return duct and seal leaks to avoid strain on the system.
- Scenario C: Outdoor coil iced over. Solution: Increase defrost cycle efficiency by ensuring proper airflow and temperature; if icing occurs repeatedly, there may be a refrigerant or sensor fault.
Prevention Tips to Keep Your Heat Pump Reliable
- Schedule regular professional maintenance twice a year to clean coils, inspect refrigerant levels, and test safety switches.
- Change filters every 1–3 months, depending on usage and indoor air quality.
- Clear snow and debris from around the outdoor unit in winter and maintain 2–3 feet of clearance for unobstructed airflow.
- Use a programmable thermostat to minimize short cycling.
- Keep your home well insulated to reduce load on the heat pump and extend equipment life.
When to Call a Pro and What to Expect
If basic troubleshooting doesn’t restore function, it’s time to contact a licensed HVAC technician. A pro will verify electrical connections, diagnose refrigerant status, and assess compressor and control components. Expect a fault code check, pressure readings, and a safe stepwise repair plan. Ask about warranties, expected lifespan, and maintenance recommendations to prevent recurrence.
Cost Considerations and Warranty Thoughts
Repair costs vary widely based on the root cause and local labor rates. Common fixes like filters, thermostat replacements, or electrical component checks are typically less expensive than refrigerant or compressor work. Review your equipment warranty terms and any extended coverage; many units have labor and parts warranties that may offset costs for major repairs.
Steps
Estimated time: 25-45 minutes
- 1
Power check and reset
Locate the main service panel, switch the heat pump circuit off, wait 60 seconds, then switch back on. Observe whether the unit powers up and the thermostat responds. If the breaker trips again, stop and call a professional.
Tip: If you’re unsure which breaker controls the heat pump, label it for future reference. - 2
Thermostat verification
Ensure the thermostat is in heat or cool mode as appropriate and that the setpoint is not set too far from room temperature. If the display is dim or unresponsive, replace the batteries or upgrade the thermostat.
Tip: Consider a smart thermostat for clearer diagnostics and energy savings. - 3
Air filter inspection
Remove and inspect the air filter. If dirty or discolored, replace with a compatible filter. Run a test cycle to see if airflow improves.
Tip: Mark a filter-change date on your calendar to stay proactive. - 4
Outdoor unit check
Clear snow, leaves, and debris from around the unit; ensure at least 2–3 feet of clearance. If you see ice, allow defrost cycles to operate but don’t hammer away at ice buildup.
Tip: Never use sharp tools to remove ice from the coil. - 5
Defrost and test
If frost persists, observe whether the defrost cycle runs automatically. If not, a professional likely needs to inspect defrost controls and refrigerant status.
Tip: Persistent icing often signals a refrigerant or sensor fault. - 6
Post-fix testing
Restore power and run a short cycle to verify normal operation. Listen for unusual noises and watch for proper cycle timing.
Tip: Document any codes or symptoms to share with the technician.
Diagnosis: Heat pump won't start or no heating/cooling
Possible Causes
- highPower issue (tripped breaker or blown fuse)
- highThermostat misconfiguration or failure
- mediumDirty air filter causing airflow restriction
- mediumOutdoor unit ice/frost or debris restricting airflow
- lowRefrigerant leak or refrigerant-related fault
Fixes
- easyReset breaker/fuse and re-test system
- easyVerify thermostat settings or replace thermostat
- easyReplace dirty air filters and clear internal ducts
- mediumGently thaw outdoor unit and remove obstructions; monitor for recurring icing
- hardCall a licensed pro for refrigerant issues or faulty electrical components
Your Questions Answered
Why did my heat pump suddenly stop working?
Most often, power or control issues trigger a sudden stop. Start by checking the breaker, thermostat settings, and filters. If the unit remains unresponsive, a professional assessment is advised.
A sudden stop is usually due to power or control issues. Check the breaker, thermostat, and filters, then call a pro if it still won’t run.
Is it safe to reset my thermostat when the heat pump won't start?
Resetting the thermostat is generally safe if you follow the manual and power safety guidelines. If resets happen repeatedly, it may indicate a deeper control or sensor problem.
Resetting is usually safe if you follow the manual. If it keeps happening, get a professional check.
My outdoor unit is frozen; what should I do?
A light frost is normal during defrost cycles, but persistent icing means airflow or refrigerant issues. Allow defrost and check for airflow obstructions. If icing recurs, call a pro.
Light frost can happen, but ongoing icing should be checked by a professional.
When should I replace my heat pump rather than repair it?
If your unit is old (typically past the middle of its expected life) and repairs are frequent, replacement may be more cost-effective long term. A professional can run a cost-benefit analysis.
If the unit is old and repairs pile up, replacement is often the smarter choice.
Can low refrigerant cause a heat pump to quit working?
Low refrigerant can prevent proper cooling or heating and may trigger safety shutoffs. Only a licensed technician should handle refrigerant repairs.
Low refrigerant can cause failures and must be fixed by a pro.
Watch Video
Top Takeaways
- Check power and thermostat first
- Inspect filters and outdoor airflow
- Defrost issues require caution
- Call a pro for refrigerant or electrical faults