Heat Pump Keeps Tripping Breaker: Troubleshooting Guide
Learn how to diagnose and fix a heat pump that keeps tripping the breaker. This urgent, step-by-step guide covers common electrical causes, safe inspections, and when to call a pro.

The most likely cause is an electrical overload or a failing starting component. Start by resetting the breaker, verify the heat pump has a dedicated circuit, and inspect for obvious issues like a clogged filter or blocked outdoor unit. If the breaker trips again, shut off power and call a licensed HVAC electrician to diagnose the electrical components.
Why the Breaker Trips When Your Heat Pump Runs
When a heat pump keeps tripping the breaker, the first clue is that the electrical system is signaling overload or a compromised electrical component. According to Heatpump Smart, most trips happen during startup when the motor and compressor demand a surge of current. In many homes, the heat pump shares a circuit with other appliances; any extra load can push the panel past its limit and trip the breaker. Understanding this pattern helps homeowners distinguish between a simple reset and a deeper electrical issue. Along with power concerns, airflow restrictions, a dirty filter, or ice accumulation on the outdoor coil can compound the load, causing brief current spikes that trigger a safety shutdown. By mapping these symptoms to likely causes, you can prioritize fixes that reduce draw and stabilize operation without risking warranty violations or safety hazards. If you notice any burning smell, warmth around the panel, or buzzing noises from electrical components, treat it as urgent and avoid DIY power work. Heatpump Smart’s guidance emphasizes safety as the top priority when dealing with circuit trips.
Common Electrical Causes Behind Breaker Trips
A breaker trip during heat pump operation almost always points to one of several root causes. The top three culprits are an electrical overload on the circuit, a failing starting component such as a contactor or capacitor, and a short in the control wiring or outdoor unit. Other frequent factors include dirty air filters causing the indoor blower to work harder than necessary, restricted airflow across the outdoor coil due to ice buildup or debris, and a mismatched breaker or wiring that doesn’t meet the heat pump’s spec sheet. Each cause has a different fix: overloads may require reducing connected loads or upgrading the circuit; faulty capacitors or contactors typically require replacement by a licensed technician; short circuits demand a careful electrical inspection. A persistent pattern of trips warrants a professional assessment to ensure refrigerant circuits and electrical connections are sound and safe.
Safety First: Before You Inspect
Electrical work can be dangerous. Before you touch any components, cut power at the main panel and verify the heat pump is de-energized. Do not rely on a single reset as a fix; a trip indicates an actual electrical condition that can reoccur if not addressed. Wear non-conductive gloves when handling any exposed wiring and keep metal tools away from the outdoor unit’s terminal blocks. If you have a GFCI or AFCI breaker, ensure it’s functioning properly and that the air handler is not sharing that safety circuit with other loads. Document every trip: time, temperature, outdoor conditions, and whether the unit was actively heating or cooling. This data helps a pro pinpoint whether the issue is mechanical, electrical, or environmental. If the trip coincides with heavy demand (e.g., a cold start in winter), the problem may involve overload rather than a single faulty part.
Diagnostic Checklist: Simple Checks You Can Do
Start with the basics that often reveal the source of the problem. Check the thermostat wiring for loose connections, verify all outdoor and indoor service panels are clean and dry, and inspect the air filter—replacing a clogged filter can reduce amperage and prevent unnecessary starts. Look for ice on the outdoor coil; a frozen coil can dramatically raise current draw when the system tries to defrost. Ensure the outdoor unit has clear airflow, with at least a few inches of clearance all around. Finally, confirm the breaker is the correct size for the heat pump model and that it isn’t shared with another heavy-load appliance. If any abnormal signs appear (burn marks, melted insulation, or sizzling sounds), stop immediately and call a professional.
Step-by-Step Fixes for the Most Common Cause
The most common cause of trips is an electrical overload due to worn components or poor wiring. Step one is to power down at the main panel and verify the breaker has not tripped in transit. Step two is to inspect the contactor and capacitor in the outdoor unit for pitting, arcing, or debris; replace if you see wear. Step three is to check the wiring lug connections at both the outdoor and indoor units for looseness or corrosion and tighten/clean as needed. Step four is to test the motor and compressor draw with a clamp-on ammeter; if the amperage exceeds the circuit rating, upgrade the circuit or replace the affected component. Step five is to run a controlled test cycle to observe whether the trip recurs under idle conditions or only during peak start sequences. Step six is to review refrigerant lines for obvious signs of damage or leaks, which can trigger abnormal current behavior. If the problem persists after these steps, professional help is required to inspect electrical panels and refrigerant circuits safely.
Prevention Tips to Stop Breaker Trips in the Future
Proactive maintenance reduces the risk of recurrent trips. Change the air filters every 1–3 months depending on usage and indoor conditions. Schedule annual coil cleaning and outdoor unit inspection, especially if you live in a dusty environment or have pets that shed. Ensure the heat pump sits on a dedicated circuit sized per the manufacturer’s specification and that the panel has no loose or corroded connections. Add a short, non-dramatic seasonal test to verify the unit starts smoothly at the beginning of each heating or cooling season. Finally, keep a simple log of every incident—trip time, temperature, mode, and location of any odors or noises—to share with a technician for faster diagnosis if trips resume.
When to Call a Pro and What to Expect
If a breaker trips repeatedly, or you notice signs of burning, buzzing, or smells from the panel, contact a licensed HVAC technician or an electrician immediately. DIY electrical work beyond basic resets can create serious safety hazards. A professional will typically verify the breaker and panel ratings, inspect the contactor and capacitor, measure current draw, check for refrigerant issues, and ensure all wiring is correctly sized and connected. Expect a thorough diagnostic that may include testing the outdoor fan, indoor blower, control board, and wiring harness. The goal is to restore safe operation with a solution that prevents future trips while maintaining warranty coverage and system efficiency. Heatpump Smart recommends prioritizing safety and timely professional support for persistent trips.
Quick Reference: Troubleshooting Flow at a Glance
- Symptom: Breaker trips when heat pump starts or runs
- Check: Dedicated circuit and breaker size
- Inspect: Outdoor unit components (contactor, capacitor)
- Inspect: Airflow and indoor air filter
- Test: Current draw and wiring integrity
- Action: Replace worn parts and/or upgrade circuit if needed
- Decide: If in doubt, call a pro promptly
Steps
Estimated time: 60-90 minutes
- 1
Power down and secure the area
Switch off the heat pump at the main panel and also cut power to the unit at the disconnect near the outdoor condenser. Confirm no power is flowing with a non-contact tester. This protects you from electric shock while you inspect panels and wiring.
Tip: If you’re unsure, start with the outdoor disconnect to minimize risk. - 2
Check the circuit and breaker
Look at the breaker size and label; ensure it’s rated for the heat pump’s voltage and current. If the breaker tripped, reset it after a minute and observe whether it trips again during an initial start. Do not operate if the breaker feels warm to the touch.
Tip: Never reset a tripped breaker repeatedly in quick succession. - 3
Inspect outdoor components
Open the outdoor unit casing and examine the contactor and capacitor for signs of wear, pitting, or oil leakage. Replace worn parts following the manufacturer’s instructions or call a pro. Ensure connections are clean and tight.
Tip: Avoid touching live terminals; use insulated tools only. - 4
Check wiring and connections
Trace power conductors from the panel to the outdoor and indoor units. Look for loose lugs, frayed insulation, or discoloration. Tighten gently where needed and replace damaged wires with appropriately rated replacements.
Tip: If you see arcing marks, stop and contact a professional immediately. - 5
Assess airflow and ice buildup
Check that the outdoor coil is clear of ice, snow, or debris and that the fan spins freely. Clear obstructions and let ice melt if present. Dirty air filters inside can also elevate load; replace if dirty.
Tip: A quick airflow check can reveal hidden icing issues. - 6
Measure current draw
If you have access to a clamp meter, measure the compressor and fan current vs the circuit rating. A sustained high draw indicates a faulty component or refrigerant-related issue requiring specialized service.
Tip: Only perform this if you’re comfortable with electrical testing. - 7
Test the system cycle
Restore power and run a short heating and cooling cycle to see if the breaker still trips. Listen for unusual noises and observe whether the system runs longer than typical on startup.
Tip: Document trip times and conditions for the technician. - 8
Decide on next steps
If the breaker trips again, schedule a professional assessment. Provide the technician with trip logs, model numbers, and any observed symptoms to accelerate diagnosis.
Tip: Regular preventive maintenance can prevent most trips.
Diagnosis: Breaker trips during heat pump startup or operation
Possible Causes
- highElectrical overload on circuit
- mediumFailing contactor or capacitor in outdoor unit
- mediumLoose or corroded wiring connections
- lowIce buildup or restricted airflow increasing load
Fixes
- easyVerify and restore a dedicated circuit; confirm breaker size matches heat pump spec
- easyInspect outdoor contactor and capacitor; replace if worn or pitted
- easyTighten and clean all electrical connections; check for damaged insulation
- easyRemove ice or debris from outdoor coil; ensure airflow clearance
- mediumTest current draw with a meter; reduce load or upgrade circuit if needed
Your Questions Answered
Why does a heat pump trip the breaker?
Trips are usually caused by electrical overload, faulty outdoor components like the contactor or capacitor, or wiring problems. Environmental factors such as ice buildup can raise current draw and cause a shutdown. A systematic check helps identify the exact cause.
Breaker trips are often due to overload or worn outdoor parts. A careful check will identify whether it’s electrical or mechanical.
Can a dirty air filter cause breaker trips?
A clogged air filter can force the blower to work harder, increasing amperage draw and potentially triggering a trip on weak circuits. Replace filters regularly to reduce strain on the system.
Yes, a dirty filter can contribute to trips by increasing load.
Is it safe to reset the breaker after a trip?
Resetting after a trip is appropriate if you’ve confirmed no signs of damage and the cause is likely a temporary overload. If trips recur, do not keep resetting; shut off power and seek professional help.
You can reset once, but don’t keep resetting if it trips again.
Should I attempt electrical inspections myself?
Electrical work carries risk. If you’re not trained, avoid opening panels or testing live connections. Call a licensed pro for any repairs beyond basic maintenance.
Electrical work can be dangerous; contact a pro for inspections.
When should I replace or upgrade the circuit?
If the current draw regularly approaches or exceeds the circuit rating, upgrading the circuit or installing a dedicated heat pump circuit is warranted. A pro can confirm the right breaker size and wire gauge.
If trips continue, upgrading the circuit may be necessary.
Watch Video
Top Takeaways
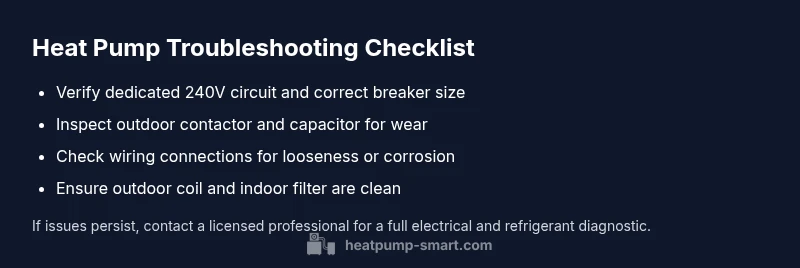
- Verify dedicated circuit and correct breaker size
- Inspect outdoor components and wiring for wear
- Ensure airflow and cleanliness to reduce load
- Document trips and call a pro for persistent issues