What to Do If Your Heat Pump Stops Working: Quick Troubleshooting & Fixes
Urgent, step-by-step troubleshooting for a heat pump that won’t run. Learn immediate checks, diagnostic flow, and when to call a pro, with safety tips and maintenance to prevent future outages.

Heat pumps usually stop working due to power, thermostat, or airflow issues. Start by checking the breaker, confirming thermostat settings, and replacing a dirty filter. If the unit still won’t run, follow the diagnostic flow and fixes outlined here.
Immediate safety checks and quick tests
When what to do if heat pump stops working, your first goal is safety and confirming simple causes that you can fix today. According to Heatpump Smart, many outages begin with electricity or control settings, not a failed compressor. Before touching electrical components, switch off the system at the thermostat and, if you’re comfortable, at the main electrical panel. Keep children and pets away from the outdoor unit, especially in cold weather. Check that the outdoor unit is not covered by snow, ice, or debris. Listen for unusual sounds or a humming from the outdoor unit that suggests a stuck relay. Now proceed to the simplest checks: verify the breaker hasn’t tripped, confirm the thermostat is set to heat (or cool) and Auto, and inspect the air filter for dirt accumulation. A clogged filter or mis-set thermostat often explains what to do if heat pump stops working and is the fastest fix.
Common causes at a glance
Most heat pump outages trace to a few recurring culprits. A tripped breaker or blown fuse stops power to the outdoor unit, followed by thermostat problems or sensor faults that send the wrong call for heat or cooling. Dirty air filters reduce airflow and force the system to shut down on safety. Ice buildup on the outdoor coil is another frequent offender, especially in colder climates; a blocked or restricted outdoor fan can also cause overheating. Ductwork restrictions, blocked vents, or closed dampers can mimic a full failure by starving the unit of air. In some cases, a refrigerant leak or a faulty reversing valve prevents proper mode switching between heating and cooling. By understanding these common causes, you can prioritize your checks and avoid unnecessary repairs. Heatpump Smart analysis shows that addressing the top three causes first resolves the majority of daytime outages.
Reading indicators and error codes
Most modern heat pumps display status indicators on the indoor unit, the thermostat, or the outdoor condenser. Look for flashing lights, fault codes, or a blinking timer. Consult the user manual for a map of codes to meanings; common ones include communication errors, outdoor fault, sensor fault, or low refrigerant indications. If you see a code or an unusual diagnostic code, note it down before resetting or powering off the system. Some systems reset codes automatically after power restoration, while others require a manual reset via the breaker or a control panel. Remember that codes vary by brand and model, so when in doubt, search your model number on Heatpump Smart’s guidance portal or call a qualified technician. Understanding what each indicator means helps you avoid unnecessary service calls and speeds up repair.
Diagnostic flow: symptom to solution
Use a simple, repeatable flow to determine why the heat pump stopped working. Start with the symptom: is the outdoor unit running, is there warm air, or is the thermostat displaying a code? Then move to likely causes in order: power, thermostat, airflow, refrigerant, and mechanical faults. For each symptom, test a basic hypothesis: if the breaker is tripped, reset it and test again; if not, check thermostat settings and sensors. If airflow is restricted, clean or replace filters and verify outdoor clearance. If you still don’t see improvement, inspect for ice on the outdoor coil or debris around the condenser. When no fix is evident, document any error codes, note recent weather or usage patterns, and contact a professional with this information. This diagnostic flow reduces guesswork and speeds up repair. Heatpump Smart recommends keeping a simple log of tests and codes to share with the technician.
Quick win fixes you can try in order
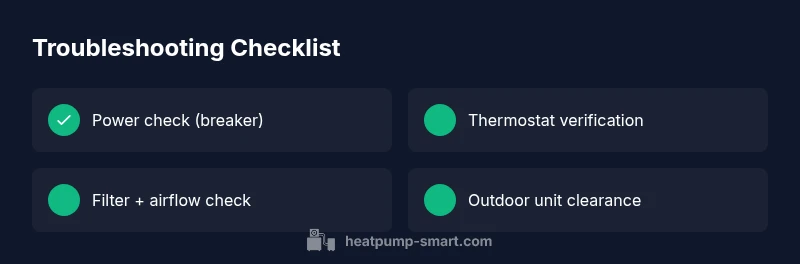
Start with the easiest fixes first, as they resolve most outages quickly. 1) Check the electrical supply: confirm the breaker hasn't tripped and the outdoor disconnect is in the ON position. 2) Verify thermostat settings: ensure mode matches the season (heat in winter, cool in summer) and that fan speed is not set to OFF. 3) Inspect the air filter and indoor grille: replace dirty filters and vacuum dust from return ducts. 4) Examine the outdoor unit: remove snow, ice, leaves, or debris, and ensure two feet of clearance around the condenser. 5) Listen for the outdoor fan: if it isn’t spinning, there may be a motor issue or capacitor fault. If none of these steps restore operation, move to the deeper checks or call a professional. These steps cover the vast majority of what to do if heat pump stops working.
Safety, maintenance, and prevention
Safety always comes first. Never bypass electrical components or attempt refrigerant work yourself. Schedule routine maintenance twice a year, with coil cleaning, filter changes, and thermostat calibration. Keep outdoor unit clear, check for ice build-up during winter, and ensure ductwork is sealed. A small daily habit like writing down any strange behavior can help you catch issues early. Heatpump Smart's guidance suggests annual professional service to keep the system running efficiently and reduce the chance of unexpected outages.
Steps
Estimated time: 60-90 minutes
- 1
Check power and safety
Turn off power at the thermostat first, then check the main breaker for trips. If the breaker trips again, there may be an overload or a faulty component. Do not bypass safety devices; professional help is advised if breakers continue to trip.
Tip: If you hear buzzing or see sparks, stop and call a pro immediately. - 2
Validate thermostat settings
Confirm the thermostat is set to the correct mode (heat or cool) and the fan is not on OFF. Check for a recent code or sensor warning and reset the thermostat if applicable.
Tip: Sometimes a simple re-sync of the thermostat with the heat pump unit resolves communication issues. - 3
Inspect air filters and indoor/outdoor airflow
Replace dirty indoor air filters and ensure returns are clear. Check the outdoor unit for snow, leaves, or debris and ensure at least 2 feet of clearance around it.
Tip: A clogged filter is the single most common cause of reduced performance; change monthly during heavy use. - 4
Power-cycle the system
Turn off power at the breaker for 60 seconds, then restore. This can reset minor control faults and clear transient errors that cause a no-run condition.
Tip: If the unit still doesn’t respond, wait a few minutes and test again before calling for service. - 5
Check for ice and condensate issues
Inspect the outdoor coil for ice buildup in cold weather and melt with a safe defrost cycle if available. Ensure condensate drains are clear to avoid overflow that could trigger a fault.
Tip: Do not chip ice off coils with metal tools; use the defrost cycle or a professional remedy. - 6
Document codes and prepare for service
Note any error codes displayed and the conditions when the outage occurred. This helps a technician diagnose quickly and accurately.
Tip: Have your model, serial number, and recent maintenance history ready when you call.
Diagnosis: Heat pump stops heating/cooling or won't start
Possible Causes
- highPower issue (tripped breaker or blown fuse)
- mediumThermostat misconfiguration or faulty sensor
- mediumIce buildup or blocked airflow
- lowRefrigerant leak or compressor fault
Fixes
- easyCheck and reset the main breaker; replace any blown fuses
- easyVerify thermostat settings and sensors; recalibrate if needed
- easyClear airflow obstructions and melt ice; ensure outdoor clearance
- hardIf refrigerant issues suspected, call a licensed technician; refrigerant handling requires professional
Your Questions Answered
What is the first thing I should check when my heat pump stops?
Begin with safety and the basics: verify the breaker hasn’t tripped, confirm the thermostat is set correctly, and inspect or replace a dirty air filter. If these steps don’t restore operation, continue with the diagnostic flow.
First, check the power and thermostat settings, and replace a dirty filter. If it still doesn’t work, move on to the diagnostic steps.
Can a tripped breaker cause a heat pump to stop?
Yes. A tripped breaker cuts power to the outdoor unit. Reset the breaker and test. If it trips again, there may be an overload or a fault that needs professional assessment.
A tripped breaker can stop a heat pump. Reset and watch for repeat trips; if it happens again, call a pro.
My heat pump is making unusual noises; what should I do?
Unusual noises can indicate a loose component or a failing fan motor. Turn off power and have a technician inspect the outdoor fan, compressor, and duct connections to avoid further damage.
If you hear odd noises, switch it off and call a technician to inspect the fan and compressor.
How often should I replace air filters to prevent outages?
Replace or clean air filters every 1-3 months depending on usage and indoor conditions. Clean filters improve airflow and reduce strain on the system, lowering outage risk.
Change filters every one to three months to keep airflow steady and avoid trips or freezes.
When should I call a professional for a heat pump problem?
Call a licensed HVAC technician if you’ve completed basic checks and the heat pump still won’t operate, if you notice refrigerant smells, ice buildup that won’t melt, or repeated breaker trips. Professional service is essential for refrigerant work and compressor issues.
If basic checks fail or you suspect refrigerant or compressor problems, call a licensed HVAC tech.
Watch Video
Top Takeaways
- Start with power and thermostat checks.
- Keep airflow clear and filters clean.
- Note error codes for technicians.
- Only perform safe resets; call a pro if unsure.
- Maintain a biannual service schedule.