Heat Pump Not Keeping Your Home Warm: Troubleshooting Guide
Urgent troubleshooting guide for a heat pump not keeping house warm. Step-by-step checks, diagnostic flow, and prevention tips from Heatpump Smart to restore comfort safely.

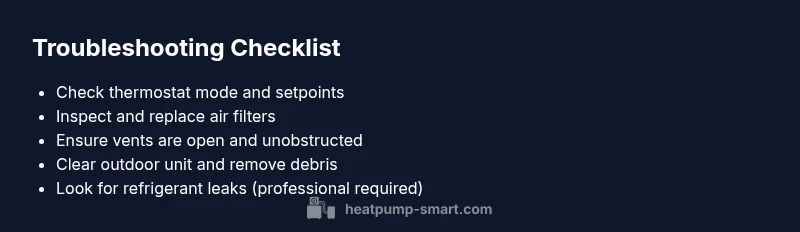
Most often, a heat pump that isn’t keeping the house warm is due to airflow issues, thermostat settings, or refrigerant/charge problems. According to Heatpump Smart, begin with basic checks: confirm heat mode and programmable schedules, clean or replace filters, and ensure vents are open and unobstructed. If the issue persists, expect professional service for leaks, refrigerant charge, or compressor concerns.
Common Causes When a Heat Pump Isn't Keeping Your Home Warm
If your home isn’t staying warm despite the heat pump running, the problem is often not with the thermostat alone. The keyword heat pump not keeping house warm describes a symptom with several potential root causes. In many homes, restricted airflow is the primary culprit. A dirty air filter, closed registers, or a blocked return air path can starve the system of air and reduce heat output, especially when outdoor temps drop. Another frequent reason is incorrect thermostat settings or a malfunctioning smart thermostat that isn’t communicating with the heat pump. Heatpump Smart notes that, in winter, thermostat programming like ECO or energy saver modes can lead to insufficient heat if the system isn’t recalibrated. Outside, a blocked condenser coil from debris or snow reduces efficiency and heat transfer, causing warm air to feel weak. Finally, low refrigerant due to leaks or a failed charge will prevent proper heating; this is a service issue best handled by a licensed technician. Safety warning: never attempt to repair refrigerant leaks yourself.
Common causes can be grouped into airflow, controls, and refrigerant/heat transfer. Start by evaluating these areas, then expand to ductwork and outdoor conditions. Understanding the relationship between airflow and heat transfer helps homeowners prioritize fixes that restore warmth quickly without risking safety or efficiency.
Immediate Quick Checks You Can Perform
Before scheduling service, run through a quick, non-invasive check list. First, confirm the thermostat is in heat mode and set to an appropriate temperature; double-check any smart scheduling features or “eco” settings that might limit heating. Next, inspect the indoor air filter and replace if dirty; a clogged filter can dramatically reduce heat output. Then, look at supply and return vents—are any blocked by furniture or curtains? Ensure all registers are open and that the blower fan is not making unusual noises. Inspect the outdoor unit for visible debris, snow, or ice buildup, and clear any obstructions around a minimum 24 inches of clearance. Finally, verify that circuit breakers feeding the heat pump are on and that there are no tripped fuses. If there’s no improvement after these checks, heat pump not keeping house warm may point to a refrigerant issue or a failing component requiring professional service.
Heatpump Smart emphasizes starting with simple checks to avoid unnecessary service calls, and to document any codes shown on the thermostat for later reference.
Verifying Thermostat and Airflow
Accurate thermostat operation is critical; a misreading can leave a safe, efficient system underperforming. Check that the thermostat’s temperature reading aligns with the actual room temperature. If you have a programmable or smart thermostat, ensure it’s communicating with the heat pump (look for recent fault codes or failed connections). If available, test with the thermostat set to “manual heat” to bypass scheduling quirks. Next, assess indoor airflow: inspect ductwork for leaks or kinks, verify that ducts are adequately insulated, and listen for whistling or rattling sounds that may indicate leaks. A blocked or leaky duct reduces system efficiency and can mimic refrigerant issues. For households with multiple zones, uneven distribution can create cold rooms; consider balancing dampers or re-evaluating zone control settings. Heatpump Smart notes that airflow problems often masquerade as a thermodynamics issue, so thorough duct and vent checks pay off. If problems persist, proceed to more detailed diagnostics or professional service.
Inspecting Ductwork, Insulation, and Outdoor Unit
Poor insulation and leaky ducts contribute to heat loss, making a heat pump work harder to keep the house warm. Inspect accessible ducts for obvious gaps and seal with professionally approved materials. Check attic and crawl-space insulation levels to ensure they meet local codes; insufficient insulation can waste heat. The outdoor unit should be free of snow, ice, and vegetation that might block airflow; keep a clear radius of at least 24 inches around it and remove any debris. Dirty condenser coils reduce heat transfer efficiency, so gently cleaning with water (never with a pressure washer) can help in reversible seasons. If you notice ice forming on the outdoor coil in heating mode, a defrost cycle may be failing or external conditions are extreme. Consider whether climate-appropriate adjustments, such as a smart thermostat with adaptive setback, could improve performance. Heatpump Smart analysis shows that addressing duct integrity and outdoor clearance often yields the most immediate improvements in warmth and efficiency.
Seasonal Considerations and System Design
Seasonal factors dramatically affect heat pump performance. In very cold climates, some units rely on auxiliary heat or resistance heating; these can dramatically raise energy use if not managed. If you observe frequent cycling between the heat pump and auxiliary heat, you may be experiencing a design mismatch: a smaller system or poor load calculations can cause inadequate warmth. Regular defrost cycles and proper refrigerant charge are essential for efficiency. Ensure the system is properly sized for your home and that insulation, windows, and air sealing keep heat loss in check. In the short term, programming the thermostat to avoid excessive setback while you’re home can help maintain a steady temperature, reducing strain on the heat pump. Heatpump Smart recommends a professional heat loss calculation every few years to validate system adequacy and prevent future cold spots.
When to Call a Professional and Prevention
If your troubleshooting yields no improvement, it’s time to involve a licensed HVAC technician. Refrigerant leaks, faulty compressors, or a defective reversing valve require professional diagnostics and safety protocols. Do not attempt to seal refrigerant leaks or manipulate sealed systems yourself. Preventive maintenance is key: schedule annual inspections, replace air filters regularly, keep outdoor coils clean, and verify thermostat firmware is up to date. Maintaining balanced indoor humidity and addressing duct leakage can improve comfort and reduce energy costs. Heatpump Smart encourages homeowners to document symptoms, codes, and recent changes to facilitate a faster service visit and a quicker return to consistent warmth.
Steps
Estimated time: 60-90 minutes
- 1
Verify thermostat settings
Confirm the thermostat is in heat mode and set to a temperature that adequately meets the room conditions. Check any smart scheduling features or eco modes that might reduce heating output. If you have a separate zone controller, ensure zones aren’t set to ‘cool’ or too aggressive setbacks.
Tip: Document the exact thermostat setting and any fault codes before making changes. - 2
Check and replace air filters
Turn off the indoor blower if you’re inspecting filters. Remove old filters and install new ones that match the recommended MERV rating for your system. Dirty filters can dramatically reduce airflow and heat output, especially during peak heating days.
Tip: Replace filters every 1-3 months depending on usage and household inventory. - 3
Inspect vents and indoor airflow
Make sure supply vents are open and unblocked by furniture or curtains. Listen for whistling sounds indicating duct leaks. If you have a multi-zone setup, check that dampers are balanced to ensure even distribution.
Tip: Use a tissue test near returns to verify airflow in each room. - 4
Inspect outdoor unit area
Clear at least 24 inches around the outdoor unit. Remove snow, leaves, or other debris that can impede airflow. Visually inspect the coil for debris and wipe gently with water if needed (no harsh cleaners).
Tip: Schedule periodic outdoor cleaning, especially after storms or heavy wind. - 5
Check for system codes and basic safeties
Read the thermostat’s error codes or snow/defrost indicators. Some heat pumps have lockout modes to prevent damage—note any codes to share with a technician.
Tip: If you see an alarm or flashing lights, power down and call for service. - 6
Test heat output and confirm performance
After making adjustments, run a short heat cycle and monitor the indoor temperature rise. If temperatures remain near the setpoint but airflow is weak, suspect airflow or refrigerant issues and escalate to professional service.
Tip: Keep a simple log of temperatures and times to share with the technician.
Diagnosis: House not staying warm even when the heat pump runs
Possible Causes
- highRestricted airflow from dirty filters or closed vents
- mediumIncorrect thermostat settings or faulty thermostat communication
- mediumBlocked outdoor unit or debris buildup around condenser
- highLow refrigerant charge or leaks
- lowUndersized system or improper load calculation
Fixes
- easyReplace dirty air filters and ensure all ducts/vents are open
- easyVerify thermostat mode and recalibrate or reprogram schedule
- easyClear outdoor unit area and remove debris or snow/ice
- hardCall a licensed tech to check for refrigerant leaks and perform a proper charge
- mediumEvaluate home insulation and consider duct sealing or system resizing
Your Questions Answered
What are the most common reasons a heat pump isn’t keeping the house warm?
The most frequent causes are restricted airflow from dirty filters or blocked vents, thermostat misconfiguration, and outdoor unit debris. Leaks or low refrigerant, plus an undersized system, can also lead to weak heating. Start with airflow and thermostat checks, then assess refrigerant or system sizing if the issue persists.
Common reasons include airflow problems, thermostat issues, and outdoor unit debris. Start with airflow and thermostat checks before investigating refrigerant or sizing.
How do I tell if my thermostat is the problem?
Check that the thermostat is in heat mode, the setpoint matches the room temperature, and there are no scheduling quirks. If you have a smart thermostat, verify it is communicating with the heat pump and not showing fault codes.
Make sure the thermostat is set to heat and communicating properly with the heat pump.
Can dirty air filters affect heating performance?
Yes. Dirty filters restrict airflow, forcing the heat pump to work harder and heat spaces unevenly. Replacing filters regularly helps maintain consistent warmth.
Yes, dirty filters can reduce airflow and warmth.
Is low refrigerant a common problem?
Low refrigerant due to leaks or improper charging can cause insufficient heating. This requires a professional to locate leaks and restore proper charge.
Low refrigerant needs a technician to fix leaks and recharge the system.
When should I replace a heat pump vs. repair it?
If the system is older than 10-15 years, frequently breaks, or repair costs exceed a reasonable portion of replacement, replacement may be more cost-effective in the long run.
Consider replacing an old or frequently failing system rather than paying ongoing repair costs.
Can climate impact heat pump performance?
Yes. Extremely cold or hot conditions affect efficiency and may trigger auxiliary heat. In very cold climates, a properly designed system with insulation and sealing is essential.
Climate conditions affect performance; ensure the system is correctly designed for your climate.
Watch Video
Top Takeaways
- Identify airflow issues first
- Check thermostat settings and schedules
- Inspect outdoor unit clearance and cleanliness
- Call a pro for refrigerant or major component problems