Heat Pump Repair: A Step-by-Step How-To Guide
Learn how to diagnose common heat pump problems, perform safe repairs, and know when to call a professional. Practical steps, tools, and safety tips from Heatpump Smart.

By the end of this guide, you will be able to diagnose common heat pump repair needs, perform safe, basic troubleshooting, select the right tools, and decide when professional help is required. You will also understand safety steps, typical repair workflows, and how to prevent future breakdowns to keep your system running efficiently.
Why heat pump repair matters
Heat pump repair is about more than fixing a noisy unit or restoring heat. For homeowners, builders, and property managers, it protects comfort, energy efficiency, and system longevity. According to Heatpump Smart, timely diagnosis and careful repairs can prevent small problems from spiraling into expensive failures and rare refrigerant leaks. A well-maintained heat pump uses less electricity, runs more quietly, and maintains even indoor temperatures across seasons. When you approach repairs with a methodical mindset, you reduce downtime, extend equipment life, and safeguard your investment.
In practical terms, 'repair' is a broader term than 'replacement.' Many trips to the service technician are about adjusting controls, sealing duct leaks, or replacing worn components rather than swapping the entire system. Understanding the difference between a quick fix and a longer-term fix helps you plan budget, energy use, and downtime. For building operators and homeowners, having a clear repair plan also helps with tenant communication and compliance with energy efficiency goals. In short, proper heat pump repair aligns operational reliability with energy savings and environmental responsibility.
Beyond comfort, repairs influence long-term cost of ownership. Regular, targeted fixes can delay full system replacement and preserve refrigerant integrity, which is essential for performance and environmental considerations. When you stay proactive, you reduce repair frequency and improve overall system resilience. Heatpump Smart emphasizes that a thoughtful approach to repair also supports reliable ventilation and consistent indoor humidity, which are key to healthy homes.
This guide prioritizes safety and clarity. You’ll learn how to recognize warning signs, what tools to gather, and which steps to take first. It’s designed to help homeowners, builders, and property managers work with confidence and minimal downtime, backed by Heatpump Smart’s guidance and best practices.
Finally, remember that some repairs require licensed professionals. If you encounter refrigerant handling, high-voltage components, or refrigerant leaks, stop work and call a qualified technician. The goal is to protect your home, your equipment, and your safety while achieving reliable heat pump performance.
noteTypesBreakdown2And3OrMore to=null}],
toolsMaterials
Tools & Materials
- Multimeter(To test voltage, continuity, and resistance of electrical components.)
- Non-contact voltage tester(Quickly verify power is off before touching any wiring.)
- Insulated screwdriver set(Securely access electrical terminals without risk.)
- Wrench and nut driver set(Loosen/tighten service valves and mounting hardware.)
- Replacement fuses/contacts/contactor (on-site)(Have spare parts for common failures such as contactors.)
- Manifold gauge set (R-410A or your refrigerant type)(Used by licensed techs to verify refrigerant pressures.)
- Refrigerant leak detector (optional)(Helpful for pinpointing leaks but refrigerants are hazardous.)
- Safety gear (gloves, goggles, long sleeves)(Protect hands and eyes from sharp edges and refrigerants.)
- Service manual or manufacturer guide(Reference specifications and safety warnings specific to your unit.)
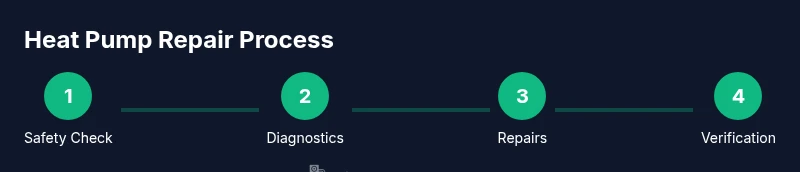
Steps
Estimated time: 60-120 minutes
- 1
Power down and verify safety
Switch off the unit’s power at the main breaker and the outdoor disconnect. Use the non-contact tester to confirm no voltage on exposed conductors before you touch anything. This prevents electrical shock and equipment damage.
Tip: Label the circuit and lock out the breaker to prevent accidental re-energizing. - 2
Inspect thermostat and controls
Check the thermostat settings, wiring, and display for faults. Ensure the thermostat communicates properly with the indoor unit and that scheduled programs aren’t conflicting with operating modes.
Tip: If the thermostat is old, consider replacing with a smart, compatible unit to improve control. - 3
Examine outdoor unit for obstructions and ice
Clear debris around the outdoor unit and remove any ice buildup from coils. Ice can indicate low refrigerant flow or poor airflow and requires careful assessment.
Tip: Take a photo of any damaged wiring before touching components for reference. - 4
Check electrical connections and components
Inspect contactors, fuses, capacitors, and wiring for signs of wear, burning, or looseness. Tighten loose connections and replace damaged parts only if you are confident in proper ratings.
Tip: If you smell burnt plastic or see arcing, stop and call a professional immediately. - 5
Assess refrigerant-related symptoms (if applicable)
Look for signs of refrigerant issues, such as oily residue near connections or rapid cycling. Do not attempt to recharge refrigerant yourself; this requires a licensed technician and proper safety procedures.
Tip: Document observed symptoms and pressures to share with the technician. - 6
Document findings and plan next steps
Record the problems found, actions taken, and parts inspected. Decide whether to complete minor repairs, schedule a professional visit, or plan a replacement if the unit is aging.
Tip: Create a simple punch list and timeline for follow-up work.
Your Questions Answered
Can I repair a heat pump myself, or should I always hire a pro?
Many minor issues can be diagnosed and addressed safely by a trained homeowner, especially basic thermostat checks and airflow improvements. However, refrigerant work, electrical faults, and sealed-system components require a licensed professional.
In most cases, start with simple safety checks and airflow, but call a licensed pro for refrigerant or electrical problems.
What are common signs that my heat pump needs repair?
Look for short cycling, unusual noises, reduced heating or cooling, ice on coils, or poor airflow. These symptoms indicate issues that may require professional diagnosis or component replacement.
If you notice odd noises, poor performance, or ice buildup, plan a professional evaluation.
Is refrigerant leakage something I can fix at home?
Refrigerant leaks require licensed service with proper recovery equipment and safety protocols. Do not attempt to seal leaks or recharge the system yourself.
Don’t try to fix refrigerant leaks at home—call a licensed technician for safety and compliance.
How often should a heat pump be professionally inspected?
Routine professional inspection every 1-2 years helps maintain efficiency and catch wear before failures. Annual checks are common in high-demand climates.
Most homes benefit from a professional check every one to two years, especially in cold or hot climates.
What maintenance can I perform to prevent repairs?
Regularly replace filters, keep airflow clear, clean coils, and verify thermostat settings. Scheduling seasonal maintenance can extend life and improve efficiency.
Do regular filter changes and keep the outdoor unit clear to stay on top of performance.
Watch Video
Top Takeaways
- Identify safety risks before touching equipment
- Differentiate between quick fixes and real repairs
- Document findings to inform pro visits
- Regular maintenance reduces unexpected breakdowns
- Invest in quality controls to extend heat pump life